|
Wing Commander Prophecy
T'LAN METH SYSTEM
T'lan Meth 1 - Treasure Hunt
|
Primary Objectives
|
Locate jamming source
|
|
Secondary Objectives
|
None
|
|
Bonus Objectives
|
None
|
|
Your Ship
|
Panther
|
|
Wingmen
|
Stiletto
|
|
Other Friendly Ships
|
None
|
|
Briefing
|
Our limited intelligence has revealed that the Kilrathi planet E'loy, in the T'lan Meth System, is being blockaded by enemy forces, but an unknown source is jamming our sensors and preventing a full assessment of the situation. As soon as the Midway jumps into T'lan Meth, all wings with the exception of Alpha and Bravo will be deployed to assist E'loy's defenders in any way possible. Meanwhile Alpha and Bravo wings will perform a sweep of a nearby asteroid field in an attempt to locate the alien jamming equipment. You are to locate and identify the broadcast source so that it can be recovered for examination. Due to the jammer's operation and the presence of the asteroids, a proximity sensor sweep will be required to identify the target. Once the jammer source is identified, an SAR team will be dispatched to retrieve and dismantle the jammer. Eliminating this jammer and restoring the Midway's sensors to full operating status is of the utmost urgency.
|
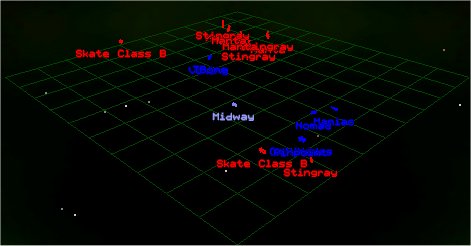
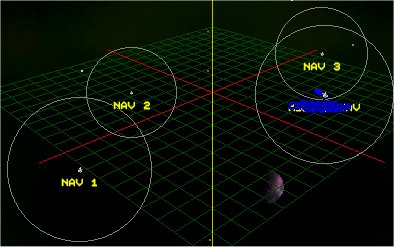
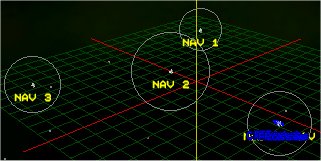
NAV 1
2 Manta
2 Moray
3 Stingray
NAV 3
5 Moray
2 Manta
|
|
Notes
- This mission is quite a change from your usual patrol. To start with you are greeted by a sequence showing three Stingray fighters becoming one. This is quite significant since when joined, they become one large plasma cannon which does a whole load of damage including damage to capships (Midway!) so when three or more of these fighters are near the Midway, knock their numbers down to two where they can't do significant damage.
- NAV 3 is a race, nothing more. When you arrive there'll be roughly 18 "Unknowns" on your radar. Your mission is to target each one and fly to within a few klicks of it until your computer identifies it. You are to do this until you find which one is the Jamming Device, however you must find it before Stiletto otherwise you'll fail the mission.
- The Jamming device is always one of the tripod shaped Unknowns. There are several ways to approach this mission. One way includes destroying each buoy as you identify it so that you don't identify one twice, however this gives Stiletto less to identify. The preferred method is to start looking while Stiletto handles the fighters leaving the buoys intact.
Outcome
Success / Failure go to T'lan Meth 2.
T'lan Meth 2 - MIA Recovery
|
Primary Objectives
|
Escort SAR Shuttle
Ensure SAR recovery of ejected pilot
|
|
Secondary Objectives
|
Protect friendly craft
|
|
Bonus Objectives
|
None
|
|
Your Ship
|
Panther
|
|
Wingmen
|
None
|
|
Other Friendly Ships
|
Condor SAR
|
|
Briefing
|
There is no briefing before this mission.
|
NAV 1
1 Manta
3 Moray
1 Devil Ray
|
|
Notes
- There isn't too much to this mission. To start with just take out the fighters in the area. Simple enough, right?
- Well no, not quite. Shortly before the SAR reports locating the pod, a Devil Ray appears. This fighter is trying to capture the ejected pilot so it is essential that you break off whatever you are doing and chase off that fighter as soon as possible.
Outcome
Success go to T'lan Meth 3a. Failure go to T'lan Meth 3b.
T'lan Meth 3a - Perimeter Sweep
|
Primary Objectives
|
Patrol all NAV points
Replaced by Rescue SWACS at NAV 1
|
|
Secondary Objectives
|
None
|
|
Bonus Objectives
|
None
|
|
Your Ship
|
Panther
|
|
Wingmen
|
Maestro, [Random pilot]
|
|
Other Friendly Ships
|
Seahawk SWACS at NAV 2
|
|
Briefing
|
Using a limited encryption key contained in the captured jamming device, our Science and Engineering Divisions have been able to obtain valuable intelligence concerning alien operations in this system. Enemy forces have captured the Kilrathi starbase at Dula Seven and converted it to an advance staging base for their fleet. A significant portion of that fleet occupies a position between the Midway and the starbase. Until Confed HQ can respond to our distress message, we must continue to gather as much information as possible. To do so, an SWACS will be deployed to perform a more thorough scan of the system. Your Alpha Wing will conduct a standard 3-point patrol, with orders to engage and destroy any enemy ships encountered and prevent any interference with the scanning operation. When your patrol is complete, return to the Midway.
|
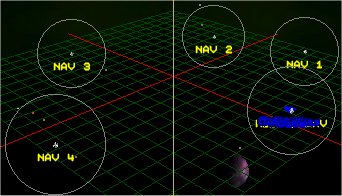
NAV 1
1 Manta
4 Moray
NAV 2
3 Stingray
3 Moray
1 Manta
Between NAV 3 and Midway
2 Manta
4 Moray
|
|
Notes
- Again, a straight forward mission, but this time with significantly more resistance. Try not to use any missiles at the first NAV point. You'll be needing them for the following battles.
- In the last two battles your only mission is to defend the SWACS. Your best bet is to constantly check your NAV map and find out which ships are targeting the SWACS and then take them out.
- There is a bug in this mission which means you can never achieve more than a 67% rating.
Outcome
Success go to T'lan Meth 4a. Failure go to T'lan Meth 4b.
T'lan Meth 3b - Panther Fighter Sweep
|
Primary Objectives
|
Patrol all NAV points
Replaced by Defend Midway at NAV 1
|
|
Secondary Objectives
|
None
|
|
Bonus Objectives
|
None
|
|
Your Ship
|
Panther
|
|
Wingmen
|
2 Random pilots
|
|
Other Friendly Ships
|
Midway, 4 Panthers at Midway NAV
|
|
Briefing
|
Using a limited encryption key contained in the captured jamming device, our Science and Engineering Divisions have been able to obtain valuable intelligence concerning alien operations in this system. Enemy forces have captured the Kilrathi starbase at Dula Seven and converted it to an advance staging base for their fleet. A significant portion of that fleet occupies a position between the Midway and the starbase. Until Confed HQ can respond to our distress message, we must continue to gather as much information as possible. To do so, an SWACS will be deployed to perform a more thorough scan of the system. Your Alpha Wing will conduct a standard 3-point patrol, with orders to engage and destroy any enemy ships encountered and prevent any interference with the scanning operation. When your patrol is complete, return to the Midway.
|
NAV 1
2 Manta
3 Moray
2 Ray
NAV 2
2 Skate T
3 Moray
2 Manta
4 Red Manta
Waves of Manta, Red Manta, Skate T
|
|
Notes
- As revenge for not saving the ejected pilot in the previous mission, the game throws this mission at you. Don't waste your missiles at NAV 1, you'll need them when you get recalled to the Midway.
- As soon as you get back to the Midway, go straight for the bombers otherwise Midway is bound to take damage. You can mop up the fighters later. Use up your missiles, they'll help you take out the bombers a bit quicker.
- In case you've forgotten, the bombers here are the Red Mantas and the Skate Ts.
- There is a bug in this mission which means you can never achieve more than a 67% rating.
Outcome
Success go to T'lan Meth 4b. Failure you lose.
T'lan Meth 4a - Kilrathi Rendezvous
|
Primary Objectives
|
Ensure Carrier elimination
Ensure Cruiser elimination
|
|
Secondary Objectives
|
None
|
|
Bonus Objectives
|
None
|
|
Your Ship
|
Shrike
|
|
Wingmen
|
2 Random pilots
|
|
Other Friendly Ships
|
6 Panthers (Hawk, Stiletto, Maestro, 3 random pilots). 4 Vaktoths at NAV 1.
|
|
Briefing
|
The SWACS scans have confirmed a large alien fleet stationed in this area. Due to their heavy patrols in the area, they are aware of the Midway's presence; however, much of this fleet is still focused upon the blockade of E'loy. While the enemy attention is divided, the Midway will attempt a strike upon a carrier element of this fleet. Prior to the main strike, a team led by Major Marshall will be sent on a diversionary strike against an inbound alien supply convoy in an attempt to draw fighter cover away from our targets. Your Alpha Wing will lead the actual assault, with support from Charlie, Delta, and Echo wings. Proceed through NAV 1 and 2, allowing the diversion time to take effect. At NAV 3, engage your primary targets: an alien carrier and its cruiser escort. You may engage other targets at your discretion, but the primary targets MUST be destroyed to prevent a retaliatory strike on the Midway. When your mission is completed, return to the Midway.
|
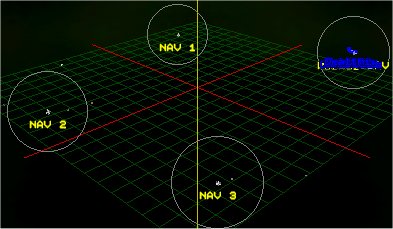
NAV 2
2 Manta
3 Moray
6 Stingray
1 Barracuda
NAV 3
Wave 1
6 Squid
1 Hydra
1 Leviathan
Wave 2
4 Squid
NAV 4
4 Moray
5 Manta
|
|
Notes
- In case you don't know how to destroy capships, you need to select torpedoes from your missile selection, and target an unshielded component such as bridge or engines. When the engines and bridge are destroyed, the ship is completely destroyed.
- The Kilrathi decided to take out the carrier while you take out the cruiser. Let the Panthers handle the enemy fighters, although you may need to take out some yourself if you get attacked. Don't forget you will probably need to take out the shield generators yourself. Only when they're gone will you be able to launch torpedoes.
Outcome
Success go to T'lan Meth 5. Failure you lose.
T'lan Meth 4b - Diversionary Strike
|
Primary Objectives
|
Destroy inbound fighters
|
|
Secondary Objectives
|
None
|
|
Bonus Objectives
|
None
|
|
Your Ship
|
Panther
|
|
Wingmen
|
[Random pilot]
|
|
Other Friendly Ships
|
2 Panthers (Stiletto, Random pilot), 2 Shrikes (Maestro, Random pilot). 2 Vaktoths, 2 Dralthi at NAV 1
|
|
Briefing
|
The SWACS scans have confirmed a large alien fleet stationed in this area. Due to their heavy patrols in the area, they are aware of the Midway's presence; however, much of this fleet is still focused upon the blockade of E'loy. While the enemy attention is divided, the Midway will attempt a strike upon a carrier element of this fleet. Major Marshall's Bravo Wing will lead the primary assault upon the enemy carrier and its cruiser escort. Meanwhile, your Alpha Wing will lead a diversionary strike upon what appears to be an enemy resupply convoy. This attack should cause the carrier group to deploy some or all of its fighters to your area. You are to engage and destroy all enemy fighters, preventing them from assisting the carrier when the attack arrives. You may engage any other targets at your discretion. When your mission is completed, return to the Midway.
|
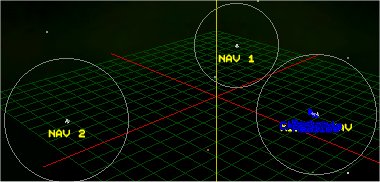
NAV 1
6 Moray
NAV 2
Wave 1
4 Triton
2 Barracuda
Wave 2
8 Moray
1 Devil Ray
6 Manta
NAV 3
4 Moray
3 Ray
|
|
Notes
- Take out the fighters at NAV 1 quickly and without taking damage so you can get on with the mission. Use your missiles if you need to.
- At NAV 2, take out the Barracudas before setting to work on the turrets. When the wave of fighters arrives, break off to attack them. Do everything you can to let the Shrikes and Vaktoths launch their torpedoes unhindered.
- NAV 3 is fairly quiet. Just kill the Morays first so you don't have anything annoying you while you go after the Rays and Remoras.
Outcome
Success go to T'lan Meth 5. Failure you lose.
T'lan Meth 5 - Cult of Sivar Rescue
|
Primary Objectives
|
None(!)
|
|
Secondary Objectives
|
None
|
|
Bonus Objectives
|
None
|
|
Your Ship
|
Panther
|
|
Wingmen
|
Hawk
|
|
Other Friendly Ships
|
6 Dralthi at NAV 1. 3 Vaktoth, 1 Corvette at NAV 2.
|
|
Briefing
|
Lieutenant Casey, you and Colonel Manley will be dispatched immediately to join the Kilrathi at NAV 1, where they are already engaged with an enemy force. Assist them in destroying all enemy forces. Then, provide an escort for the remainder of their forces to a rendezvous with a Kilrathi corvette at NAV 2. When your mission is complete, return to the Midway.
|
NAV 1
5 Moray
5 Manta
|
|
Notes
- Use your missiles at NAV 1 to help you take down the enemies quickly. They aren't too much of a threat to you, but the Kilrathi will have a difficult time with them. Go for the Mantas first since they do a lot more damage.
- Hawk wants you to attack the Kilrathi. Whether you do or not is your choice, but be warned that if you do, you face a much tougher fight later on.
- Don't attack the Kilrathi at NAV 2 otherwise you'll be branded a traitor and you'll lose the game.
Outcome
Success / Failure go to T'lan Meth 6.
T'lan Meth 6 - SWACS Scan of Dula 7
|
Primary Objectives
|
Escort and defend SWACS
|
|
Secondary Objectives
|
None
|
|
Bonus Objectives
|
None
|
|
Your Ship
|
Panther
|
|
Wingmen
|
Maestro
|
|
Other Friendly Ships
|
Seahawk SWACS
|
|
Briefing
|
In order to obtain valuable intelligence about Dula Seven, the occupied Kilrathi starbase, an SWACS vessel will be dispatched to perform a perimeter scan of the base. Your patrol will pass through these points, allowing the SWACS full visibility of Dula Seven's radar shadow. You must provide escort for the SWACS until it reaches a proximity position from which to scan the starbase and its surroundings. Protect the ship while it completes its scanning, and return at once to the Midway.
|
NAV 1
1 Lamprey
2 Manta
1 Ray
NAV 2
2 Moray
2 Ray
NAV 3
1 Manta
2 Moray
1 Ray
|
|
Notes
- The challenge here is to keep the SWACS alive. It has no weapons and will just sit and take fire if you let it.
- Here you will meet your first Lamprey. These ships are more of an annoyance than anything. Their weapon does very little damage. Just ignore them.
- At each NAV point, take out the fighters before breaking up the Ray cluster. The last thing the SWACS needs is a dozen Remoras swarming around it.
Outcome
Success go to T'lan Meth 7. Failure go to T'lan Meth 8b.
T'lan Meth 7 - Shrike Bomber Assault
|
Primary Objectives
|
Ensure destroyer elimination.
|
|
Secondary Objectives
|
None
|
|
Bonus Objectives
|
None
|
|
Your Ship
|
Shrike
|
|
Wingmen
|
2 Random pilots
|
|
Other Friendly Ships
|
Bravo Wing (Stiletto, 3 random pilots) - Panthers.
|
|
Briefing
|
The SWACS data has revealed an alien destroyer which was hidden in Dula Seven's radar shadow. Our sensors now indicate that the destroyer is moving away from the starbase and its defenses. Your Alpha Wing will be dispatched to this intercept point. While Stiletto's Bravo Wing intercepts and eliminates any fighters launched from the base itself, your wing will make a full assault on the destroyer. When the destroyer is eliminated, return to the Midway.
|
NAV 1
2 Moray
2 Manta
2 Squid
3 Barracuda
1 Orca
|
|
Notes
- Since there is only one wave of fighters, it is best to clear out the area before starting work on the destroyer. Start with the Barracudas and let the Panthers handle the rest until you're done.
- Sit back until the destroyer's shield emitters are destroyed, then gain your torpedo lock from a distance before afterburning in, launching, then getting back out. This method will minimize the chance of turrets downing the torpedo.
- Don't forget that when the fighters in the area have been destroyed, your autopilot light usually comes on, but don't autopilot until the destroyer is destroyed otherwise you'll lose the mission.
Outcome
Success go to T'lan Meth 8a. Failure go to T'lan Meth 8b.
T'lan Meth 8a - No Survivors
|
Primary Objectives
|
Engage and destroy fighters
|
|
Secondary Objectives
|
None
|
|
Bonus Objectives
|
Protect friendly craft
|
|
Your Ship
|
Panther
|
|
Wingmen
|
2 Random pilots
|
|
Other Friendly Ships
|
2 Panthers at NAV 2.
|
|
Briefing
|
Now that Dula Seven's perimeter defenses have been significantly weakened, our forces have a small window of opportunity to mount an attack on the station proper. Each Wing will take control of a specific zone, destroying all remaining alien fighters in the area. Lieutenant Casey, you will be leading Alpha Wing. Your objective is to destroy all enemy forces at this NAV point. When your zone is cleared, return to the Midway. The marines will launch when all zones are cleared.
|
NAV 1
7 Moray
2 Ray
3 Lamprey
NAV 2
3 Moray
3 Manta
|
|
Notes
- I know I said to ignore Lampreys a few missions back, but this time they're running to alert the alien fleet and if they do, Midway will be destroyed, so this time get them first and get them quickly.
- The rest of the fighters shouldn't pose too much of a problem, but when they're destroyed you get an SOS call from another wing. You don't have to help them, but you probably should. Press Ctrl-N to get to your NAV map and target the new NAV 2 by right clicking on it.
- The extra fighters at NAV 2 shouldn't be too much of a problem unless you're seriously damaged. Just use up the rest of your missiles.
Outcome
Success go to T'lan Meth 9. Failure you lose.
T'lan Meth 8b - Bug Hunt
|
Primary Objectives
|
Engage and destroy fighters
Defend Midway (added at NAV 1)
|
|
Secondary Objectives
|
None
|
|
Bonus Objectives
|
Protect friendly craft
|
|
Your Ship
|
Panther
|
|
Wingmen
|
2 Random pilots
|
|
Other Friendly Ships
|
2 Panthers at NAV 2. 4 Panthers at Midway.
|
|
Briefing
|
Although Dula Seven's perimeter defenses have not been entirely eliminated, the SWACS scans indicate that there are humans being held aboard the station. For this reason, the Captain has upped the timetable for our invasion of Dula Seven. Each Wing will take control of a specific zone, destroying all remaining alien fighters in the area. Lieutenant Casey, you will be leading Alpha Wing. Your objective is to destroy all enemy forces at this NAV point. When your zone is cleared, return to the Midway. The marines will launch when all zones are cleared.
|
NAV 1
6 Moray
3 Manta
2 Ray
2 Lamprey
NAV 2
3 Moray
3 Manta
2 Ray
Midway NAV
If you go to NAV 2
Wave 1
7 Moray
3 Red Manta
1 Manta
2 Skate T
Wave 2
1 Manta
5 Moray
2 Red Manta
2 Skate T
If you miss NAV 2
Wave 1
4 Moray
3 Manta
2 Skate T
Wave 2
1 Manta
2 Red Manta
3 Moray
3 Skate T
|
|
Notes
- This mission is going to make you wish you won the previous mission. To start with you get a larger force at each NAV point, but don't be tempted to use missiles to help. You'll be needing them all for your return to Midway.
- You get a distress call from NAV 2 when you're done at NAV 1. You can go help if you wish, but if you do there'll be a much larger force at the Midway, so it would be best to head straight back.
- Once you get back to Midway, all you can really do is ignore the fighters and just head straight for the bombers (Red Mantas and Skate Ts). Use your NAV map to find out which of these are closest to the Midway and get those first. Also keep an eye out for torpedoes and try to shoot them down if you can.
Outcome
Success go to T'lan Meth 9. Failure you lose.
T'lan Meth 9 - Storming The Rock
|
|
|
|
Secondary Objectives
|
None
|
|
Bonus Objectives
|
None
|
|
Your Ship
|
|
|
Wingmen
|
|
|
Other Friendly Ships
|
|
|
Briefing
|
|
|
|
|
Notes
Outcome
Success go to T'lan Meth 10. Failure you lose.
T'lan Meth 10 - Holding the Line
|
Primary Objectives
|
Engage enemy fighters
Defend Midway
|
|
Secondary Objectives
|
None
|
|
Bonus Objectives
|
None
|
|
Your Ship
|
Panther
|
|
Wingmen
|
2 Random pilots
|
|
Other Friendly Ships
|
4 Panthers at Midway.
|
|
Briefing
|
The aliens have pulled a significant portion of their fleet from the assault on E'loy and are attempting to pin the Midway against this asteroid belt. Already, scanners detect multiple wings of inbound bogeys closing on our position at attack speed. Although we have received word that Confed is sending reinforcements, it is doubtful that they will reach the Midway in time. We will be scrambling all available fighters to deal with this threat. Each Wing will be responsible for a specific intercept zone, destroying all enemy fighters as they approach the Midway. Your Alpha Wing's objective is to destroy all enemy forces present at NAV 1. When your mission is completed, return to the Midway.
|
NAV 1
7 Moray
5 Manta
Midway NAV
Wave 1
4 Stingray
2 Red Manta
2 Manta
2 Skate B
Wave 2
2 Stingray
3 Red Manta
1 Skate B
Wave 3
3 Red Manta
3 Stingray
|
|
Notes
- There are a lot of enemies in this mission, so be sure to save your missiles for when you get back to Midway. Also be sure not to take too much damage early on. The Kilrathi will help you if you didn't shoot them down earlier on.
- As usual when defending the Midway, get the bombers first. In this case the Red Mantas are the bombers, although a Stingray cluster should also be targeted. Once there are fewer than three of these in the area, they aren't much of a threat any more.
- If you attacked the Kilrathi with Hawk, they won't help you here, and you'll have an extra Defend Midway mission to contend with next.
Outcome
- Success and you didn't attack Kilrathi go to G'mar 1.
- Success and you attacked Kilrathi go to T'lan Meth 11.
- Failure you lose.
T'lan Meth 11 - Panther Scramble
Notes
- Again, you have to defend the Midway. Primary targets here are the Stingrays and the Skate Ts.
- Use you missiles against targets if you need to, but remember you have to face fourteen fighters at NAV 1.
- Be sure to go to help the Kilrathi at NAV 1. If you just land, you'll be court-martialed and the game will be over.
Outcome
Success go to G'mar 1. Failure you lose.
Comment on a mission
Submitted by : NiteFox
Mission : T'lan Meth 1 - Treasure Hunt
Comments : Disable target locking and just head for the nearest "unknown."
The real problem is being shredded by the enemy forces rather than Stiletto finding the device. She's just not interested, and even less so in looking after your tail :)
Submitted by : Luke "Shadow" Taylor - member of the WolfPack
Mission : T'lan Meth 5
Comments : If you do attack, it means that Hawk will die at NAV 2 but dont shoot the Kilrathi there only NAV 1, later if you do shoot them, all it means is you get another chance to boost your kill score :), so shoot them, that way you get more kills.
Submitted by : mastertoci
Mission : T'lan Meth 9
Comments : Is it just me, or did nobody notice that there is no walkthrough posted here for the 9th mission?
Submitted by : Benoit Delage
Mission : T'lan Meth 7 - Shrike Bomber Assault
Comments : If you happen to fail this easy mission, you will get a funny cutscene with Maniac...Just kill all the fighters and hit the autopilot when the light comes on (before blowing the destroyer).
Submitted by : Benoit Delage
Mission : Tlan Meth 9 - Storming the Rock (427.2)
Comments : Here is some info:
Objectives: Escort and defend Dekker. You fly the Panther with 3 wingmen (Alpha). There is also 4 other Panthers (Bravo), and the marine LC. Enemies at NAV 1: 6 Moray, 5 Manta and 1 Ray. In this mission you get to rescue Blair.
Submitted by : Benoit Delage
Mission : Tlan Meth 9 - Storming the Rock (427.2)
Comments : At NAV 1, there is another wave of enemies(Moray and Manta i think) but i did not count them. At some point, Midway will tell you to hurry because the station is going to explode. Kill everything and get the LC back or you will fail (and die).
|