|
Wing Commander Prophecy
H'REKKAH SYSTEM
H'rekkah 1 : Kilrathi Distress Call
|
Primary Objectives
|
Escort and defend Dekker
|
|
Secondary Objectives
|
None
|
|
Bonus Objectives
|
None
|
|
Your Ship
|
Piranha
|
|
Wingmen
|
Maestro, Stiletto
|
|
Other Friendly Ships
|
Maniac, [Random Black Widows pilot] (Panthers)
|
|
Briefing
|
Your wing will deploy when the Midway jumps into the H'rekkah system. Panthers from the Black Widow Squadron will provide primary escort for a marine LC, with your Alpha Wing providing additional support. Escort the marines to the remains of the Kilrathi fleet. Your objective there is this Fralthi II Class cruiser. SWACS scans have detected faint life signs aboard. The LC will dock with the damaged ship, and Colonel Dekker will lead a detachment of marines aboard to recover the ship's data log and locate any survivors. When the marines have returned to their ship, escort them back to the Midway.
|
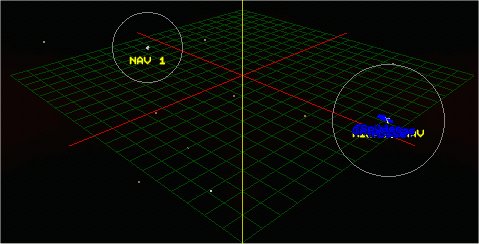
NAV 1
6 Moray
|
|
Notes
- First mission. I hope that you've flown the first few simulator missions before flying for real. If not, do it.
- Six enemy fighters and nothing more. You can use your missiles freely because you probably won't have a chance to run out. The same goes for Stormfire ammo.
Outcome
Success / Failure go to H'rekkah 2.
H'rekkah 2 : Black Widow Rescue
|
Primary Objectives
|
Locate and escort Black Widows
|
|
Secondary Objectives
|
None
|
|
Bonus Objectives
|
None
|
|
Your Ship
|
Tiger Shark
|
|
Wingmen
|
Maestro, Stiletto
|
|
Other Friendly Ships
|
Bravo Wing (NAV 1) : Maniac, Spyder, 2 Random Black Widows pilots (Panthers)
|
|
Briefing
|
There is no briefing before this mission. It is a scramble.
|
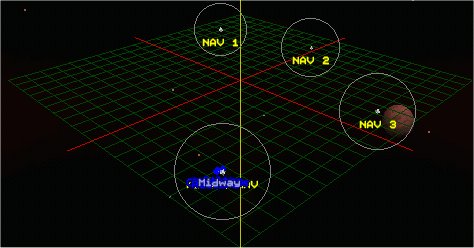
NAV 1
13 Moray
NAV 3
14 Moray
|
|
Notes
- In contrast to the previous mission, this is quite a tricky mission especially at the higher difficulty levels. 27 enemies to your 7 fighters. This mission will be classed as a failure if you lose more than one Black Widow pilot.
- You have a Tiger Shark for this mission. It carries Dragonfly rocket pods which are unguided, and do relatively little damage. However, the high rate of fire means that if you can get on an enemy's tail and unload a few of these and full guns, you have a high chance of getting a kill.
- The other star weapon on your fighter is the Charging Mass Driver. Hold down the trigger to charge, release to fire. A direct hit with a fully charged CMD usually destroys a Moray.
Outcome
Success go to H'rekkah 3a. Failure go to H'rekkah 3b.
H'rekkah 3a : Sweep and Rendezvous
|
Primary Objectives
|
Patrol all NAV points
|
|
Secondary Objectives
|
None
|
|
Bonus Objectives
|
None
|
|
Your Ship
|
Piranha
|
|
Wingmen
|
Stiletto, [Random Diamondback pilot]
|
|
Other Friendly Ships
|
None
|
|
Briefing
|
The Midway's primary sensors are now on line, and indicate that a large body of unidentified contacts have positioned themselves between the Midway and the Nephele jump point. These ships are on an intercept course. We estimate that they will be within striking distance of the Midway by 0100 hours. Our best escape route is a jump to the G'wriss system. The Midway must reach the jump point before the enemy fleet can intercept us. Patrols in force will be deployed along our intended escape route to clear a path to the jump point, limiting enemy reconnaissance and preventing a preemptive strike on the Midway. Your Alpha Wing will patrol this route, eliminating any and all enemy forces, before rejoining the Midway at NAV 4. You must rendezvous with the Midway by 0100 hours in order to make the jump.
|
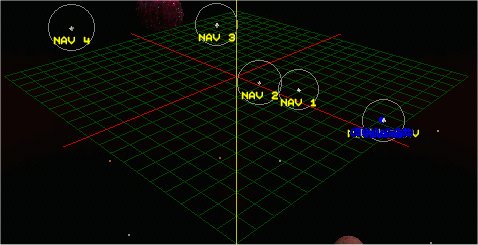
NAV 1
4 Moray
NAV 2
4 Moray
NAV 3
3 Moray
2 Manta
|
|
Notes
- Put your Stormfire to good use early on in this mission. It takes out Morays quite quickly, and will allow you to keep your missiles. You'll be needing them later.
- Watch out for fighters getting behind you on this mission. Everything here carries several missiles, and they hurt. Especially if your shields are down.
- Once you reach NAV 3, it's time to unload those missiles you've been saving up. Focus on the "Unknowns" (which are actually Mantas) to begin with since they have more powerful weapons and Piranhas can't take much punishment.
Outcome
Success go to H'rekkah 4a. Failure go to H'rekkah 4b.
H'rekkah 3b : Patrol and Rendezvous
|
Primary Objectives
|
Patrol all NAV points
|
|
Secondary Objectives
|
None
|
|
Bonus Objectives
|
None
|
|
Your Ship
|
Piranha
|
|
Wingmen
|
Dallas, [Random Diamondback pilot]
|
|
Other Friendly Ships
|
None
|
|
Briefing
|
The Midway's primary sensors are now on line, and indicate that a large body of unidentified contacts have positioned themselves between the Midway and the Nephele jump point. These ships are on an intercept course. We estimate that they will be within striking distance of the Midway by 0100 hours. Our best escape route is a jump to the G'wriss system. The Midway must reach the jump point before the enemy fleet can intercept us. Patrols in force will be deployed along our intended escape route to clear a path to the jump point, limiting enemy reconnaissance and preventing a preemptive strike on the Midway. Your Alpha Wing will patrol this route, eliminating any and all enemy forces, before rejoining the Midway at NAV 4. You must rendezvous with the Midway by 0100 hours in order to make the jump.
|
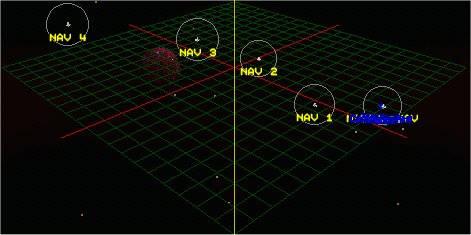
NAV 1
6 Moray
NAV 2
6 Moray
NAV 3
5 Moray
2 Manta
|
|
Notes
- You get this mission if you failed to save enough Black Widows pilots in the previous mission. As a result, you now have two extra Morays at each NAV point to face. They'll make saving your missiles and your wingmen a lot more difficult. However do your best, it will help you in the end.
- Put your Stormfire to good use early on in this mission. It takes out Morays quite quickly, and will allow you to keep your missiles. You'll be needing them later.
- Watch out for fighters getting behind you on this mission. Everything here carries several missiles, and they hurt. Especially if your shields are down.
- Once you reach NAV 3, it's time to unload those missiles you've been saving up. Focus on the "Unknowns" (which are actually Mantas) to begin with since they have more powerful weapons and Piranhas can't take much punishment.
Outcome
Success / Failure go to H'rekkah 4b.
H'rekkah 4a : Wasp Intercept
|
Primary Objectives
|
Patrol all NAV points
|
|
Secondary Objectives
|
None
|
|
Bonus Objectives
|
None
|
|
Your Ship
|
Wasp
|
|
Wingmen
|
Zero, [Random Diamondback pilot]
|
|
Other Friendly Ships
|
Omega Wing: Stiletto, 2 Random pilots (Wasps). Gamma Wing: Maestro, 2 Random pilots (Wasps). 3 Random pilots (Wasps).
|
|
Briefing
|
There is no briefing before this mission. It is a scramble.
|
Midway NAV
6 Moray
3 Red Manta
Then infinite waves of Morays and Mantas.
|

|
Notes
- You get to try a nice new Wasp in this mission. Hit B as soon as you launch and head towards the enemy fighters. You'll not only get there quickly, but your turn rate will be much better without that booster pack holding you back. Just be sure not to get too far away from the Midway.
- Weapon of the moment on your fighter is the Swarmer missile. Try it on those Mantas. You'll like it. Be advised that you need to keep your target in view after you fire otherwise the rocket pods will lose their lock on their target.
- Get the Red Mantas first. They can launch torpedoes at the Midway. If it takes too many torpedo hits and all of its critical components (bridge and both engines) are destroyed, the Midway will be destroyed. Also, if both landing bays are destroyed, you will be unable to land. You will get a message "You are unable to land" and you will have to restart the mission.
- Never get drawn too far away from Midway. When you get the call to return to ship, you need to head back immediately. If you fail to do so, the Midway will jump without you and then it's game over.
Outcome
Success go to G'wriss 1. Failure you lose.
H'rekkah 4b : Tactical Retreat
|
Primary Objectives
|
Patrol all NAV points
|
|
Secondary Objectives
|
None
|
|
Bonus Objectives
|
None
|
|
Your Ship
|
Tiger Shark
|
|
Wingmen
|
Zero, [Random Diamondback pilot]
|
|
Other Friendly Ships
|
Omega Wing: Stiletto, 2 Random pilots (Wasps). Gamma Wing: Maestro, 2 Random pilots (Wasps). 3 Random pilots (Wasps).
|
|
Briefing
|
There is no briefing before this mission. It is a scramble.
|
Midway NAV
6 Moray
4 Red Manta
Then infinite waves of Morays and Mantas.
|
|
Notes
- You're on the losing track in this system so you get the "all-purpose" Tiger Shark. Just use your Dragonfly pods and be sure to save enough afterburner fuel to get you back to the Midway in time and you'll be fine.
- Get the Red Mantas first. They can launch torpedoes at the Midway. If it takes too many torpedo hits and all of its critical components (bridge and both engines) are destroyed, the Midway will be destroyed. Also, if both landing bays are destroyed, you will be unable to land. You will get a message "You are unable to land" and you will have to restart the mission.
- Never get drawn too far away from Midway. When you get the call to return to ship, you need to head back immediately. If you fail to do so, the Midway will jump without you and then its game over.
Outcome
Success go to G'wriss 1. Failure you lose.
Comment on a mission
Submitted by : Jed "Mercury" Heilan
Mission : Wasp Intercept
Comments : In this mission, be extra alert; The other Wasps will not activate their Booster Packs sometimes, and this can result in you versus a whole alien fight/bomber wave.
|
