|
Wing Commander Prophecy
KILRAH SYSTEM
Kilrah 1 : Fleet Remnant Destruction
|
Primary Objectives
|
Ensure destruction of alien capships at NAV 1
Ensure destruction of alien capships at NAV 2
|
|
Secondary Objectives
|
Protect Alpha Wing during strike
|
|
Bonus Objectives
|
Eliminate 50% of fighters
|
|
Your Ship
|
Vampire
|
|
Wingmen
|
Stiletto, 2 Random pilots
|
|
Other Friendly Ships
|
3 Devastators. 2 Vampires, 1 Devastator at NAV 2.
|
|
Briefing
|
Enemy presence in this system is stronger than expected, and the aliens are continuing to bring in reinforcements. Your Alpha Wing will provide cover for a wing of bombers as they strike advance elements of this new alien fleet. At the same time, a second attack force will pursue and destroy the survivors from our plasma weapon's attack on the fleet in Hrissith. Your objective is to eliminate all fighters and starships at your designated NAV position. When both groups are eliminated, return to the Midway.
|
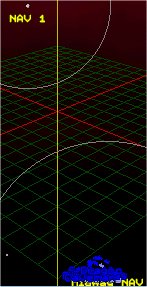
NAV 1
Wave 1
12 Moray
1 Leviathan
Wave 2
6 Manta
Wave 3
6 Moray
NAV 2
8 Squid
1 Orca
|
|
Notes
- You should be pretty used to escorting bombers by now. Just stop the bugs from blowing up your bombers and everything will be happy.
- Take the number of fighters in the first wave down to around two before heading to the carrier to blow up any remaining shield generators. Your wingmen should be able to handle those remaining fighters until the next wave jumps in.
- This mission employs the usual trick of letting you think everything is under control before throwing an SOS call at you. Be prepared for it by keeping enough missiles back to take on the extra fighters.
Outcome
Success / Failure go to Kilrah 2.
Kilrah 2 : Cap Missile Interception
|
Primary Objectives
|
Protect Midway from Capmiss attacks
|
|
Secondary Objectives
|
Destroy alien bombers
|
|
Bonus Objectives
|
Protect Alpha Wing
|
|
Your Ship
|
Wasp
|
|
Wingmen
|
Maestro
|
|
Other Friendly Ships
|
2 Panthers (Maniac, Random pilot), 3 Vampires (Stiletto, 2 random pilots)
|
|
Briefing
|
There is no briefing before this mission. It is a scramble.
|
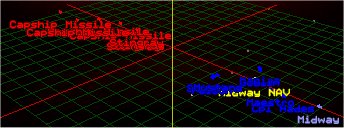
Midway NAV
Wave 1
3 Stingray
4 Cap Missiles
Wave 2
Waves of 4 Moray until Wave 3 arrives
Wave 3
8 Skate T
Waves of 4 Moray and 4 Manta until Skates are destroyed.
|
|
Notes
- The first thing to do in this mission is hit your Wasp's boosters and head straight for the Cap Missiles. Target each one in turn firing one of your missiles at each of them. That's the first key threat out of the way...
- After a certain amount of time, you'll see a whole load of new red dots appear on your radar. At this point, focus on nothing except getting those Skate Ts. With 8 of them around, at least one torpedo will almost certainly get launched at Midway. If one does and you think you can get to it in time, try to shoot it down.
- When you're done with the Skates, you can take on the Mantas, then finally the Morays. Use up the rest of your missiles if you feel the need. It'd be a shame to let those Swarmers go to waste.
Outcome
Success go to Kilrah 3. Failure you lose.
Kilrah 3 : Dreadnought Support Assault
|
Primary Objectives
|
Destroy enemy cruiser force
|
|
Secondary Objectives
|
None
|
|
Bonus Objectives
|
Eliminate 50% of alien fighters
Protect Alpha Wing during patrol
|
|
Your Ship
|
Devastator
|
|
Wingmen
|
3 Random pilots
|
|
Other Friendly Ships
|
5 Vampires. 2 Vampires (Stiletto, random pilot), 1 Devastator at NAV 2.
|
|
Briefing
|
The alien dreadnought is the most significant threat in this system. In order to mount an assault on this ship, we must first break through its screen of escort vessels. You will lead Alpha Wing's bombers in an assault on the enemy cruiser force at NAV 1. A second, identical force will strike at the second advance force at NAV 2. When all enemy ships are eliminated, you are to return to the Midway.
|
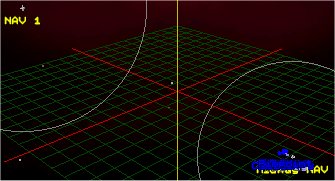
NAV 1
Wave 1
4 Squid
1 Ray
1 Leviathan
Wave 2
6 Moray
Wave 3
2 Moray
2 Squid
NAV 2
3 Moray
1 Orca
1 Hydra
1 Leviathan
|
|
Notes
- Here you have a mission very similar to the first Kilrah mission... except this time it's you flying the bomber. Since there isn't much you can do about the fighters, your best bet is to fly in and take out the carrier as quickly as you can.
- You probably will need to take on the fighters when you are done. You may prefer your plasma weapon especially if you are a good aim since it downs most enemies in one shot. You may prefer to use your ship's Stormfire though, although the limited ammo can be a bit frustrating.
- Once again Stiletto needs your help. Fortunately there are only three fighters at her NAV point so you can easily take them out before setting to work on the capships. From there all you need to worry about are the turrets. Don't autopilot until the job is done unless you really want to fly the extra mission taking another crack at the capships.
Outcome
Success go to Kilrah 4. Failure go to Kilrah 3b.
Kilrah 3b : Cleanup
|
Primary Objectives
|
Eliminate alien strike force
|
|
Secondary Objectives
|
None
|
|
Bonus Objectives
|
Eliminate 50% of alien fighters
|
|
Your Ship
|
Devastator
|
|
Wingmen
|
4 Random pilots
|
|
Other Friendly Ships
|
4 Panthers.
|
|
Briefing
|
There is no briefing before this mission. It is a scramble.
|
NAV 1
4 Manta
4 Moray
4 Squid
1 Leviathan
1 Hydra
Between NAV 1 and Midway
4 Moray
|

|
Notes
- Since you screwed up the last mission, you now have to take another crack at the capships, and this time around they have more fighter support. You're going to have to take on a lot of those fighters too since those Panthers aren't going to be too much help.
- Concentrate on the fighters before taking on the capships. You don't want any enemies bugging you while trying to get a torpedo lock or while waiting for your plasma cannon to recharge.
- In typical fashion, you get jumped by fighters on the way home. Just use up the rest of your missiles and let your wingmen mop up.
Outcome
Success go to Kilrah 4. Failure you lose.
Kilrah 4 : Defang the Beast
|
Primary Objectives
|
Destroy Dreadnought's turrets.
|
|
Secondary Objectives
|
None
|
|
Bonus Objectives
|
Destroy Dreadnought engine shield emitter
Eliminate 50% of alien fighters
|
|
Your Ship
|
Vampire
|
|
Wingmen
|
4 (Spyder, 3 Random pilots)
|
|
Other Friendly Ships
|
None
|
|
Briefing
|
All wings are tasked with reducing the dreadnought's defenses. Proceed to the target NAV point and eliminate all threats. Your primary targets are turrets and shield emitters on the dreadnought, as well as any fighter cover in the vicinity. Additional ordnance may be expended upon the dreadnought's engines and bridge, but these are not your primary targets. When the ship's defenses are eliminated, return to the Midway for further briefing.
|
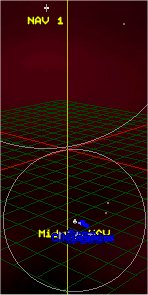
NAV 1
Wave 1
4 Squid
1 Tiamat
Wave 2
6 Squid
4 Moray
Wave 3
8 Manta
6 Stingray
|
|
Notes
- This mission is simple. Blair's training missiles trick doesn't work for long so take out all of the fighters. When they're all gone take out all of the turrets. No problem.
- If you are good at handling your fighter, this mission should be no problem. Autoslide is an extremely valuable tool here so that you can simply slide past turrets without having to keep stopping and starting.
Outcome
Success / Failure go to Kilrah 5.
Kilrah 5 : Dreadnought Assault
|
Primary Objectives
|
Destroy Dreadnought bridge
Destroy Dreadnought engine
|
|
Secondary Objectives
|
None
|
|
Bonus Objectives
|
Destroy alien Devil Ray fighter
Eliminate 50% of alien fighters
|
|
Your Ship
|
Devastator
|
|
Wingmen
|
4 (Spyder, 3 Random pilots)
|
|
Other Friendly Ships
|
3 Vampires.
|
|
Briefing
|
There is no briefing before this mission. It is a scramble.
|
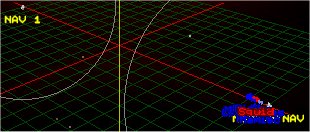
Midway NAV
2 Manta
3 Squid
NAV 1
Wave 1
1 Devil Ray
3 Squid
3 Manta
1 Tiamat
Wave 2
4 Moray
|
|
Notes
- I hope you're ready to finish off that pesky Dreadnought. But first you need to defend the Midway. Nothing there will try to damage the Midway so take your time, try not to take damage, and save your missiles.
- Now that you're done defending Midway, on to the Dreadnought. Your first task is to kill the Devil Ray before it kills you. Believe me, it'll have a good try launching loads of missiles at you. From there, take out the Dreadnought and leave your wingmen to deal with the fighters although if one is constantly bugging you, turn around and drop it.
- Don't die. If you do, you'll also need to replay the previous mission.
Outcome
Success / Failure go to Kilrah 6.
Kilrah 6 : Wormhole Destruction
|
Primary Objectives
|
Destroy wormhole gate towers
|
|
Secondary Objectives
|
None
|
|
Bonus Objectives
|
Protect friendly craft
Eliminate 60% of alien fighters
|
|
Your Ship
|
Vampire
|
|
Wingmen
|
Stiletto
|
|
Other Friendly Ships
|
Marine LC. 3 Vampires (Zero, 2 random pilots). Blair, Maniac, Maestro after refueling.
|
|
Briefing
|
The Midway will now pull away from the wormhole to draw the aliens' attention. While we withdraw, your Alpha Wing will escort Dekker's assault team in their landing craft to the wormhole gate. Once the Marines land, they will divide into two teams and navigate around the wormhole's superstructure, disabling the shields on each of the seven stabilizing towers. As each shield is lowered, you will destroy its corresponding tower. Science Division believes that when all seven Towers are destroyed, the Wormhole will collapse and destroy itself. As soon as all seven towers are destroyed, escort the landing craft back to the Midway as quickly as possible to avoid any backlash from the wormhole's collapse.
|
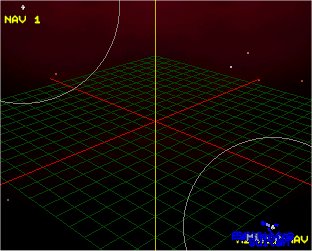
NAV 1
1 Devil Ray
4 Manta
Infinite waves of Manta, Moray, Squid, and Lamprey until recalled to meeting point.
After Refuelling
9 Stingray
1 Devil Ray
5 Manta
3 Moray
Then infinite waves of Stingray, Manta, Moray.
|
|
Notes
- This mission is a true exercise in endurance. You have to survive infinite waves of fighters while the marines knock down the shield of each tower. All that you can do is survive and knock down each tower as the shields are dropped. Chances are you'll run out of afterburners and missiles. Fortunately you get supplies when you head back for Blair.
- Both times you reach the wormhole, there is a Devil Ray in the area. This should be your first priority otherwise it could do you some damage, and that is the last thing you need in this long mission.
- As soon as Blair drops the shield on the last tower, nail it as quickly as you can. If you wait too long, the entire enemy fleet will come through the gate and then it's over. You do get a nice losing scene though...
Outcome
Success you win! Failure you lose.
Comment on a mission
Submitted by : Jed "Mercury" Heilon
Mission : Wormhole Destruction
Comments : Do not get the willies. You will not travel through the wormhole. Think of it as a one-way hologram.
You don't have to destroy any cooling towers until you meet Maestro, Maniac, and Blair. After you get the Devil Ray, destroy all green towers.
Submitted by : NiteFox
Mission : Kilrah 6 : Wormhole Destruction
Comments : Perhaps Maniac should've gone into the tower instead of Blair...
Missiles are your prized resource on this mission, keep 'em and look after 'em like brothers. When 6 towers are down, you can begin to get your money worth out of your stockpile.
Submitted by : Kasreyn
Mission : Kilrah 2
Comments : An alternate method: Use ordinary thrust to close with the cap missiles. Remove them and the 1st wave. When the bombers appear back at Midway, use your booster; you'll get back in plenty of time to save her.
Submitted by : Luke " Shadow " Taylor
Mission : Wormhole Destruction
Comments : Just blow the living hell outa all the fighters ya clan, forget the towers till Blair's done his work then blow up some more fighters just for fun then hit the towers. If your good, you can get away with no damage.
Submitted by : Dammerung
Mission : Kilrah 5
Comments : That Dreadnaught isn't that tough, it's a little kitty on the inside. Easy pickings.
|

