|
Wing Commander III
TORGO SYSTEM
Torgo 1
Conversations:
|
Character
|
Location
|
Choices
|
Effects
|
|
Tolwyn
|
Flight Deck
|
We're all equal here
Score points with the Admiral
|
Increase ship morale
Decrease ship morale
|
|
Flint
|
Gunnery Control
|
She can see Tolwyn's a jerk
It's none of her business
|
Increase Flint's morale
Decrease Flint's morale
|
Notes
- Since you are stuck in an Arrow, you need to make the most of your limited weaponry. This means only using your missiles when absolutely necessary.
- Nav 1 is the only Nav point where you are outnumbered, but since the Strakhas shouldn't be much of a problem, it's nothing to worry about.
-
- Nav 2 consists of five waves and as if Vaktoth's weren't enough to contend with you have to face Paktahns too. Fortunately it is four against four so you shouldn't have to worry about an enemy getting on your tail.
Outcome
Torgo 2
Conversations:
|
Character
|
Location
|
Choices
|
Effects
|
|
Rachel
|
Flight deck
|
None
|
None
|
|
Rollins
|
Elevator
|
None
|
None
|
|
Tolwyn
|
Bridge
|
None
|
None
|
Notes
- Although the Thunderbolt is a ship option, it can't carry enough mines to complete the mission so you must take the Longbow to succeed.
- This mission is very similar to the previous mission with the waves of Vaktoth and Paktahn, except this time you are in a Longbow. Because the Longbow is such a slug, take out the Vaktoths first since their speed advantage makes them more of a threat.
- As you clear each Nav point your autopilot light will come on, however don't forget to drop two mines before hitting autopilot. Your computer will report "Proceed to next waypoint" when two mines have been dropped.
Outcome
Success / Failure go to Torgo 3.
Torgo 3
Conversations:
|
Character
|
Location
|
Choices
|
Effects
|
|
Objectives
|
Disable three fuel transports
|
|
Ship Choices
|
Arrow, Hellcat
|
|
Wingmen Choices (if alive/obtained)
|
Hobbes, Vaquero, Vagabond, Maniac, Cobra, Flash, Flint
|
|
Other Friendly Ships
|
None
|
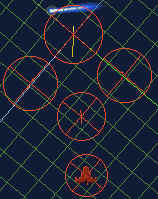
NAV 1
Wave 1
3 Transports
2 K'ha'haf
Wave 2
2 K'ha'haf
Wave 3
2 K'ha'haf
Wave 4
2 K'ha'haf
|
|
Notes
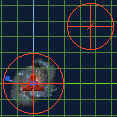
- You need to disable the three transports in this mission. This is done by damaging them until your computer reports "transport disabled". Be very careful not to get carried away and blow one up.
- Fighters disguised as asteroids. Nice. They are quite speedy too for flying rocks. Providing you can get behind them and drop them, they won't pose a problem.
- Your wingman tends to go flying straight for the transports as soon as you order Break and Attack, so you'd be better off issuing an Attack my Target order if you want help with the fighters.
Outcome
Success / Failure go to Loki 1.
Comment on a mission
|