DL2: H'hrass - Cruiser Group Assault
| DL2: H'hrass - Cruiser Group Assault | |
|---|---|

| |
| Designation | DL2 |
| Type | Escort Bomber |
| Date | 2681 |
| TCSM | 313.2 |
| Location | H'hrass |
| Disc | 2 |
| Fighter | Tigershark |
| Wingmen | Alpha Wing |
| Other Wings | Bravo Wing |
| Other Friendly Ships | TCS Midway |
| Primary Objectives | Ensure Cruiser Elimination |
| Secondary Objectives | Defend Shrikes Eliminate 66% of Cruiser Turrets Eliminate Alien Corvettes |
| Bonus Objectives | Eliminate 66% of Alien Fighters |
| Previous | DL1: H'hrass - Mine the Jump Point |
| Success | D1: H'hrass - Relay Station Insertion |
| Failure | D1: H'hrass - Relay Station Insertion |
| Eject | Midway NAV: Rescued NAV 1: Captured |
DL2: H'hrass - Cruiser Group Assault is a mission in Wing Commander Prophecy. It follows DL1: H'hrass - Mine the Jump Point and is followed by D1: H'hrass - Relay Station Insertion.
Mission Briefing
The alien cruiser and its escorts have broken past the mines surrounding the jump point. At their current speed and trajectory, they will intercept the Midway within the hour. Sensors reveal that they have already launched fighters and bombers for an initial assault. Hawk's Charlie Wing will deploy to provide combat space patrol for the Midway. Meanwhile, your Alpha Wing will escort Maniac's Bravo Wing as they make a direct assault on the cruiser group. When the attack is completed, return at once to the Midway and assist in its defense if necessary. The Midway is the last line of defense before Confederation space. Your mission is critical.
Wing Layout
Alpha Wing
Designation Pilot Ship Type Profile Notes Alpha 1 Player Tigershark Alpha 2 Tigershark Diamondback Alpha 3 Tigershark Diamondback Alpha 4 Tigershark Diamondback
Bravo Wing
Designation Pilot Ship Type Profile Notes Bravo 1 Maniac Shrike Midway NAV to NAV 1 Bravo 2 Shrike Black Widow Midway NAV to NAV 1 Bravo 3 Shrike Black Widow Midway NAV to NAV 1 Bravo 4 Shrike Black Widow Midway NAV to NAV 1
Other Friendly Ships
Designation Pilot Ship Type Profile Notes TCS Midway Midway Midway NAV
Mission Layout
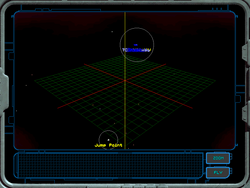
Midway NAV
- START
NAV 1
- JUMP POINT
# Faction Ship Type Callsign Profile Notes 2 Nephilim Squid English 11 1 Nephilim Squid English 13 1 Nephilim Squid English 14 1 Nephilim Squid English 15 2 Nephilim Barracuda 1 Nephilim Hydra Neutral Jump Buoy NAV 1
Cutscenes
Takeoff Introduction 2210 Dismissal 2215 Launch 2543 Landing Landing (Winning) Generic Landing (Losing) 0640 Egress (Winning) Generic Egress (Losing) 0645
Rec Room
Script
Briefing
Speaker Speech Download Transcript ICIS 04020004.wav The alien cruiser and its escorts have broken past the mines surrounding the jump point. 04020005.wav At their current speed and trajectory, they will intercept the Midway within the hour. Sensors reveal that they have already launched fighters and bombers for an initial assault. 04020006.wav Hawk's Charlie Wing will deploy to provide combat space patrol for the Midway. 04020007.wav Meanwhile, your Alpha Wing will escort Maniac's Bravo Wing as they make a direct assault on the cruiser group. 04020008.wav When the attack is completed, return at once to the Midway and assist in its defense if necessary. 04020009.wav The Midway is the last line of defense before Confederation space. Your mission is critical.
Origin's Official Guide to Wing Commander Prophecy
DL2: H'hrass - Cruiser Group Assault
| Combat Summary — TCSM 313.2 | |
| Objective Ensure cruiser elimination | Bonus Eliminate 66% of Alien fighters |
| Alpha Wing Defend Shrikes, eliminate 66% of cruiser turrets, eliminate Alien corvettes | |
| Your Ship Tigershark | Wingmen 3 |
| Other Friendly Ships 4 Shrikes | |
| Briefing. The mines didn't work. This is your last chance at that pesky cruiser. You're assigned to escort a Torpedo strike against the enemy. | |
Alien Forces NAV 1 5 Squid
2 Barracuda
1 Hydra
Notes
- Nothing particularly tricky here. Follow the same priorities you learned in mission C2.
- You probably want to eliminate the numerous and aggressive Squids before tackling the cumbersome Barracudas.
- Once again, your Autopilot light will come on when the enemy fighters are gone, but don't bug out until you've finished the mission and crippled the cruiser.
Success/Failure
Success/Failure go to D1.
WC:CIC Game Guide
Notes
- This is your last chance to take out that pesky cruiser. If you can't take it out this time, you don't have much hope for completing the rest of the game. Remember : Fighters, then shield emitters, then turrets. Take them out in that order.
- There is very little fighter cover here. Set to work on the Squids first, then set to work on the corvettes.
- If you have taken out everything, just sit back and let the bombers do their thing.
User Comments
Submitted by : Benoit Delage (delage.b@videotron.ca)
Mission : H'hrass Losing Path 2 : Cruiser Group Assault
Comments : You can also use your Dragonflies for the turrets, but the Hydra's ones are tougher than the Orca's. At 100cm per shot, you need 6 for gun turrets (600cm), 8 for missile turrets (800cm) and a dozen for shield emitters!

