Episode 5 - Winning Mission 16 - Charge of the Leathernecks
| Charge of the Leathernecks | |
|---|---|
| Date | 2669.001.0534 |
| Fighter | Rapier or Sabre |
| Wingmen | (Rapier) Longshot and Hades (Sabre) Squealer and Hotdog |
| Other Friendly Ships | 1 wing of Rapiers 1 wing of Sabres 12 Hermes-class Marine boarding ships (Rapier) 1 extra wing of Sabres (Sabre) 1 extra wing of Rapiers |
| Primary Objectives |
|
| Previous | Episode 5 - Winning Mission 14 - Sacrifice |
| Next | Episode 5 - Winning Mission 17 - Big Damn Ending |
Preflight Conversation / Briefing
Popsicle: Captain Bradshaw, any news?
Bradshaw: News? Yeah, there's news. Get to your planes. The marine shuttles are approaching the cat fleet, and we've got to protect them.
Saxman: Marine shuttles? What are the Marines doing out there?
Bradshaw: Planting explosives. They will board and destroy the enemy carriers.
Popsicle: Whoa. And I thought we had it tough.
Bradshaw: We will, if the Marines don't make it. Get to your ships and let's go!
Mission Layout
- Target Area Nav
- Kilrathi Reinforcements
- 5 Sartha (arrive after 3 minutes)
Player Notes
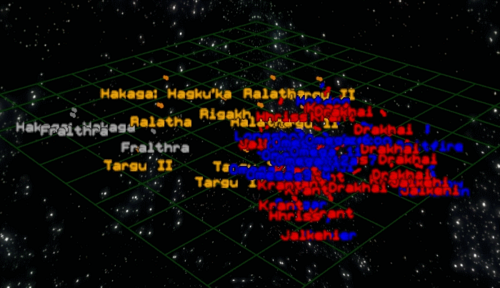
To accomplish this mission the player needs to get at least half of 12 the transports to board their targets, with the added requirement that two of them must reach the Hakaga supercarrier. In theory, all of the Kilrathi capital ships in the target area could be destroyed if all of the Marine transports survived to board capital ships, but given the defending fighters outnumber you 3 to 1 and there's a huge area to cover to protect all the transports, it's unlikely that's going to happen absent some truly colossal luck. The general problem you're going to have in this mission can be summarised by the tactical map just after the initial clash of fighters. It's complete chaos, and your chances of being able to keep track of what's where - even with the map as a guide - are very low. Equally, there's not much chance of pulling off a clever strategy here. It's a case of finding the nearest fighter, blasting it, and moving onto the next one as quickly as you can. Each fighter you can kill is one less that can go after the transports, and time spent trying to maneuver to kill what looks like a more tactically important target is time not spent killing Kilrathi. Taunt liberally, fly aggressively, shoot straight. The only real concession you might make to tactics is keeping back dumbfire missiles for the Hhriss and Vatari, which take an annoyingly long amount of time to kill without them.
