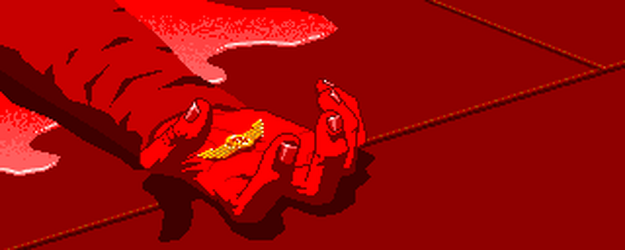
WC vs History - Star Raiders


For Lt. General "Jimmie" Doolittle, who did the end run first. Thank you, Godspeed, and safe journey. – William Forstchen, Dedication Page, Wing Commander: End Run
An end run is defined as an evasive trick or maneuver. The Doolittle Raid and Raid on Kilrah were both end runs, albeit in different ways. The Doolittle Raid was never meant to inflict serious damage to the Japanese. It was a purely morale operation and it succeeded expectations. What made it an end run was the use of twin engine Army Air Corps B-25 medium bombers from an aircraft carrier. The Raid on Kilrah was expected only to divert a part of the Kilrathi Home Fleet, if the raid inflicted some damage on military targets it was a bonus. It was the end run. By attacking the Kilrah system itself in order to split the Kilrathi fleet rushing to seek revenge was a masterful deceit. That Strike Force Valkyrie not only caused the splitting of the Kilrathi fleet, but also massive damage to the ship construction installations on Largkza was a victory comparable to the one it enabled at Vukar Tag.
On the 70th anniversary of the Doolittle Raid, we present the next installment in our WC vs. History series: Star Raiders.
The setbacks of early 1942 left the United States reeling. The Pacific Fleet had been attacked and knocked out at Pearl Harbor the previous December. Wake Island, Guam, and the Philippines had all been attacked and captured by Imperial Japanese forces. The people of the United States needed good news and they needed it yesterday.
The Confederation was in a similar situation following the heavy losses of 2666. Eight carriers had been destroyed that year, halving the entire Confederation carrier force. Others were heavily damaged and needed months of repair and refit. Whereas the Americans needed a moral boost, the Confederation needed a real victory to swing the pendulum of war back towards the humans’ side. Both the Americans and Confederation take extraordinarily bold moves to do just that. They launched “End Runs” at the heart of their respective enemies.
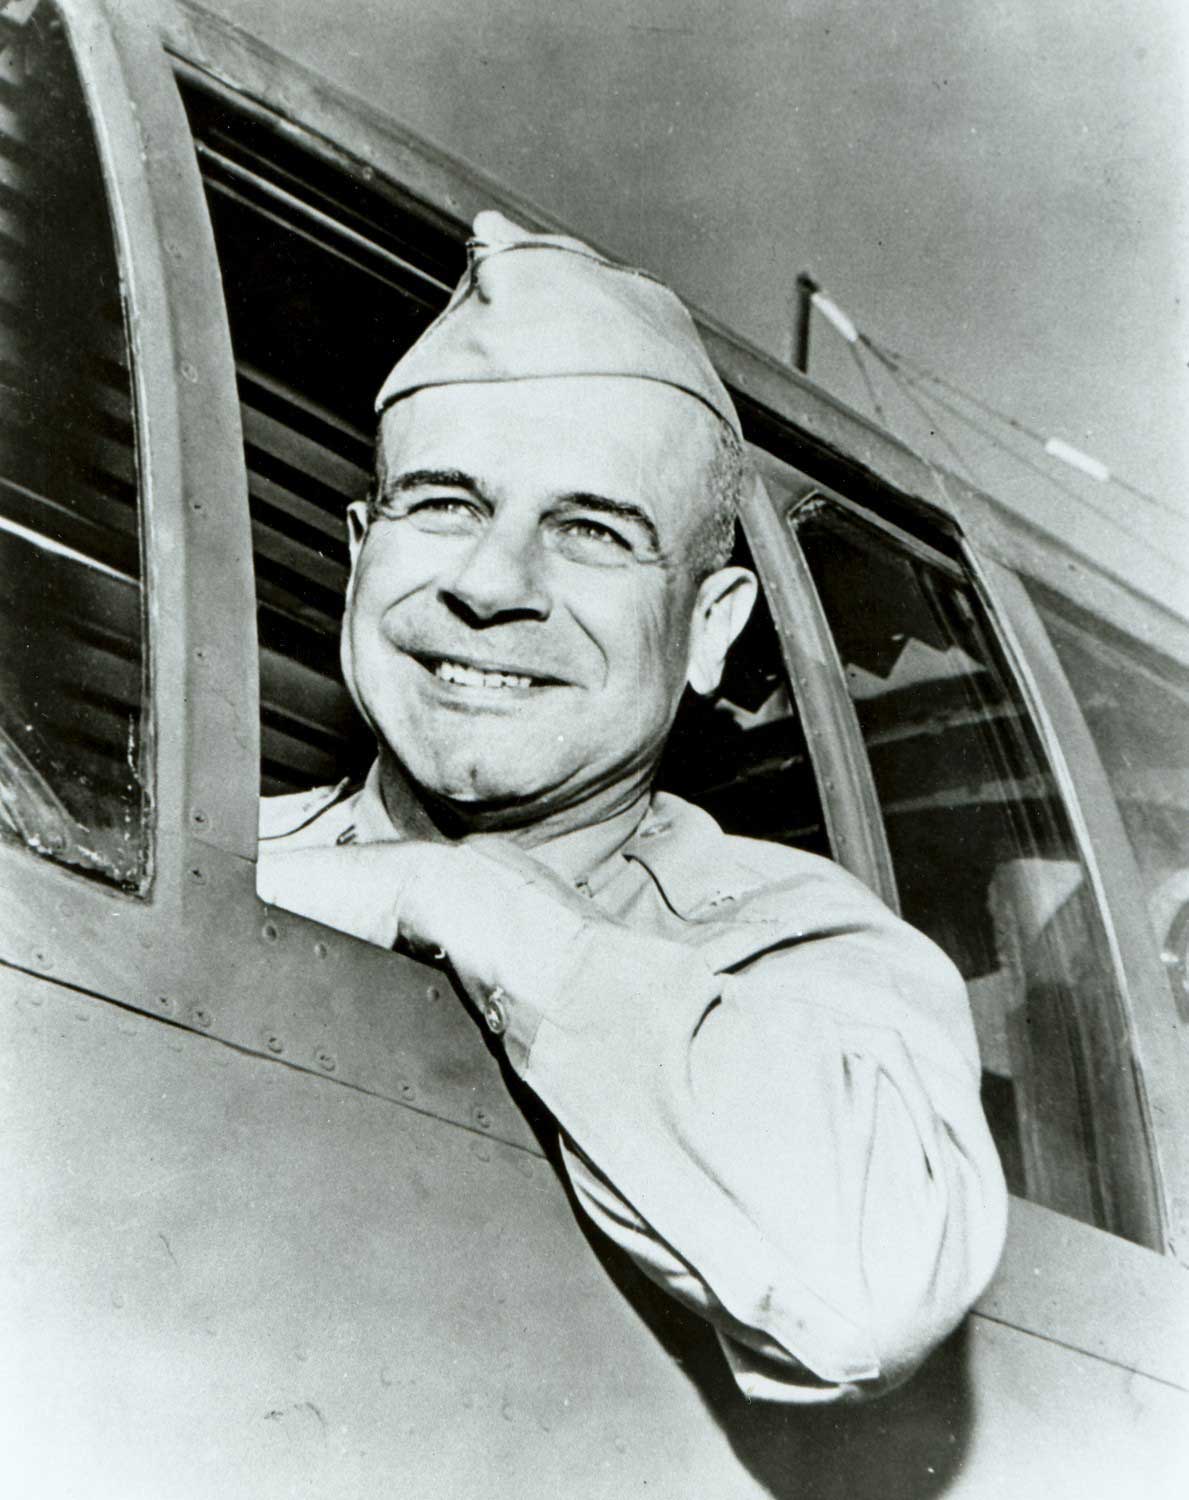
Special Aviation Project No. 1 was the result of a request by President Roosevelt, several weeks after Pearl Harbor, to attack the Japanese Home Islands to boost public morale. The idea for an attack came from the Assistant Chief of Staff of Anti-Submarine Warfare, Captain Francis Low. He thought that twin engine Army bombers could launch from an aircraft carrier after watching bombers land at a nearby Naval Air Station where a carrier outline was painted onto the runway. He brought the idea to Admiral Ernest King in early January 1942. The idea was seen as being worth exploring and an Army bombing unit, under the command of the famed aviator Lt. Colonel Jimmy Doolittle, set out to solve the problem of taking off in less than 500 feet.
The 17th Bomb Group was chosen to carry out the raid because it was the first to receive the B-25 “Mitchell” Medium Bomber in September 1941. By Spring 1942, the 17th was the most experienced B-25 unit. The B-25s required extensive modifications before training could begin. The lower gun turret and the guns were removed from the aircraft, removal of the top-secret Norden bombsight and the installation of additional fuel tanks. The aircraft were then flown to the Pensacola Naval Air Station to begin carrier take off training. After several weeks of training, sixteen crews were chosen to fly to California where they were to meet the new carrier, USS Hornet (CV-8). Sixteen B-25s were loaded onto the Hornet’s flight deck, while the carrier’s own air group was stored below in the ship’s hangar. The carrier and her task force left California on 2 April 1942.
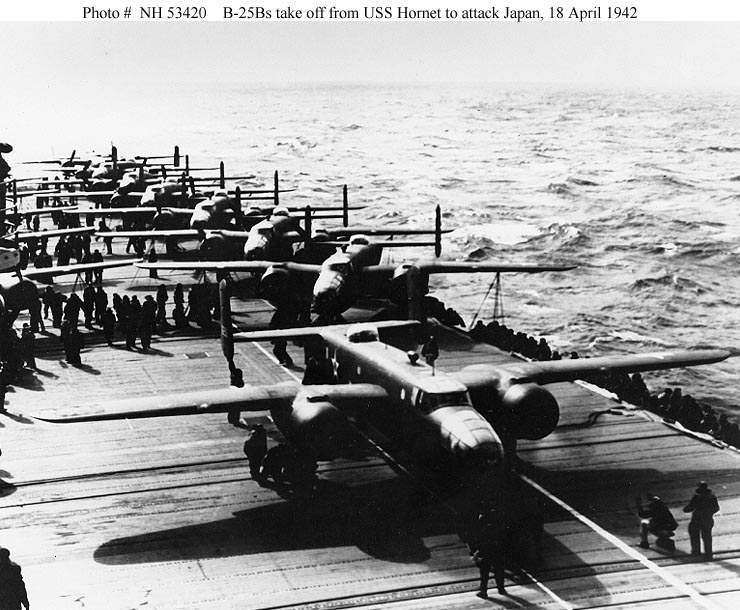
Two images of the B-25B "Mitchell" medium bombers on the deck of the USS Hornet during the transit across the Pacific. Note the SBD Dauntlesses in the rear facing image parked in between the bombers.
Onboard the Hornet, the Army pilots were at first treated with mixed disregard and disdain by the crew. The Army aircraft were keeping the Hornet’s own planes in a position unable to defend the carrier from attack. On 13 April, the Hornet rendezvoused with USS Enterprise and her task force under the command of Vice Admiral William “Bull” Halsey. Scuttlebutt immediately went to work on the ships. What was the Enterprise and Halsey doing here? What was the Hornet doing here with Army bombers on her deck? Later in the day Admiral Halsey made things perfectly clear to the entire force, including the Raiders themselves: “This force is bound for Tokyo!” Admiral Halsey later reported that he never heard a cheer so loud in his entire life before or since as he did at that moment. Treatment of the Army fliers on the Hornet immediately changed. They went from sleeping in the hallways of the carrier to sleeping in bunks as the sailors gave up their racks. The Raiders experienced the best treatment of any Army member on a naval vessel. One can doubt if even MacArthur received the same level when he served afloat.
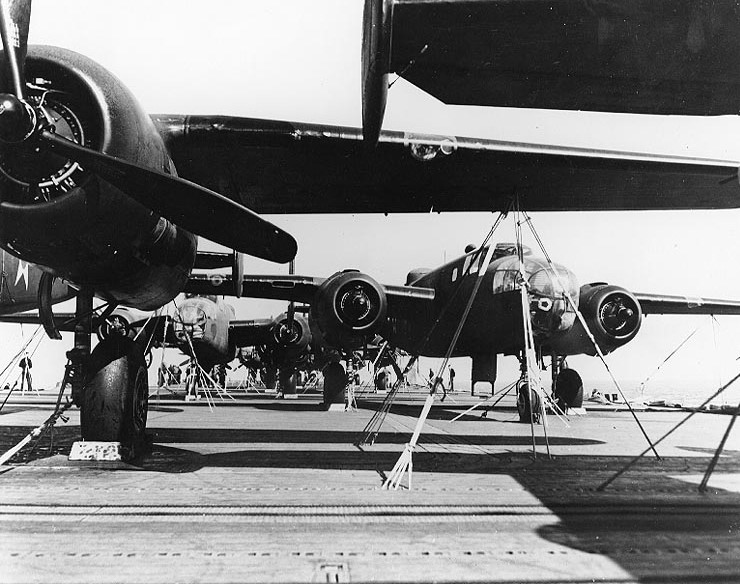

Looking at the B-25Bs at flight deck level and an image from the fantail of the Hornet.
Colonel Doolittle had been given Japanese “Friendship Medals” that the Japanese government had given to the United States. They were to be returned attached to the fins of American bombs. Captain, future Admiral, Marc Mitscher helped Doolittle attach the medals before the planes were to launch.
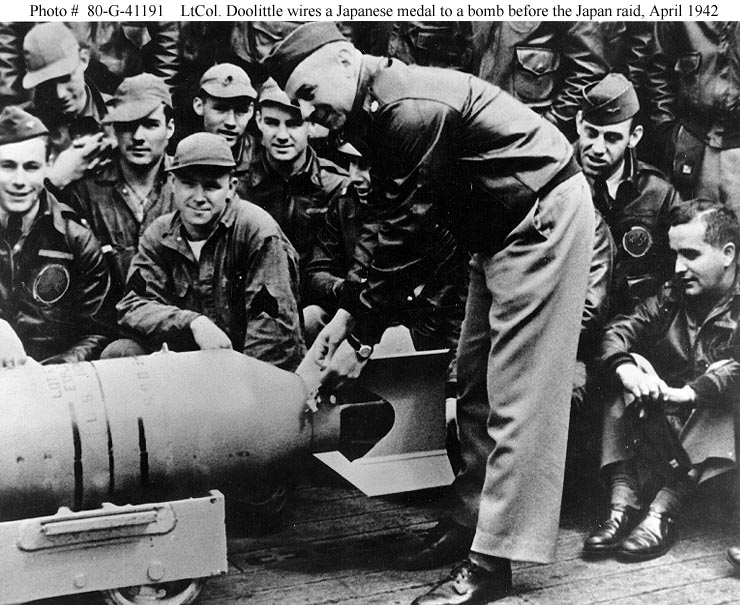
Lt. Colonel Doolittle attaching Japanese friendship medals to a bomb and posing with Captain, future Admiral, Marc Mitscher.
As the combined task force steamed the thousands of miles across the Pacific, they almost made it to the 500 mile launching point without being seen. The plan had been to launch at 500 miles so as to allow the Raiders to bomb Japan during the evening and then fly the 600 miles to China to land with the sun at their backs. However, early on the morning of 18 April, when the Americans were still 650 miles away from Japan, their radar detected a nearby contact. A Japanese picket ship lay just over the horizon. Admiral Halsey ordered his cruisers to open fire and destroy the picket. Halsey also ordered Doolittle and his planes into the air. Knowing the additional distance posed a significant risk, the B-25s were loaded with as many jerry cans of gas as they thought they could safely carry. Before takeoff, Admiral Halsey messaged:
TO COL. DOOLITTLE AND HIS GALLANT COMMAND
GOOD LUCK AND GOD BLESS YOU – HALSEY
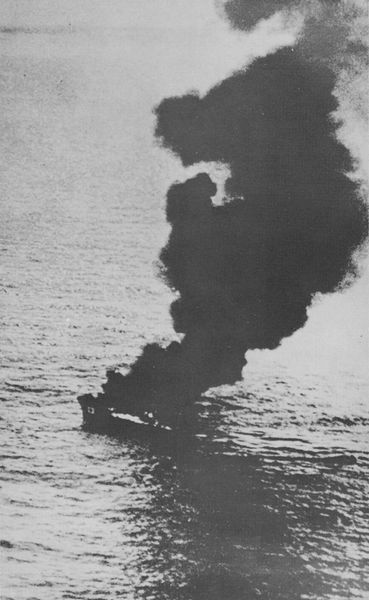
The Nitto Maru sinks after taking shells from US ships.
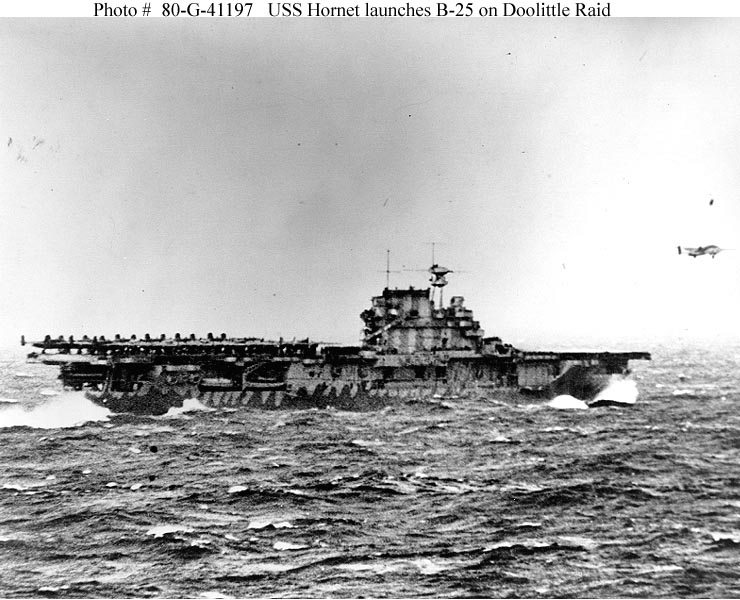
Between 0820 and 0919, sixteen United States Army B-25 “Mitchell” medium bombers launched from the US Navy aircraft carrier, USS Hornet. This is the only time the second time in history, as well as the last, that Army aircraft launched from an aircraft carrier. The first time had in February 1942, off the USS Hornet as well, when Captain Donald Duncan became the first to fly a B-25 from a carrier in 500 feet. Colonel Jimmy Doolittle became the second at 0820. He timed his released with the heaving of the flight deck, as the weather was very rough at the time. He throttled the engines to full, held the brakes and the right moment released them to roar down the flight deck. The B-25 reached the end of the deck at the exact moment it pitched to its maximum height. The aircraft seemed to hang in the air for a moment before dipping from view. It then reemerged flying away from the carrier. The other fifteen B-25s followed. All of the aircraft took off from roughly the same position because of the limited clearance offered the larger wingspan of the bombers of the carrier deck. The wings of the B-25s passed dangerously close to the island of the Hornet and any misjudgement by the pilot would have resulted in a collision and loss of the aircraft.
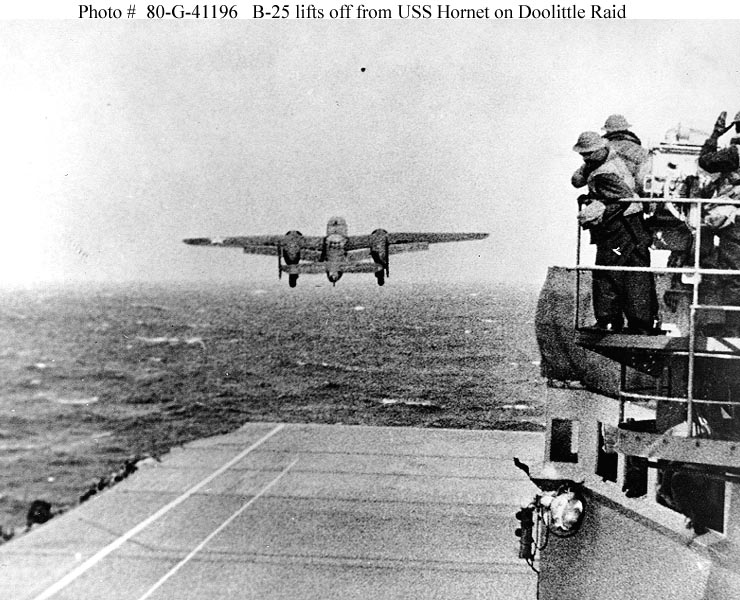
Lt. Colonel Doolittle launching from the USS Hornet, 18 April 1942.
Because of the launch distance, the sixteen B-25s did not wait to form up before proceeding on to Japan. Instead, each aircraft made their ways independently to the Home Islands flying at tree top level. As happened throughout the Spring of 1942, Lady Luck smiled upon the Americans. The Japanese were running an air raid drill as the Raiders made landfall. Their presence did not cause a stir at first, however once bombs began to fall on Japanese cities that garnered a response from anti-aircraft batteries and fighters. The Raiders were given specific orders not to bomb the Imperial Palace. Those orders were followed, however at a recent conference I heard one of the surviving Raiders describe how they buzzed the Imperial Palace yelling out the window so low “there’s no way he couldn’t have heard us if he was home.”
The Raiders struck a number of Japanese cities including Tokyo, Yokohama, Yokosuka, Nagoya, Kobe and Osaka. The physical damage was minimal, the Japanese dubbing the raid in propaganda the “Doo-Little raid!” The morale damage was enormous. Admiral Yamamoto, as Commander-in-Chief, Combined Fleet, was in charge of protecting the Home Islands from enemy assault. Following the raid, which had so closely threatened the security of the Emperor, Yamamoto locked himself in his cabin for days without food or water his shame was so great. This is where the Doolittle Raid played a role in the Battle of Midway. Yamamoto had been proposing a plan to force the remaining US carriers to battle, but the High Command had refused to give it the go ahead. After the Raid, Yamamoto not only received the green light, he then created the Midway battle plan. A plan that belongs only in textbooks under the heading “What Never To Do With Your Fleet In War.”
Of the 16 planes, one landed outside Vladivostok in the Soviet Union, while the others headed towards China. Eight men from two crews had been captured by the Japanese. The two other members of the crew drowned when trying to escape their bomber off the coast of China. Two of the remaining captured men were later executed by the Japanese. Six other went into detention for the duration. The remaining Raiders variously made their way to extraction points in China. The Japanese killed an estimated quarter million Chinese in their search for the Doolittle Raiders.
The Doolittle Raid was the much needed morale boost President Roosevelt had sought. Doolittle assumed the worst and braced himself for a court martial. He had lost all 16 aircraft after all and caused minimal damage. Instead when he arrived back in the United States, he was awarded the Medal of Honor and was promoted directly to Brigadier General. Every Raider received the Distinguished Flying Cross, along with two Silver Stars for aiding fellow crew members.
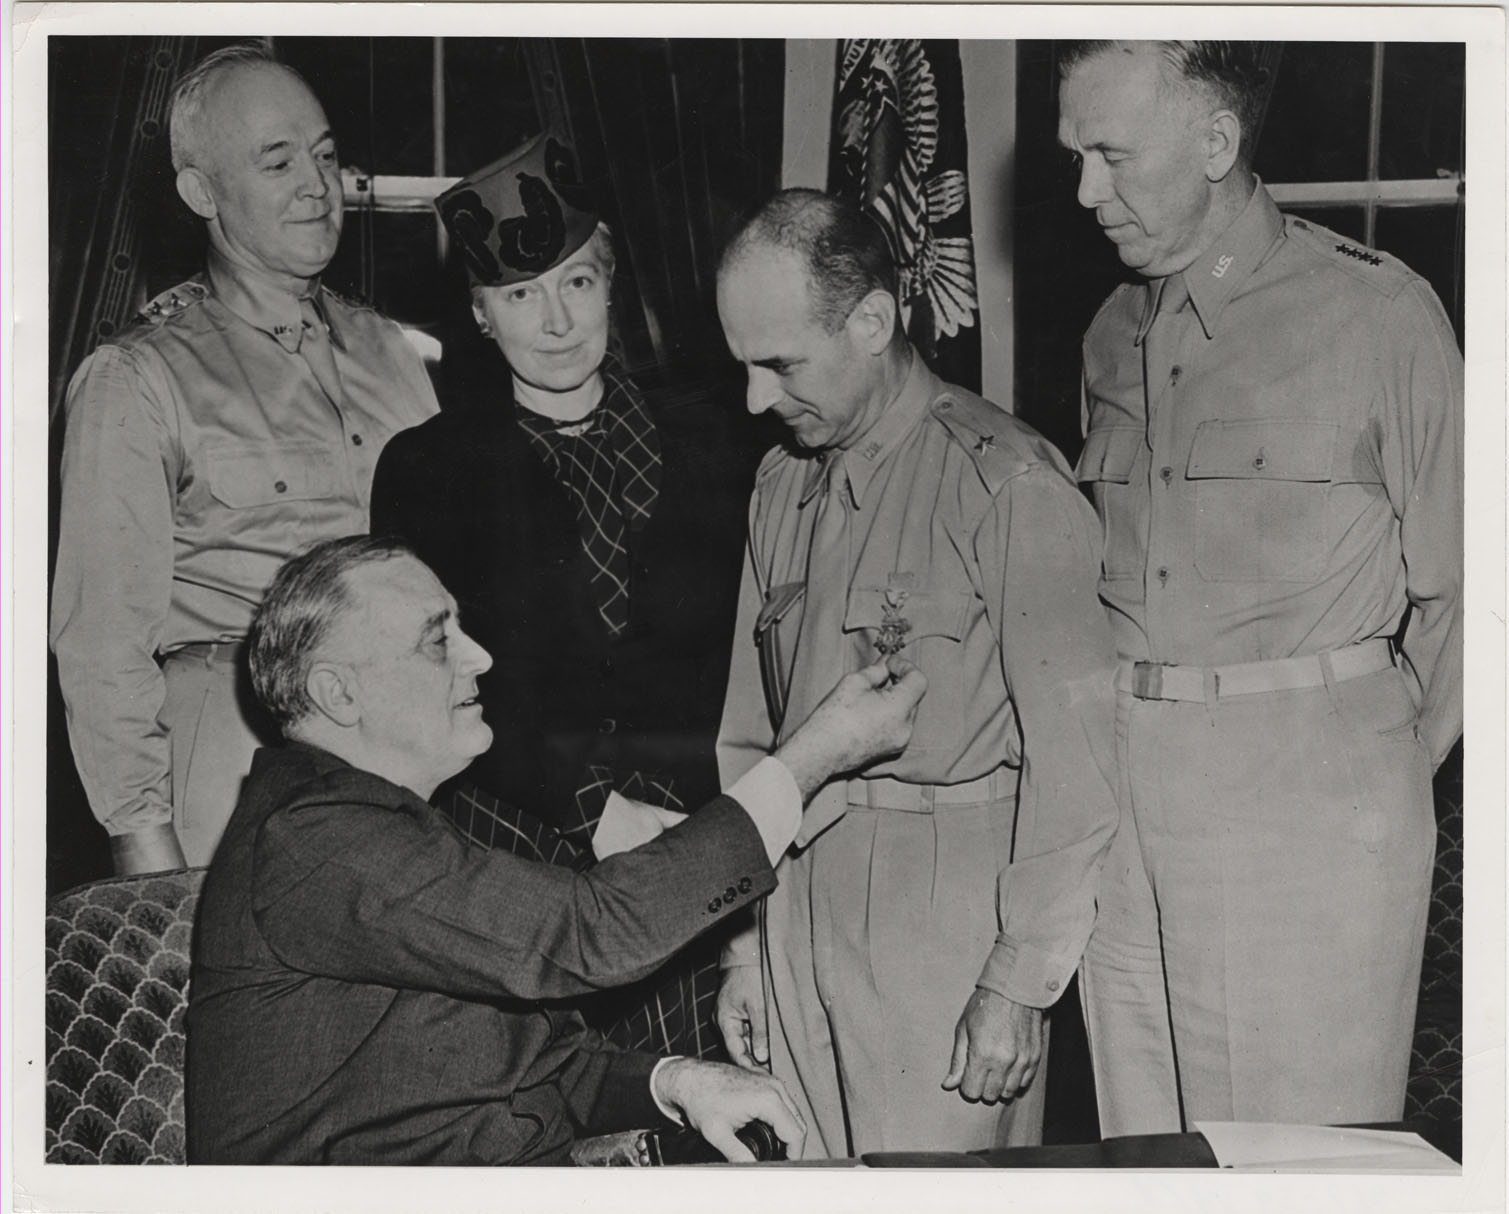
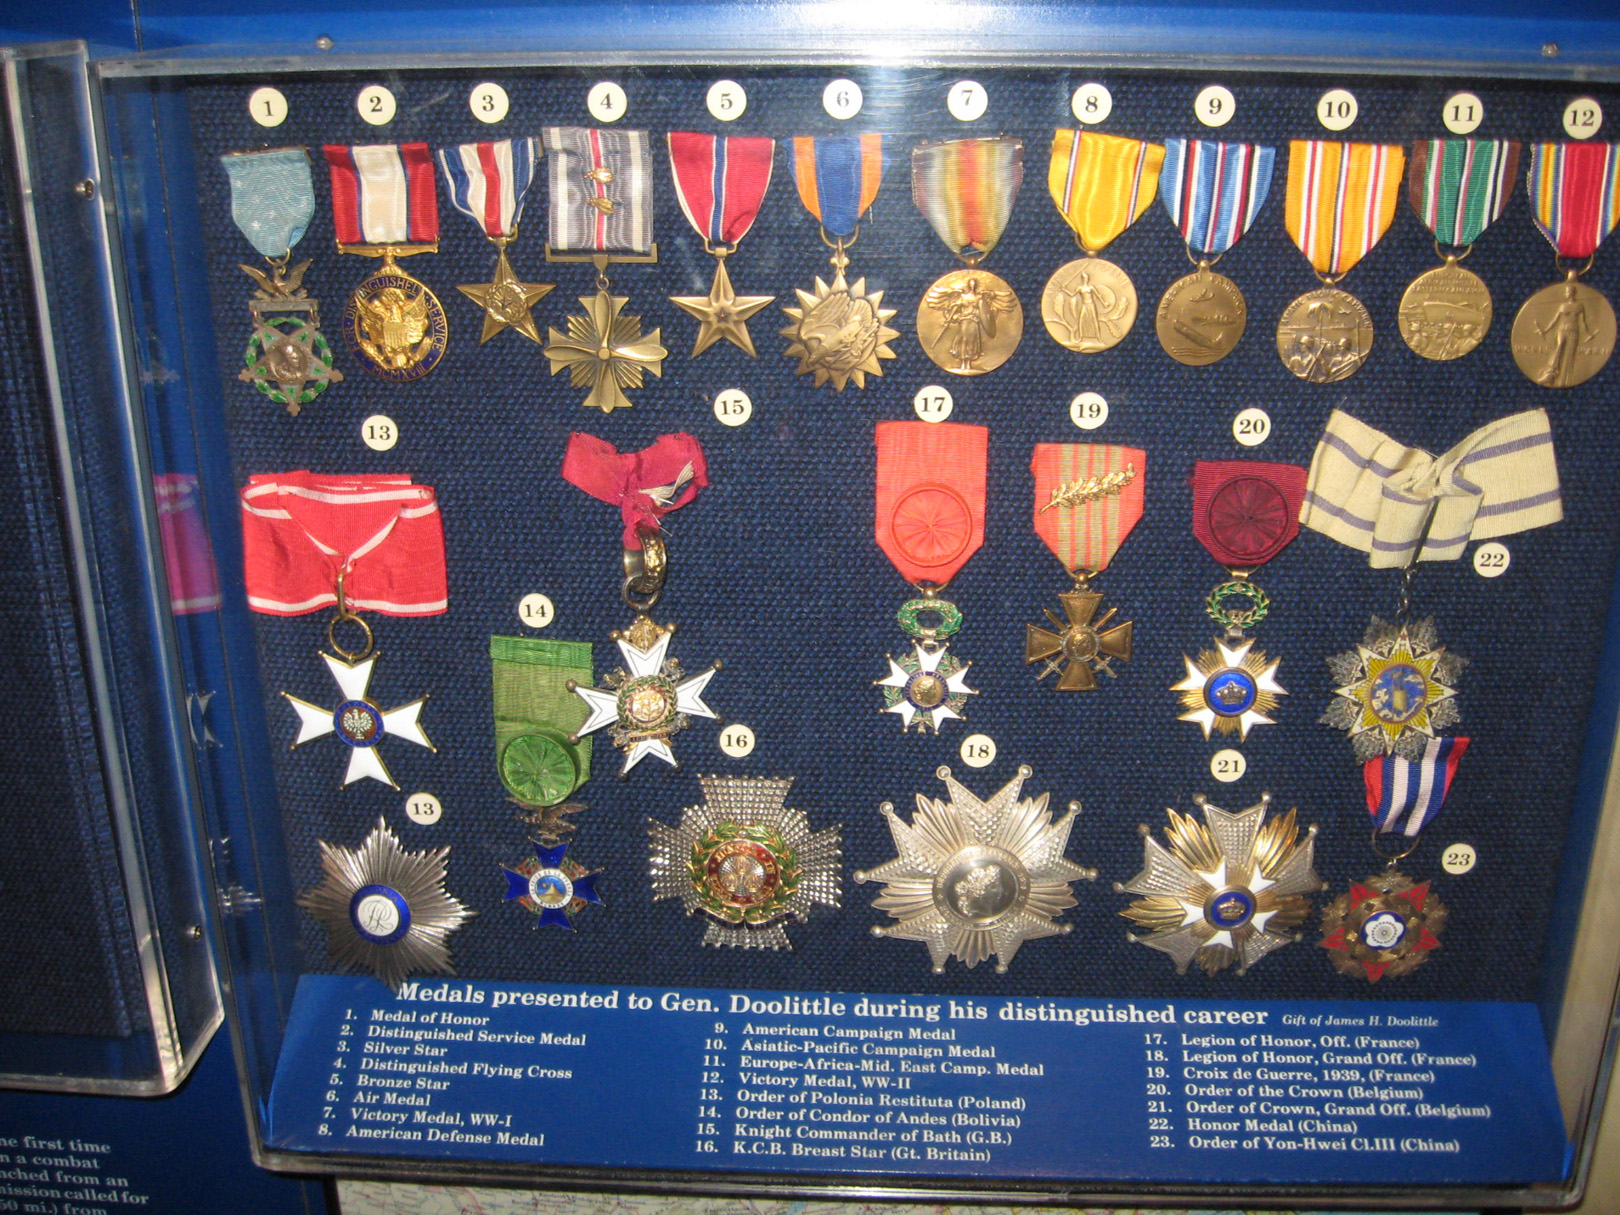
Recently promoted Brigadier General Doolittle receiving the Medal of Honor from President Roosevelt and all of General Doolittle's military awards.
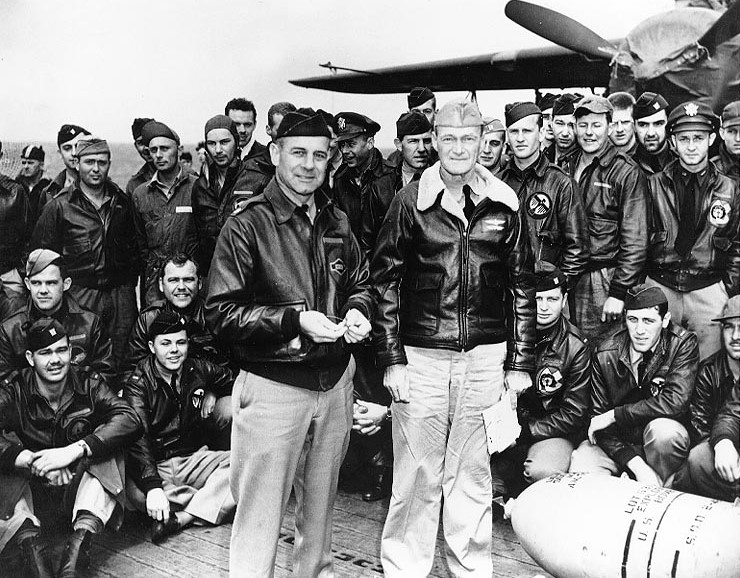
Last December, I was able to attend the International Conference on World War II at the National World War II Museum of the United States in New Orleans. Five of the six remaining Doolittle Raiders came and gave a great presentation about the Raid and the rest of their times throughout the war. I managed to get autographs on a book about the Raid and a poster of one of the Raider B-25s that I still need to get framed.
The Raid on Kilrah was part of a larger operation. Operation Back Lash was designed to tip the balance of the war back onto a more equal footing following the heavy Confederation carrier losses of 2666. Nine carriers were destroyed during the year that forced the Confederation back in multiple sectors. Back Lash wanted to return the favor to the Kilrathi by setting an ambush for a portion of the Kilrathi Home Fleet. An attack was ordered on Vukar Tag and in particular on the ancestral home of the Emperor’s Dowager mother, Graknala nar Kiranka. This type of insult forced the only Kilrathi response: a full sortie of the ten carriers of the Home Fleet. In order to even the odds, the Confederation needed a way to split the Home Fleet on its approach to the ambush set at Vukar Tag. Strike Force Valkyrie was that way to force the split. Centered on the TCS Tarawa, one of the first batch of Wake-Class Escort Carriers, the force was to use a previously undisclosed jump line to approach the Kilrah system. To quote Admiral Banbridge himself:
"Your mission is to drive straight into the heart of the Kilrathi Empire and to launch a strike on their home system...If anything will split off the home fleet it will be this action. We've traced out a route into the Empire which will follow back trade lanes, using a recently discovered jump point that will take you across a dozen sectors in a single leap. From there, you'll be down into the bottom side of the Empire nearly five hundred parsecs from here and just four jumps from their home world of Kilrah. You'll then drive straight up, relying on speed and stealth. The key point, however, is that you will let the Kilrathi know you're coming...that's the heart of the plan. We expect that once you've completed that long jump, the Kilrathi home fleet will be over halfway out here to Vukar and then, suddenly, you push the backdoor alarm bell. They'll be between a rock and a hard place. They won't know about the trap waiting at Vukar, but they will know about you. We expect that interior defenses will be damn near stripped for their offensive. Ignore you, and the home planet gets a hell of a shaking up. Abandon the offensive and race back home and honor is lost for not immediately retaking Vukar...They'll walk into the trap with part of their fleet missing and we'll smash it to pieces. If it works, it just might trigger a political crisis that could bring down the Emperor himself and at the very least we'll have bagged half a dozen of their finest capital ships."
The Kilrathi were placed in an excruciating dilemma. They had to redeem the honor of the Dowager mother and defend the home world itself. Against the advice of Baron Jukaga nar Ki'ra, Crown Prince Thrakhath nar Kiranka split three carriers from the Vukar Tag force to intercept Strike Force Valkyrie. The result was the First Battle of Kilrah. We turn to the Terran Knowledge Bank of WCPedia for a recap of the epic raid.
Penetrating the Empire
Strike Force Valkyrie spent five days running at full speed into the Empire. They had only encountered a lone transport which Tarawa pilot, Etienne Montclair, destroyed. In a system predetermined by Admiral Banbridge's staff, Wing Commander Jason Bondarevsky launched in a Ferret and deliberately sent out active radar scans in order to attract attention from Kilrathi forces. He was able to lure six Sartha back to the Tarawa. However, Commodore O'Brian had chosen to alter the plan and scrambled eight ships to intercept them before they sighted the strike force. Bondarevsky conspired with Doomsday on Commlink 2331 to allow the Kilrathi to spot the strike force despite O'Brian's intentions. Upon completing the mission, Bondarevsky and O'Brian had a heated argument on the bridge of the Tarawa. Serious charges were cast about by both parties. O'Brian was on the verge of turning the strike force back when Captain Grierson arrived and reinforced Bondarevsky's position by forcing the strike force forward through intelligent use of his position as a fellow ship captain. This ensured that the planned trap for the Kilrathi was now set.
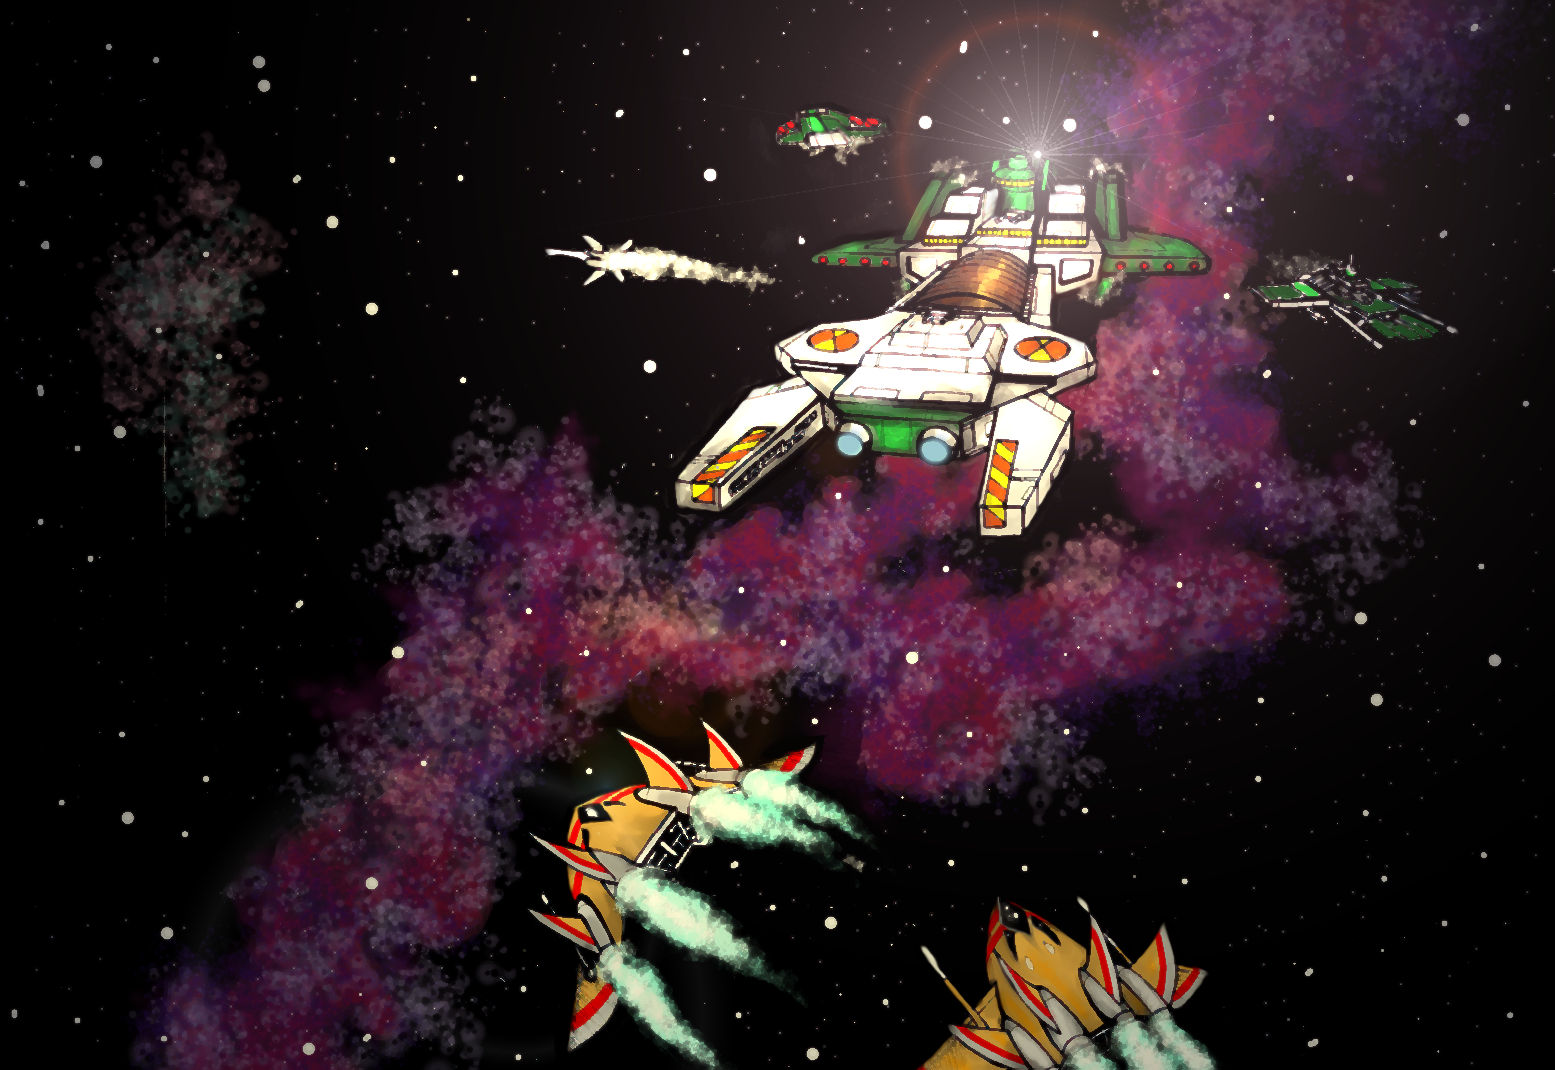
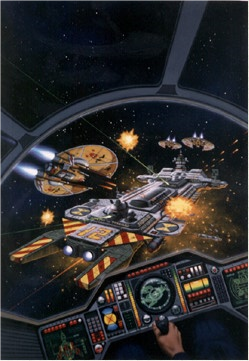
Strike Force Valkyrie is spotted! - NinjaLA's new piece of art is based on the moment the strike force was revealed to the Kilrathi.
The First Battle of Kilrah
Strike Force Valkyrie penetrated the Kilrah system and immediately launched a reconnaissance sweep composed of Ferrets. They reported twenty five plus Kilrathi fighters (Sartha, Dralthi and several Grikath) and three Kamekh-class corvettes on an intercept approach. In the ensuing dogfight, the Kilrathi force was destroyed in exchange of the loss of one fighter and one seriously damaged.

Kilrah and two of its moons
Assault on Largkza
TCS Intrepid and Kagimasha bombarded Largkza's surface for an hour before eight Sabres and four Rapiers made an anti-point defense strike using new Space-to-Ground Anti-Radar Submunition Missiles. The weapon broke into fifty submunitions and tracked individual radars, radio links, laser trackers, point defense guidance systems, and subspace transmitters. One Sabre was lost before release, however, the seven remaining Sabres each released four of the missiles for a total of 1,400 warheads. Hundreds were destroyed before reaching their targets, but hundreds more still made it through to destroy Kilrathi point defenses. Jason Bondarevsky launched a single anti-radar missile after the initial strike to catch any Kilrathi systems that had stayed off-line during the attack.
Ten landing craft carrying the 500 commandos made their assault following the strike by the Tawara's fighters. One was shot down making the landing while the other nine reached the surface to begin their mission. At the same time, another group of Dralthi had sortied from Kilrah to intercept the strike force but was stopped by Janice Parker's mixed force of Ferrets and Rapiers.
At this point in the battle, Bondarevsky took a mental tally of kills and losses. Fifty plus Kilrathi fighters destroyed as well as four corvettes. The Tarawa's flight wing had lost five Ferrets, five Rapiers and one Sabre. He also saw Kilrah in the distance noting, "It looked similar to Earth, a beautiful blue green sphere, hanging in the blackness." (This differs from the game vision of a red tinted planet seen in the image at the beginning of this update.)The battle waged for another hour with Bondarevsky attacking several ground targets, but Montclair's Sabres were inflicting the most damage on secondary targets revealed by the marines as they took out phase-shield generating systems. The attack ripped apart barracks and construction areas, the heavy single-missile matter/anti-matter warheads throwing debris twenty kilometers above the moon's surface.
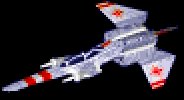
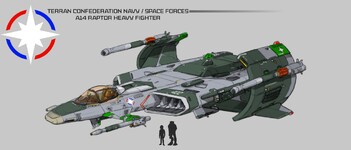
The P-64 Ferret, F-44 Rapier II, and F-57 Sabre made up the Tarawa's space group.
Enter the Crown Prince
Crown Prince Thrakhath was delayed in entering the Kilrah system because the Kilrathi fleet's jump had gone awry. Instead of placing his force of one carrier and eight escort ships into the Kilrah system hours ahead of Strike Force Valkyrie, they had jumped into the system beyond Kilrah. As a result they were delayed in reaching Kilrah by several hours and the previous navigator committed Zu'kara in atonement for the error. Thrakhath's other carriers had moved around the flank to cut off escape routes for the Confederation forces.
When Thrakhath's carrier did jump to the Kilrah system they found Strike Force Valkyrie fully engaged in assaulting Largkza. They were screened by an asteroid field and launched Strakhas to interfere with the ongoing operations.
The TCS Tarawa suffered a hit and fires broke out in the Combat Information room disrupting communications between Bondarevsky and the carrier. Captain Grierson on the Intrepid informed Bondarevsky of the situation. They had three and a half hours before the carrier and escorts became a serious threat.
It was at this point that Commodore O'Brian initiated an immediate withdrawal to the jump point. This sparked the final confrontation between him and Bondarevsky over the communications channel. O'Brian was willing to leave the marines and any fighters that did not reach the carrier behind, and relieved Bondarevsky of command and placed him under arrest for insubordination. Bondarevsky called him a coward and threatened to kill him once he arrived on the Tarawa. The carrier had already turned away from Largkza and was moving out-system at full speed when Bondarevsky landed. Bondarevsky informed Grierson of the situation and instructed him to rescue and provide cover for as many marines as possible.
Bondarevsky landed on the Tarawa and made his way to the bridge when, while en route, a tremendous explosion shook the carrier. A Kilrathi kamikaze attack had slammed into the bridge killing everyone, including Commodore O'Brian. Bondarevsky assumed control of the carrier and had a new bridge set up in flight control overlooking the flight deck. His first order was to get the carrier back into the fight.
Valkyrie on the Run
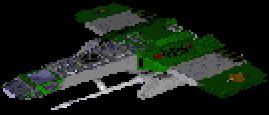

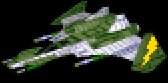
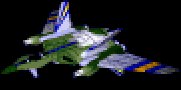
TCS Tarawa, a Wake-Class CVE, TCS Kagimasha, class unknown Venture-Class stand-in, and TCS Intrepid, class unknown Gilgamesh stand-in, were the three ships of Strike Force Valkyrie.
From the bridge of the TCS Tarawa Jason Bondarevsky was now in de facto command of the strike force. Technically, Captain Grierson outranked Bondarevsky, but Grierson deferred to Bondarevsky for the duration of the fighting.
The Tarawa's radar was knocked out by the kamikaze and had to rely on Intrepid for information on Thrakhath's approaching forces. They reported, "The enemy carrier is closing in at flank speed, with a spread of two cruisers and four destroyers forward and two corvettes to the flanks. Will arrive in twenty-seven minutes. We have a second wave of inbound fighters as well, fifty plus."
The Tarawa's flight wing had been reduced to eight Ferrets, eight Rapiers and six Sabres that were still in flying condition. Damage Control on the Tarawa reported airlocks had been established around the hull breach near the bridge, however the engine room was still cut off from the rest of the ship except for a radio link. The inertial dampening system was out of phase, by less than one thousandth of a second, but it made all maneuvers noticeable. The status of the jump engine was in question as the jump control officer had been killed. The infirmary and forward crew bays were also destroyed. One fifth of the crew had been lost, over a hundred dead and forty wounded.
The marines on Largkza had accelerated their timetable and had begun their withdrawal. The Intrepid in the mean time landed on the surface and extracted two landing ship crews before lifting off. One crew was lost while trying to lift off. The two landing craft docked with the Intrepid shortly afterwards and a further three on the surface lifted off to rendezvous in orbit.
After briefly recovering fighters for rearmament, Bondarevsky delivered a short speech to the crew and prepared to take on board the landing craft which were lifting off the surface of Largkza. The landing craft carrying Svetlana Ivanova was hit by a heat-seeking missile launched from the surface. It lost power and impacted back on the planet. After an emotional exchange between Bondarevsky, Merritt and Ivanova, Ivanova detonated the anti-matter mines. The damage to the facilities on Largkza was extensive and Svetlana and the 34 marines on board were killed in the blast.
Fifty of Tarawa's crew were causalities from the kamikaze strike and the ship itself needed time to effect repairs to its shield generator and jump drive. Bondarevsky knew the jump points would be blocked and found an alternative in the gas giant Igrathi. During the three hour run to the planet the Tarawa lost three Ferrets, two Rapiers and a Sabre in exchange for a dozen enemy fighters (mostly Grikath and Jalkehi fighters) and a single torpedo hit on a Ralatha destroyer which forced it to withdraw from the chase. As they neared Igrathi, the Intrepid and Kagimasha began trading torpedo salvos with the Ralathas still chasing them. One appeared to carry an improved engine system that allowed it to afterburn a dozen klicks per second faster than the Tarawa.
Bondarevsky ordered his escorts to smash the orbital base while instructing his navigator to fly them directly through the debris field and fully extend the ram scoops to slow the escort carrier down. As the carrier slowed, Bondarevsky ordered all fighters to immediately return to base. He signaled his escorts to rendezvous in thirty hours at 17:24 CST. The plan was to confuse the Kilrathi. Using an unmanned landing craft loaded with an matter/anti-matter mine as a cover, the three Confederation ships planned to drive into Igrathi's atmosphere. Meanwhile, the Tarawa's fighter wing was landing at twenty second intervals while Janice Parker, commander of the Ferret squadron, remained on station behind the carrier to provide some cover for the landing fighters.
Multiple Kilrathi capital ships and fighters were still closing on the Confederation ships. Six Grikath bombers intercepted the carrier and launched six torpedoes. Five of the torpedoes were destroyed by the combined fire from anti-torpedo guns and missiles on all three Confederation capital ships. Janice Parker destroyed the final torpedo by flying her Ferret directly into it. The mine aboard the unmanned landing craft was detonated which provided the cover necessary for the three Confederation ships to dive five hundred kilometers into Igrathi's ammonia and sulphur atmosphere. The Kilrathi ships used high energy microwave bursts to search for the Confederation ships, but without success.

Captain Jason "Bear" Bondarevsky during the Gettysburg Incident, 2667.
Bondarevsky addressed the crew of the Tarawa briefly:
"All hands. We've managed to elude the Kilrathi attack by diving into the upper atmosphere of a gas giant where their sensing devices can not find us due to atmospheric interference. As you can guess, any type of visual search is like looking for a feather in a blizzard. We will rendezvous with our escorts in a little less than thirty hours. In those thirty hours we are going to repair our ship and our damaged fighters and we are going to come back out kicking. Congratulations on a job well done. Merritt's marines smashed half a dozen carriers under construction and a hell of a lot of equipment. Our task force has downed over seventy enemy fighters, four corvettes, one orbital base, along with a number of probabilities and damaged. I'm proud of you, and the Confederation is proud of you. All damage control officers, weapons officers, and engineering officers report to the temporary bridge in one half hour. Thank you and keep it up, Tarawa. I'm damned proud to be part of this team."
Prince Thrakhath's force took defensive positions to intercept possible approaches to Kilrah. Destroyers were left to scan Igrathi. A picket line of cruisers and corvettes was stationed between Kilrah and Igrathi while the carrier carrying the Crown Prince was stationed in high orbit above Kilrah. In a conversation with the Emperor, Thrakhath learned of the developing situation at Vukar Tag. A Confederation task force had been detected entering the system as Kilrathi landing operations commenced. The Battle of Vukar Tag had been joined.
Making Repairs and Burying the Dead
For the next 29 hours, the crew of the Tarawa worked to repair the damage suffered during the first phase of the fighting. The ship had sustained serious structural damage. In a conversation between Bondarevsky, Montclair, the bridge staff and a twenty-five year fleet veteran named Jim who was a transfer from the Concordia the damage control situation was assessed. Jim had replaced the senior Damage Control Officer, a fresh from the Academy graduate who had died on the bridge. The bridge itself had been completely destroyed by the kamikaze hit with all hands lost. The Launch Control Room had been transformed into a backup bridge, a feature the Wake-class was not designed with. Helm Control, Combat Information, Navigation and Damage Control stations had been set up in the space and the only major station missing was Radar. The long range scanner had been completely destroyed in the kamikaze strike. Three of the six main keel beams had structural cracks running down them. These along with hundreds of other fractures in the hull allowed air to leak while also allowing Igrathi's toxic atmosphere to seep in. Some of the structural damage was repaired with durasteel salvaged from a wrecked Ferret. Fires remained in the aft crew quarters but were under control. These fires had polluted the air in the section and the air filtration system would require a couple of days to clean the section out. The shield generators had been damaged allowing no more than 75% power. The engine room was now in direct contact with the rest of the carrier through a pressurized corridor established by damage control.
The flight wing had suffered almost 50% causalities. 23 of 44 pilots remained, not including Bondarevsky who was now acting-captain. Two marine pilots were qualified to fly Ferrets but neither Bondarevsky or Montclair wanted to risk their lives against Kilrathi fleet pilots unless it was absolutely necessary. Bondarevsky promoted Montclair to Wing Commander. Bondaresvky also promoted Kevin Tolwyn to squadron leader for the Rapiers and "Round Top" Chamberlain for the Ferrets. Seven Ferrets, eight Rapiers and five Sabres were all that remained of the fighters in flying condition.
The officers made their way to the flight deck for a brief funeral ceremony for those who had been killed. Bondarevsky made a short remark and read the 23rd Psalm. Bodies were pushed through the airlock into Igrathi's atmosphere. Colonel Merritt came forward and symbolically ordered two sergeants to push a pair of jump boots with a helmet placed on top through the airlock as well. Thirty seven minutes later Strike Force Valkyrie emerged from Igrathi's atmosphere on a course directly towards Kilrah with ram scoops closed.
Changing "Maneuvering Tactics and Close-In Tactics Forever!"
Bondarevsky's plan was to distract Thrakhath's forces by launching a Ferret and Marine landing craft armed with "old-style atomic weapons" that would be easily detected by the Kilrathi. Prince Thrakhath's forces quickly detected the ships and made all effort to make sure they did not reach Kilrah. Thrakhath had been informed by the Emperor of the disaster suffered at Vukar Tag as well as ordering him to make sure no Confederation attack touched Kilrah. This worked directly into Bondarevsky's plan.
With ram scoops closed, the three Confederation ships accelerated rapidly. As they crossed eight thousand klicks per second, the Ferret and landing craft were launched towards Kilrah. Kilrathi forces responded with overwhelming strength towards the two small ships. The three Confederation capital ships then fired their maneuvering thrusters to turn perpendicular to their flight path. The landing craft was rammed by a Sartha and the Ferret was destroyed. Kagimasha was also rammed by a Sartha completely destroying the corvette and killing everyone on board.
The Tarawa and Intrepid cruised fifty kilometers over Kilrah's north pole using their tractor beams on the planet to slingshot them towards jump point F-One / Vuwarg jump point. In less than ten seconds, the two ships put Kilrah a hundred thousand kilometers astern. They would arrive at the jump point in seven hours and thirty two minutes. They had an estimated five million kilometer lead on any Kilrathi forces.
Prince Thrakhath admitted to himself that though the maneuver by Bondarevsky had been "brilliantly executed", it was also "an exercise in futility". It had bought the Humans a bit more time. He realized he had not thought the situation through a Human's perspective where a chance to hit the enemy home world took priority over living another day. Thrakhath ordered the KIS Karu to block the jump line from the Baragh to Rushtasystems. KIS Torg was ordered to block the Baragh to Xsar system jump line. Thrakhath's task force moved to block the Baragh to Lushkag system jump line. He ordered that thirty reserve fighters be delivered from the palace guard to his carrier to replenish losses suffered in the battle. Thrakhath's carrier was to move towards its blockade point two hours after the Confederation ships completed their slingshot maneuver.
Seven hours and thirty two minutes later the Confederation ships jumped from the Kilrah system to Vuwarg. The battle had become a stern chase.
The Return to Confederation Space
In the system after Vuwarg, Strike Force Valkyrie encountered a Kilrathi orbital base. It was taken out in a sharp attack led by Grierson, several Sabres, and a company of marines. It was then stripped of durasteel, emergency air canisters and a light shuttle craft. They also removed half a dozen of the base's mass driver mini guns, which were welded to the ship just forward of the landing airlock for point defense. The gun crews were volunteers and had to go EVA to reach them.
Two days later, the Kilrathi had two Frathlas and four Ralathas only six hours behind the Confederation ships. Two hours and twenty eight minutes later the Confederation ships jumped into the Baragh System.
Battle of Baragh
As soon as Strike Force Valkyrie entered Baragh, they encountered Prince Thrakhath's picket forces. One carrier was parked on the edge of an asteroid belt in system and had deployed a belt of mines forward. Another carrier was deployed on the far side of the system, several hours' travel from the Confederation's location. The third of Thrakhath's carriers was also jumping in on the far side of the system as well. A fourth carrier was detected jumping in system from the Jugara system but it was also several hours away was shrouded by heavy jamming and an asteroid belt. Bondarevsky ordered all fighters launched and to push towards the Jugara jump point. Strike Group Alpha moved to attack the closest carrier, led by Montclair. The strike consisted of six Rapiers and three Sabres. Tolwyn led the Rapiers covering Montclair. Tarawa had a Combat Air Patrol (CAP) led by "Round Top", consisting of six Ferrets, two Rapiers and two Sabres. Strike Group Alpha made an attempt on the Kilrathi carrier but scored no hits and only Montclair and Tolwyn survived.
The Intrepid moved into position to intercept an inbound cruiser while ten Gratha fighter-bombers made an attack run on the bow of the Tarawa, while the CAP was engaged astern. Seven torpedoes were launched. Six torpedoes were downed by point defenses however one slammed into the armored bow. This hit caused the forward twenty meters of the bow to shear off, taking the thirty five members of the volunteer crews on the salvaged Kilrathi turrets to their deaths. Amazingly, the Tarawa's hull held despite the massive damage. The armored bow had been an add on to the original transport design. It was simply welded on and was not integrated into the hull. Shields were knocked down to only eight percent.
A Kilrathi fighter positioned itself in front of the flight deck airlock and pumped mass driver rounds into the hangar. A Ferret's fuel tank detonated, destroying the fighter and killing the pilot inside. The flight deck became chaotic when the Kilrathi fighter was destroyed by a Rapier being chased by two Drakhai. This was a fighter from the TCS Concordia which was using a Kilrathi IFF to mask its identity. Admiral Tolwyn had intercepted a Kilrathi message stating the Tarawa had gone through the F-One / Vuwarg jump point, and rushed to aid the strike force after the battle at Vukar Tag was essentially over. As Thrakhath's carrier moved out of its minefield, the Intrepid engaged a Fralthra and both ships were destroyed by torpedo spreads fired at point-blank range. When Montclair and Kevin Tolwyn landed, they informed Bondarevsky that the fourth carrier from Jugara was the Concordia. Admiral Tolwyn had launched fighters to cover the Tarawa and a strike force to drive off the remaining Kilrathi. Thrakhath chose to curb his losses and disengaged, while the Confederation forces withdrew to Jugara and, ultimately, back to Confederation space.
Aftermath
Strike Force Valkyrie suffered significant losses during the attack on Kilrah. Only the TCS Tarawa survived the raid and was so badly damaged that she narrowly avoided decommissioning and scrapping only by the insistence of Admiral Tolwyn and Jason Bondarevsky. Tarawa also received the unique distinction of having First to Kilrah painted on her hull directly under where the bridge had been located. Bondarevsky was promoted to Captain for his leadership during the raid. Jim Merritt was promoted to Brigadier General and given command of the First Marine Regiment. He replaced a female commanding officer named Gonzales who was killed during the Kilrathi bombardment of Vukar Tag.
Despite these losses, the devastation to the Kilrathi Home Fleet was far greater. With the loss of six carriers, several construction facilities and over 4,000 naval personnel and soldiers, the First Battle of Kilrah was a clear victory for humanity. The attack deprived the Kilrathi Navy of a large amount of irreplaceable equipment and war ships, and it proved to be an enormous humiliation for the Kilrathi as a whole. The complimenting Confederation victory at Vukar Tag was a victory equal to the success of the raid on Largkza. Humanity regained hope that they would win the war against their enemy, strengthening their resolve and giving humanity an advantage on the battlefield.
The success of the First Battle of Kilrah prompted the Terran Confederation to assemble and commission another dozen Escort Carriers, all of which would participate in deep-space raids on high-profile Kilrathi targets deep within the Kilrathi Empire. Within a year, these strikes effectively rendered the Kilrathi military undermanned and deprived of equipment. A further seven carriers were destroyed by Confederation forces. By the end of 2668, the Kilrathi Empire was losing the war, forcing its leadership to enact daring plans to destroy humanity before further losses were suffered. This series of events culminated in the return of exiled Baron Jukaga nar Ki'ra, who would turn defeat into victory with the proposal of the 2668 Armistice on 2668.191.


Follow or Contact Us