Episode 5 - Winning Mission 17 - Big Damn Ending
| Big Damn Ending | |
|---|---|
| Date | 2669.001.1221 |
| Fighter | Sabre |
| Wingmen | Cougar, Squealer, Troll and King |
| Other Friendly Ships | At start 3 wings of Rapiers 1 wing of Sabres 1 wing of Crossbows At Craxtha Nav 1 Wraith (Stingray) 1 wing of Epees 2 wings of Morningstars |
| Primary Objectives |
|
| Previous | Episode 5 - Winning Mission 16 - Charge of the Leathernecks |
Preflight Conversation / Briefing
Reismann: At ease, everyone. I wanted to brief you all personally for this one. Whatever the result may be, there's every indication we've entered the endgame of this battle. This is the most important mission any of you will ever fly, and let's face it, not all of you will come back from it.
Trigger: We'll be back, sir. It's the cats that are gonna suck void.
Saxman: Yeah, we'll show 'em.
Reismann: I'm glad to hear it, but pay attention. Now, our fleet, and you gentlemen had some part to play in that, has managed to deal a very heavy blow to the Kilrathi. Most of the enemy capital ships have taken damage or been destroyed. Unfortunately that's also the case for our ships. Truth is, victory's still up for grabs. You might go out there and finish the cats, but you just might not have a carrier to come home to. It all depends on you now.
Popsicle: Don't worry, sir, we're ready for anything.
Bradshaw (amused): Huh. Alright, alright, enough interruptions. Let the Commodore finish.
Reismann: Thank you, Captain. So your job is a simple one. You'll go out there, meet up with the rest of the fleet's strike fighters, and take the fight to the enemy. We don't know what's going to happen. Intel predicts that if we push hard enough now, Prince Thrakhath may order a retreat. But it's just as easily possible that he'll turn this into an all-or-nothing affair. I ask only one thing of you: fight to the end. Keep on fighting until you have nothing left. To the last missile, the last drop of fuel. Don't get yourself killed, but if the difference between retreat and ejection is one more enemy killed, forget all that bullshit about your ship's price tag. Stay out there as long as you can, and if you're lucky, someone might pick up your ejection pod. Best of luck to you all. Make us proud.
Bradshaw: You heard the man, let's get to it!
Mission Layout
- Intercept Nav
- Kilrathi Reinforcements
- Craxtha Nav
- Kilrathi Reinforcements (once only 5 fighters out of the first wave are left)
- Kilrathi Reinforcements after 5 minutes
Player Notes
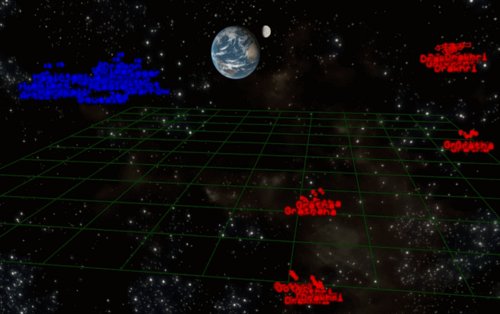
The winning path goes out with a bang amidst a swarm of Kilrathi. 128 enemies here, including the last Hakaga and Thrakhath in his Bloodfang. The length of the fight means you've got to husband your non-renewing resources - afterburner fuel and missiles - very carefully. The first fight in this mission is a big clash in terms of numbers, but it's one the Confederation forces have a huge edge in - 24 Kilrathi fighters, only four of which are cutting-edge designs, against 15 Rapiers and 15 strike fighters (assuming you've got that many - the game will attempt to fill up your strike wings with all the Sabres and Crossbows the Firekka has left). Your wingmen aren't going to need much help here, so only use your afterburners for defence and save missiles for the missions big fight once you reach the carrier. Since there's so many friendlies around, friendly fire is also a big concern. Probably the best way to help with that is to go for one of the two central (see image) Gratha groups - since they've got less fighters in than the Drakhri/Grikath/Gothri squads around the edge, they also normally attract fewer Confed fighters, so there's much less firepower flying around to get winged by. Equally, don't hang around on the tail of an enemy fighter, especially once you've thinned down Kilrathi numbers a bit - empty your gun banks and then break off.
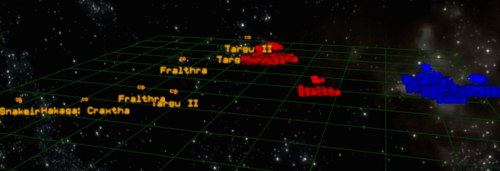
The second fight is quite a bit harder. Achieving the mission objectives requires at least four torpedoes into the Craxtha, eight to kill the two cruisers, and at least one and preferably three into the Snakeir to get the bonus objective. Obviously, you're not going to be able to accomplish all of that with just your Sabre. It's important to try and keep as much of the Confederation strike force alive as you can, and to start off with that means taking advantage of the Kilrathi initial deployment, which is terrible.
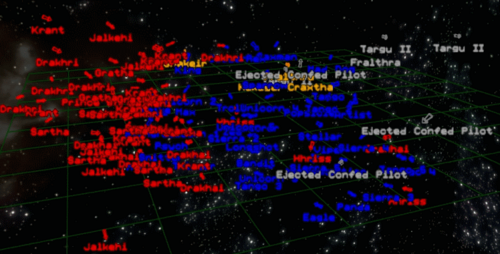
As the battle starts, the Morningstar wings will hit their burners and try to Mace the Kilrathi frigates. This strike needs to succeed or else far too many torpedoes and strike craft will succumb to Targu-II flak. Trying to add your Sabre's torpedoes to the mix is just likely to end with you tangling with multiple Vatari while trying to make a torpedo run, so your best bet is to take down cat interceptors as fast as possible. That means dumping your IR missiles at the Sartha here - find the nearest one, kill it with an IR missile, and repeat until you run out of IR missiles or the target nearest key brings you up a Vatari. Your wingmen struggle quite badly against Vataris so these are high-priority targets. I suggest holding back your dumbfires for the next wave, where there's more superfighters than in this one, but one into a Vatari now wouldn't be a waste. If you're on your game here and got some solid Sartha kills in at the start, the Confederation forces will quickly begin to get the upper hand here. But once you're down to five enemy fighters, Prince Thrakhath shows up in his Bloodfang to make things harder, at the head of an eight of Vatari with 35 other fighters along for the ride.
You only need to shoot Thrakhath down for the bonus objective. If you're not chasing that, a single dumb-fire into the Bloodfang will make him retreat - and that's worth doing right away, because he's a deadly pilot and the Bloodfang will tear through your bomber wings. If you want to kill him, it's a bit harder. The Bloodfang will survive a DF and is much faster than a Sabre if Thrakhath retreats at afterburner, so what you need to do is take his shields down and slightly thin the armour out on one facing, then hit that facing with a DF. One way to do this is to fire a Dart at the end of a head-to-head pass, but that risks taking a lot of damage from the Bloodfang's four particle cannon. Once Thrakhath has been dealt with, unload any remaining missiles you've got into Vatari (DFs) or Sarthas (IRs), and then it's just a case of killing the nearest fighter, or, if there's nothing particularly nearby, looking to see what good you can do with your torpedoes (in general, it's better to finish off a damaged target than start on an undamaged one, since it decreases the volume of enemy turret fire).
Even then, there's a certain element of luck in this mission, because you need the AI to chip in with somewhere in the region of 13 torpedo or Mace hits in order to get a mission success (no help in crippling the Craxtha from Commodore Polowski in the Standoff universe, I'm afraid). This strategy is probably the best way to make it possible for them to do that, but sometimes they just don't want to co-operate.


