Ghorah Khar 5
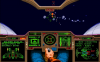
Hobbes and I see Major Edmond again on Olympus station. She tells us that so far, long-range patrols have only sighted a small strike fleet coming along the path that we arranged with the decoy data pod. The Major has set up teams to assist with interception and decoding of the Kilrathi communications. I admit my surprise that the Kilrathi have not committed more forces, and ask the Major if this communications data is correct. She’s doing her best with what she has available, and I tell her to continue her work. I launch in a Crossbow with Hobbes and Landis as my wingmates. Our first encounter are three Drakhri, but they are completely no match versus three Crossbows. I target and destroy all three fighters and continue to the next nav point. There are four more Drakhri here along with two Fralthra cruisers. Taking out the Drakhri again proves fairly simple, and I start my approach on the cruisers. They both withdraw before I can get in range, and I head back to Olympus. There is a lone Drakhri on our way back, and he is destroyed with only minor troubles. On my landing approach to Olympus, Paladin tells me to stay on the flight deck. My ship will be refueled and refitted, and I’ll launch again. I ask Paladin what is going on since those capital ships we went after left the area. Paladin says that this was not the entire attack force, and there are five carrier groups coming this way. This group destroyed our patrol ships before we could receive a warning. Major Edmond detected some of their tactical communications, and was able to determine the size of the fleet by using their command codes. The system will soon be swarming with cats, so it’s very important to launch again ASAP to do what we can about this strike group.
Ghorah Khar 6
I see Paladin again before my next launch from Olympus station. He tells me that he is heading out to another system to track the incoming approach vectors of the fleet. I tell Paladin that his ship would be in great danger if a Kilrathi squadron found him alone. Paladin accepts the risk since there are not enough ships to cover both the station and him. He also thinks that one Free Trader ship won’t attract Kilrathi attention, and Hobbes also warns him not wager his life on this assumption. Upon takeoff, I get a communication from Paladin. I tell him that the Kilrathi are beginning their assault on Olympus. Paladin gives me orders to defend Olympus from this first wave and then head to his position as quickly as possible. His ship was attacked by a small squadron of Kilrathi. The power plant and jump capacitor are both damaged, so he can’t jump or defend himself. This squadron broke off their attack when another group of Kilrathi came into the same sector and started shooting at them. I concentrate on that first wave of Kilrathi attacking Olympus, and there are three Grikaths in a tight formation looking to destroy me quickly. I focus on and destroy the middle fighter, but my shields and armor are damaged. The other two Grikaths break formation, and I nail a second one without too much more damage to my ship. My wingmate takes down the capital ship, and flak from Olympus wipes out that last Grikath. I head off to the jump point and make the jump with no opposition. I then notice an ejected Kilrathi pilot floating around, and ask Paladin if I should pick him up. Paladin does want me to retrieve the pilot, which is fortunate for him since his life support was failing. I then engage the Kilrathi squadron, and there are multiple Jalkehis here. I focus on and destroy one, but not before taking damage and running into Hobbes. I go after a second Jalkehi, and he does damage to more of my ship systems before I can kill him. Fortunately, I take out the remaining two Jalkehis with no more damage to my ship. I then head off to defend Paladin’s Bonnie Heather. There are only two Jalkehis here, and Paladin ices one with flak before I can finish it off. I destroy the remaining Jalkehi with a barrage of full guns. I set my Crossbow into a parking position alongside the Bonnie Heather. I give Paladin a kill score card for this mission as well as letting him know that I have the Kilrathi pilot. Paladin wants to have a chat with the pilot, and explains that due to the power plant damage on his ship I’ll need to stay close to keep any Kilrathi away. After no more Kilrathi pursuit, I land on Paladin’s ship and ask Hobbes where he is. Hobbes gives me the incredible news that I rescued Prince Thrakhath. I ask Hobbes if he’s joking, but he’s very serious. The heat regulator on his suit broke, which was leading to him being slowly frozen to death. A few more minutes would have left the Prince a corpse. Paladin is questioning the Prince at the brig, so Hobbes recommends that I join Paladin there.
Ghorah Khar 7
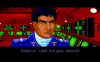
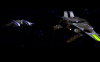
Paladin, Hobbes, and myself are having a nice little chat with the Prince. Thrakhath accuses Hobbes of having no honor by holding him prisoner. Hobbes rebukes the Prince’s notion of honor, and Paladin points out that we could have just left him floating in space. Without our actions, we’d not be having this conversation. Thrakhath tells us that Khasra was behind what happened to him. Khasra tried to kill the Prince, but Thrakath made it hard for Khasra by taking out eight members of his squadron. Khasra still got the upper hand by destroying Thrakhath’s fighter, and the Prince swears to kill Khasra at his next opportunity. The Prince asks us what we’ll do, and Paladin says that we’ll take him to Confed High Command. Paladin advises enjoying our hospitality during this trip. A while later, Paladin asks me to bring the Prince to the communications room. I ask Paladin what is going on, and he points out Khasra on the communications screen. Khasra makes it known that he realizes that we are holding Thrakhath, and the Prince returns a threat to kill Khasra. Khasra gives us a choice: Return the Prince and possibly live, or face complete destruction. Paladin points out that there is still a full squadron to support Khasra. Thrakhath wants to make a final stand against Khasra, and says that it is a matter of honor to not die aboard an enemy ship. I tell the Prince that even though I hate his guts and everything the Kilrathi Empire stands for, I won’t let Khasra kill him. Thrakhath then offers to fight with me, but I insist on keeping him in the brig. I undock my Crossbow from Paladin’s ship, and attempt to establish communication to tell him that I’m heading to intercept Khasra’s squadron. After getting no reply, I try to get a reply from Hobbes. Thrakhath responds to my communication, and tells me that the Bonnie Heather had a power failure just as Hobbes was putting the Prince back in the brig. Thakhath only knocked Hobbes out since killing somebody from behind is dishonorable, and also wanted to return a favor in letting Hobbes live since he has not made an attempt on the Prince’s life. Thrakath is taking Hobbes’ Crossbow, and I tell him to dock or be destroyed. The Prince notes correctly that he is out of range of my missiles, and will personally deal with Khasra and his fellow pilots. I try telling the Prince that he has no chance against those odds, but he insists it is a matter of honor between himself and Khasra. He will kill Khasra regardless of the impossible odds. I really don’t want to let Thrakhath get away, so I send a communications message that I’m going after the Prince. I manage to catch up to Thrakhath, and he is fighting six Gothri fighters in the Crossbow. I focus on one of the Gothris heading directly for me, and destroy his ship on the first pass. A second Gothri comes straight at me while I’m shooting at him and kamikazes into my Crossbow. The next cat that comes after me is Khasra. I launch a missile to keep him occupied and also lay down a barrage of gun fire. He decides to retreat after taking too much damage. I switch to rear guns and blow away a Gothri attempting to get me from behind. I damage a second one that way, and switch to the forward view to finish him off. My autopilot light comes on, so I must have taken out a fifth one with one of those missiles I launched. I head back to the Bonnie Heather, and Paladin asks what happened during my approach. I tell Paladin that Thrakhath used my intervention to make his escape, and he regrets losing such a prize to take back to Confed High Command. Paladin asks me to dock and refuel since our priority now is to get back to Olympus station before the rest of the strike fleet arrives.
Ghorah Khar 8
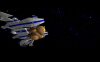
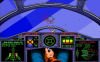
On my return approach to Olympus, they express surprise that I’m still alive. Three of the five Kilrathi carrier groups attacked yesterday, with the first wave killing fourteen Confed pilots. The next assault wave is fifteen minutes from its final approach. Olympus has made multiple attempts to call for reinforcements, but they have been jammed by the Kilrathi. Since Hobbes and I are the only ones that can help here, I offer to assist in the defense. Only two Sabres and a Ferret are ready on the flight deck. Olympus offers to refit the Crossbows that we are flying, but there is no time. I ask Hobbes if he thinks he is up for this challenge. Hobbes thinks that this will be entertaining, and I express my acknowledgement of the grim odds. I’ve promised Angel to come back alive, and I intend to make my best effort to fulfill that promise. I land on Olympus and see Major Edmond before I head for the waiting Sabre. I congratulate her on the work she has done in detecting the enemy fleet approach. The Major says that she’s just doing her job, but I tell her that without her assistance Olympus would have had no warning of the attack. The Major makes the observation that there is a big fleet, and my odds of survival are very small at best. I tell her that I’ve had situations where I broke the odds, and ask her to make the best possible effort to get a message thru the communications jamming and call in reinforcements. I hear the warning klaxon go off, which means the fleet has been sighted. The Major wishes me good luck, and I thank her. Along the way to the strike fleet, I receive a communication from ‘Bear’ who offers to help out. Admiral Tolwyn sent ‘Bear’ and another pilot ahead after losing communication with Olympus. ‘Bear’ also points out that there is a big strike fleet coming. I ask ‘Bear’ to form on my wing so that we can attack the cats together. There are two Sartha fighters that my Sabre makes short work of, but one of them took out the wingmate of ‘Bear’. Knowing that this is not a good way to begin against such bad odds, I decide to make a gamble upon approaching the cruisers. I afterburn away to 30000 kilometers in an effort to draw the fighters away from the cruisers. The gamble works, and our group engage the Gothris. I pursue a Gothri and wipe out the fighter with guns. During the pursuit, I run into Hobbes and take frontal armor damage. I go after a second Gothri, and he is eliminated without more damage. Going after a third Gothri gives my ship more damage, with the rear armor significantly chewed up. One of the Gothris launches a missile, and I use afterburners to keep the missile from hitting. A fourth Gothri takes dedicated pursuit, and he really tries his best against us. ‘Bear’ is forced to eject, and I take a number of hits to my ship systems. My engines have been damaged, and I finally frag that furball’s fighter. I notice that Hobbes and I are just within range of the cruisers, and I get away from the deadly flak and anti matter gun fire. Hobbes tries a more heroic approach, but he’s forced to withdraw. I get into range and lock on a cruiser with a torpedo. I afterburn to throw off any anti matter gun fire and to also get within good torpedo range quickly. After a VERY close call with anti matter guns, I let one of the cruisers have it with my first torpedo. I afterburn again and get out of range. I get into range again and do the same tactics for my next torpedo run. One cruiser is destroyed, and I again get out of range for my next pass. Again, afterburning makes the cruiser shoot wide and I let loose with a torpedo. I again head to get out of range, but not before the cruiser tries to shoot me from behind. Fortunately, distance and some evasion help to make that attack miss. On my fourth pass, the cruiser again misses with anti matter guns and I shoot a torpedo. He is destroyed, and Olympus establishes communication due to reading distress beacons. I tell them that all the other fighters withdrew or were shot down. Due to Search and Rescue heading for those ejected pilots, I decide to head back. I approach the Concordia instead of Olympus for my landing. I am congratulated on saving Ghorah Khar, and in the hangar bay is a rather large reception. Admiral Tolwyn is there to express his gratitude, and says that I have turned defeat into victory. The Admiral explains that the Kilrathi are retreating on all fronts, and we have struck a major blow.
Meanwhile, at the Kilrathi Battle Command, Prince Thrakhath tells the Emperor news that the defeat at Ghorah Khar was merely part of a deception. By diverting the Confed fleet from the Enigma sector to prevent Ghorah Khar from being destroyed, Kilrathi forces were sent into the Deneb sector. Deneb Sector Command was captured in only six hours, and soon the Kilrathi will control all of Deneb. The Emperor is impressed with the Prince’s performance in comparison to K’Tithrak Mang, and Thrakhath promises not to have another failure. The Emperor makes it perfectly clear what would happen if Prince Thrakhath did fail again. The Prince tells the Emperor of Khasra’s demise at my hands, so he must have been waiting to jump Khasra after he withdrew from attacking my Crossbow. The Emperor is saddened by this news, but he feels that the death in combat was honorable. This is more than the Emperor expected of him, and the Emperor asks the Prince of his plans. Thrakhath will be waiting for the sure attempt to recapture Deneb Sector Command. Once Confed makes their move, the Prince will be quite ready to show no mercy in his response.
P.S. - I think I'll post the intro video to SO2 today since it's short and easy. I'm looking forward to the posts on the upcoming missions!
") That's what saved the day for me. The offset torpedo run doesn't work all the time, but as long as you stay back far enough aborting the run doesn't cost you anything except for some afterburner fuel.
That's what saved the day for me. The offset torpedo run doesn't work all the time, but as long as you stay back far enough aborting the run doesn't cost you anything except for some afterburner fuel.

 )
)