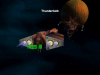
Proxima seems like a bit of a disappointment compared to Krieger. Conserving torpedoes in the Shrike mission was just about the hard challenge and even then you get some Thunderbolt backup.
Proxima 1:
Our successes in the Krieger system has given us a little bit of time to relax and celebrate. I know that Meastro will be moaning about his booze for a long time to come yet, but I still think it was worth it. Besides, it's the captain's fault, not mine. It certainly helps us take our minds off the Captain's briefing. Our mission in the Proxima system is going to be vital in ensuring the Confederation's success. The extra support from ships already in the system will be a welcome bonus.
It doesn't look like this will be the end of the war, however, as the Captin's included information indicating the aliens have been scouting out a number of locations in Confed space to do something and I reckon that new wormholes are a firm bet as to what they'll be trying in the future. I just hope that we manage to solve the mystery of Clippy sometime before the end of the war. Given how long the Kilrathi War took, I'm still not sure that we'll have enough time to work that one out.
Our first mission in the Proxima system is a simple one. Patrol a three point Nav route and eliminate any aliens encountered. Our force is a mix of Devastators and Vampires. Our first indication of alien activity in this system is a transport escorted by a corvette and some fighters that we encounter at Nav 1. The 4 Mantas prove to be little threat but letting a Devil Ray loose amongst bombers is a sure way to lose some craft, something Stilleto finds out unfortunately quickly before I'm able to divert the alien craft's attention and take him out myself. It's a little disheartening to watch such a numble craft take a plasma shot without even penetrating the armour, but he's soon taken care of, leaving the Corvette and Transport defenseless and, soon enough, dead.
The second Nav point only has a pair of Mantas and enough Stinrays to form a cluster, the only danger here is in getting less kills than my wingmen. Our last nav point contains a pair of transports with a heavier fighter and Corvette escort. Still nothing to be concerned about, but the large number of transports in this system is a sure sign that they're up to something. These light forces lure me in to making the rookie mistake of relying on the tachyon cannon to shoot down a missile launched at my nose by a Manta. I don't aim well enough and soon enough a three-pack of missiles has taken off all my front armour and a good chunk of my ships structure. He doesn't last long enough to celebrate his victory and nothing else penetrates my shields, but it's still an embarassing moment when I land.
Proxima 2:
The aliens are guarding their stellar-accretion device with a large carrier group. With their supply line cut during our last mission, it's now up to Cerberus to launch an assault upon this carrier group. First, though, we have escort our home to the proper point to launch an attack. The damage to our fighters is beginning to show as well, with half of our force flying Panthers to conserve our Vampire numbers.
The force at Nav 1 is definitely a worry, with a large number of bombers being escorted by a few fighters. The light escort makes the bombers easy targets, but having so many of them makes it more likely that one will slip through and damage the Cerberus. I order my wing to break and attack and begin the process of wiping every bomber that so much as looks at the Cerberus funny, beginning with a pair of Skate T clusters. True to my prediction a Red Manta manages to score a torpedo hit on the Cerberus' right engine, damaging it but not taking it out before we can eliminate the enemy force. Nothing else manages to make it near the Cerberus and we move on after the mop up is complete.
Nav 2 is less of a threat to the Cerberus, but a much larger threat to ourselves with 4 Devil Rays escorted 4 bombers. Taking out the bombers with a Devil Ray on your tail is no easy task, but we somehow manage to get it done without and more hits on the Cerberus. Once our ship is safe, we turn on the Devil Rays that have been hounding us and get some of our own back. The Vampires take the lead in this, but the Panters are providing constant support with the Chain Ion guns.
The final Nav Point proves to be the toughest of them all, with quite a few bombers in attendance, escorted by a lot of Devil Rays. Complicated matters is the fact that we have to split our attention between Cerberus and the Arkhangelsk, a Murphy-class destroyer. The first Skate T is quickly taken care of, but another one manages to get a torpedo off at the destroyer. I chase the Torpedo down with the Pulse Particle Guns before turning my attention to the remaining Stingrays, using ELRIRs to stop them from clustering. Devil Rays are dogging my back the entire time, but I have no choice but to ignore them until the bombers are taken care. Once the bombers are gone, though, the Devil Rays go from being the hunters to the hunted, as our fighters chase them down and take them out. The Cerberus even jumps the gun a little and clears me to land before the final alien fighter is dealt with. Naturally, I make sure that space is clear before I land.
Proxima 3:
There's no time to lose in taking down that carrier force as we're instantly turned around to launch a strike against them. Nothing drives home our shortage of ships more than launching an assault against a two carrier group in Shrikes. At least we'll have the Arkahgelsk along with us to provide support.
The first step is to punch a hole in the carriers screening ships, in this case a Destroyer and another Transport with moderate fighter cover. I order my wingmen to break and attack while moving to intercept the Squids and Mantas moving towards us. Without the Devastator's plasma gun, every torpedo counts in this mission. Fortunately, the screens seem willing to dogfight and let Spyder and Maestro punch on through towards the capships while I use the heavy forward firepower of the Shrike to clean up the Mantas and Squids. As the dogfight gets closer to the capships, I take the time to scrape the rear turret off the Transport to help out my wingmen before returning to the fray.
After I've racked up a nice kill score against the escorts, it's time to move on the cap ships. Spyder and Maestro have already taken out both bridges, so all that remains to assist them in taking out the engines. With both targets down, it's time to move on to the carriers. The CAP around the carriers is much more intelligent than their brothers with the Destroyer and move to engage us well short of the carriers. My wingmen still manage to punch through, but it's an intense dogfight for a little while I'm glad to help the fighters out with the Shrike's guns until the CAP is thin enough for us to punch through.
We manage to whittle their numbers down enough for me to punch through towards one of the carriers. Spyder and Maestro had thoughtfully taken out both the shield generators on this one before moving towards the other one, so I begin my attack on the bridge instantly. With the carriers still launching fighters, I have to take my target down as quickly as possible, using a Heavy Torpedo on my first run on the bridge with a Light Torpedo to finish the job and then repeating that against the Engines.
The carrier goes up quickly enough, but that leaves me only two light torpedoes to use against its friend. I deliver them to the bridge ASAP before moving on the turrets. Using both my forward guns on the approach and the turrets as I pull back to take them out as quickly as possible. The dogfight is finished shortly after I get to work and I'm soon joined by our Vampires and some Thunderbolts launched from the TCS Adelaide. With such firepower being directed against it the carrier is soon defenseless and just waiting for the final blow, delivered by Maestro.
With such a big target out of the way, we head back to the Cerberus. As we head in to land, Maestro asks a question that I'm ashamed to admit I didn't think of first. Did Dekker and his men get infect during their time onboard the alien capships? Spyder replies in the negative, apparently, the virus is only set loose on the cap ship's death. A neat little revenge for anyone taking out an alien ship.
Proxima 4:
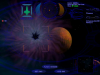
This is it. The big one. We're going in to take out the alien accretion device. Or the ship controlling it, anyway. Intel believes that taking out the device itself would cause a lot of harm to the Proxima system, so we're going to clean the area out and let Cerberus take control of things from there. Our successes so far in this system have everyone in a good mood and the banter before we set off, though morbidly about picking through Maestro's stuff if he dies, is good humoured in nature.
When we arrive at the accretion device, I'm not particularly suprised to see an alien Dreadnaught covering it. It makes sense the aliens would use their biggest and baddest to provide cover. The fighter cover is fairly light as well. I order my wing to break and attack and begin to clear out the fighters as quickly as possible before going in towards the dreadnaught. There are a pair od transports trying to make an escape as we arrive and they would have made it, too, if the dogfight hadn't drifted off in their direction, prompting me to take a quick detour and finish them off.
As the transports go up, the Cerberus comes on the comm and warns us that the alien device is warming up. We need to take that alien command ship out now. I lock my afterburners and head staight for the dreadnaught, pounding the bridge with light torpedoes and plasma fire while using the bulk of the massive ship to protect me from it's return fire. I then afterburn my way around to the rear of the ship and begin locking on a Heavy Torpedo and firing my plasma gun as soon as it's in range. The torpedo is enough to finish the dreadnaught off and bring this phase of the war to a close. There are a few little fighters to mop up before I can land on the Cerberus, but our mission in the Proxima system is a complete success. I haven't heard that captain sound so happy in his life.
Once the celebrations have died down, we get the good news. Confed forces are ready to begin analysing the alien wormhole technology. We're to report back to the Midway while the Cerberus moves on to a new mission. I'm not quite sure how to interpet that little bit of news, the Cerberus has become home in the short of amount of time that I've been aboard her, but there's nothing like flying off a fleet carrier. It's also going to make finding out why our captain was called Clippy a whole lot harder.