You are using an out of date browser. It may not display this or other websites correctly.
You should upgrade or use an alternative browser.
You should upgrade or use an alternative browser.
Wing Commander Prophecy Replay Week 8
- Thread starter Dundradal
- Start date
DaveO
Rear Admiral
Enjoy the football game!
22 shots added to Photobucket for the finale, and it was very hard to chose just five to post for this reply.
http://s204.photobucket.com/albums/bb15/DaveO-MM/Wing Commander/
YouTube missions are done as well at: http://www.youtube.com/davecaspermeyer
Happy Holidays to everyone at the CIC!
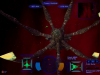
P.S. - The Tiamat is just wanting to give a hug. Really, it is!
22 shots added to Photobucket for the finale, and it was very hard to chose just five to post for this reply.
http://s204.photobucket.com/albums/bb15/DaveO-MM/Wing Commander/
YouTube missions are done as well at: http://www.youtube.com/davecaspermeyer
Happy Holidays to everyone at the CIC!
P.S. - The Tiamat is just wanting to give a hug. Really, it is!
Attachments


Lorien
Rear Admiral
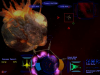
I finally catch up in time for things to end. The last mission features odds that make it almost a challenge in the Vampire but not quite. For the comple lack of fanfare it sure is once hell of a super ship!
Kilrah 3:
With the alien dreadnaught making it's presence felt, it's time the Midway went on the offensive to get it out of our way. The first step to achieving that goal is an assault on the dreadnaught's escorts which are currently flying ahead of their charge. We'll be launching simultaneous attacks on the two leading enemy forces. Both of them contain carriers so it's likely to get hairy. Our carrier target certainly has a strong CAP up as we approach, so I release my pilots to attack before moving to cover them in the usual fashion. The Ray moving to intercept makes an easy target for the plasma cannon, but the Remoras it releases are best shot at with the stormfire and turret guns. The Squids insist on making head on attacks, which doesn't go well for them as it only takes a single shot to take them down. The Morays launched as the second wave suffer the same problem and are dispatched just as quickly. The Morays and Squids forming the third wave barely clear the hangars before getting shot down. Past that, it's a simple matter of scraping the turrets off the carrier and taking it down.
Just as the carrier explodes, we receive a comm transmission from Stiletto and the Midway, the second strike force has run into trouble and need reinforcements. Forming my wing back up, we set course to find three capships at the second Nav point, though Stilleto's wing takes out the Carrier as we arrive. It's clear the fight has been a harsh one, with only two Vampires and a Devastator left out of the attack and only 3 Morays left on the aliens side. I quick volley of our new IR missiles take out the fighters and we move on to the capships. Using the plasma cannon and my own turret fire, I strip the Destroyer of turrets. My wingmen destroy the enemy Cruiser just as my heavy torpedo finishes off the Destroyers engines. With a major enemy force destroyed we set a course back to the Midway. Stiletto admitting that she owes me makes the whole endeavor worthwhile.
Kilrah 4:
With the escorts out of the way, it's time to begin our assault on the dreadnaught proper. The CAG and Blair clearly still don't have a good relationship built up but she does listen to his suggestion about launching some training missiles to distract the dreadnaught's defenders. The first phase of our operation isn't expected to kill the beast, we're just tasked with pulling it's fangs in our Wild Weasel Vampires. Blair's training missile trick is working like a charm when we arrive with the Squids heading in the wrong direction. They're quickly dispatched from behind. The dreadnaught scrambles a second wave before we're able to get to work on it's turrets, but the Squids and Morays prove to be little challenge to the force we have brought. We're starting to get to work on the turrets when the Dreadnaught gets it's third wave into the air, this time with Mantas and Stingrays.
The dogfight is mostly between the Vampires and Mantas, though I do use the occasional Enhanced LRIR to break up the Stingray clusters that form. Regular IR missiles are used to finish off the Mantas while my guns recharge. Those tachyon guns sure do drain the batteries. We turn on the dreadnaught as the last Manta detonates, the big dreadnaught arms prove to be of great assistance in protecting our ships from the turrets. All you have to do is keep the arms between you and every turret but the one you're taking out. Unfortunately, the quick acquisition times reduce the number of HARMS you can fire. They work much better once all the gun turrets are gone and we can take out the missile turrets from a distance. With stage 1 complete, we head back to the Midway.
Kilrah 5:
I walk past Maestro delivering another terrible pickup line on Stiletto as I check my mission scores. I've known him for a very long time and I'm still not sure if he means them or just uses them as a way to break the ice. The CAG doesn't give me any time to try to figure it out, bursting through the doors and announcing that we're taking another shot at that Dreadnaught. At least we got all the turrets. Maestro's complaints don't get much air time as an alien attack forces us to launch. Our bombers launch into the middle of a dogfight. I order my wingmen to attack and move to engage myself, though I'm being conservative with my afterburner fuel and missiles I still manage to take 2 of the attackers out before the Midway's CAP finishes them off. My wing forms up with our escort and sets course for the dreadnaught.
The first thing I notice when we arrive at the dreadnaught is an alien ace in a Devil Ray making a beeline towards me. I release my wingmen again and return the favour, only taking a break to destroy a Manta that's bothering me we close. There's nothing elegant about the ensuing dogfight, the Devastator means that my best recouse is to rely on my shields and armour and some precise aiming with the plasma cannon. The alien ace admits that he's been humbled as his high tech fighter disintegrates in a fight against a bomber. I increase my missile expenditure as we move on to the rest of the fighter escorts and demolish them.
With the escorts out of the way, the only remaining task is to take out the dreadnaught's vital components. My first torpedo shot against the bridge detonates on the wreckage of a missile turret so I move a little further up to clear my line of fire. The second torpedo, followed by plasma fire finishes off the bridge, so I move towards the engines, where my wingmen are already gathering. There are a number of simultaneous torpedo launches against the engines, but I'm sure that I saw my impact causing the fatal damage. Arriving back at the Midway, Anderson informs me that the recon flight completed their mission and I get the feeling this battle is almost over.
Kilrah 6:
This is it. The final assault against the wormhole gate that the aliens are using to bring their forces into our space. Finley gives us a quick briefing on the science behind the gate before the CAG tells us how we're going to take it out. The Midway is going to withdraw to a safe distance to draw the enemy's attention while we escort a Marine LC in to board the command centre and take out the shields protecting the cooling towers. Once those towers are taken out, it's game over for the bugs. I'm questioning the logic of taking only two Vampires along, though, as the aliens are going to defend the gate heavily.
My fears are given form when we arrive at the gate. An ace fighter and 4 Mantas are guarding the gate, shortly joined by a number of alien fighters. I launch a MIRV from long range into the thick of the alien forces before moving to engage the ace. This dogfight is a true test of skill, with both of our machines evenly matched. Our skills are certainly on different levels, though, and it's only a matter of time before the alien's ship is debris. The next stage of the battle is a wild melee and I almost lose track of the situation as we battle. but Dekker eventually comes on the comm and alerts me to the first shield being taken down. I break away to take out the tower, using a MIRV as I rejoin the battle to keep things clear.
The battle continues around the wormhole gate as the aliens continue to bring in reinforcements while I occasionally break away to destroy the towers that the marines knock out. I've almost lost count but I'm at about 50 kills and one tower to go before Dekker comes on the comm and admits that his marines won't be able to take out the shields around the last tower. He's lost most of his boys and is calling for reinforcements. I continue to fight as we wait for word from the Midway. I hope they're quick, I'm fast running out of missiles.
When the CAG comes online with the latest plan, I'm beginning to wonder how desperate things truly are. We're to pull back and refuel, collecting two more fighters and Blair in a marine LC while we're there. Once that's done we're to escort Blair back in as he takes down the shields on the last tower himself. Surely there's a commando unit or someone better suited for that sort of battle than Blair, but he seems quite insistent, telling my that my father would be proud before we head back. The aliens have taken the time to reinforce and I'm glad for the new load of missiles so that I can use a MIRV to thin out their numbers before engaging the alien ace and taking him out. The dogfight continues to be intense around the wormhole as Blair makes his insertion and I'm passing 60 kills by my count before he manages to take down the last shield and let me destroy the tower. We clear out the last alien fighters are make a break for it before the wormhole's explosion takes the rest of our fighters out. In the confusion, I lose track of Blair's LC.
I land to find that Maestro had managed to survive his ejection, saved by SAR in the nick of time. Unfortunately, Stiletto informs me that Blair didn't make it out of the tower. At least he acheived his goal of making sure the aliens don't torture any other pilots. My head's still a little full of Blair thoughts as I accept the medal for my role in the removal of the alien presence and I retire to the observation deck as the rest of the crew celebrates on the flight deck. Stiletto interrupts my musings as she comes to check on me and tell me the Blair would be very proud. As we pull out the bottle Maestro smuggled on board and forget about the aliens for one night she gives me a look Maestro would be envious of before we both gaze out to the stars.
Lorien
Rear Admiral
I hope your game went better than the test match against the South Africans 
Now on to some happier scores. I had 466 kills going into the last mission and scored a massive 64 (!) before the mission's end. Admittedly that's counting in my own head but I tried to be conservative to keep the numbers down.
That gives me a nice even total of 530 kills to finish of Prophecy. It certainly is a target-rich game.
Dundradal
Frog Blast the Vent Core!
47-7 and the Cards only scored after we had taken out all our starters....
On a side note, talk about perfect timing with the week off during the holidays")
I'm going to continue to catch up, just a bit busy this time of year.
Good work Lorien and Dave, you guys have been great throughout the replay.
On a side note, talk about perfect timing with the week off during the holidays
I'm going to continue to catch up, just a bit busy this time of year.
Good work Lorien and Dave, you guys have been great throughout the replay.
DaveO
Rear Admiral
Congrats to you Lorien! You beat my kill count, and I don't think I got to 500 kills. I had 441 before heading out on the final mission. YouTube comments have said that this is the worst game in the series, but I don't agree.
On a football related note, the Arizona Cardinals are looking bad for the playoffs. Looks like one and done to me, with more time before they make another run.
Kilrah 3
I head into the briefing room to find out our next plan of attack is. We’re to go after the support vessels of the alien dreadnought. We’ll be using the Devastators again to attack the cap ships at two separate nav points. I’m responsible for the cap ship at the first nav point, and Stiletto will take on the second nav point.
We head off to our assigned areas, and I sit back and let the fighters do their thing to attack any alien fighter cover. I have to fend for myself a few times, but I manage to get two Morays and two Squids with a plasma shot. My bomber is a bit damaged with the rear armor gone and light damage to my ship’s core. A torpedo from one of the other bombers in our wing damages the bridge of the carrier, and I blast the bridge with a plasma shot. With the carrier ‘blind’, I head for the engines. We lose a pilot to the bugs, and I’m within range of the carrier’s engines. A few blasts to the tailpipe, and there is one less big bug to worry about. Stiletto called for some help at the second nav point, so I use the computer to set course for it. When we arrive, an alien carrier goes up in a massive explosion. There’s a bit of fighter cover still left, so I keep my eyes open for any potential attackers. I manage to hit a Moray, and an alien cruiser is tagged. There is only a destroyer left, but another Moray tries its luck of its firepower versus mine. All I need is to hit that Moray once, and he is a pile of debris. The bridge of the destroyer fares little better against the plasma cannon, and it’s time to hit the engines to finish it off. I damage the engines badly, and a torpedo from another bomber gets the final blow. Stiletto had to eject before we could pull the plug on the destroyer, but a SAR shuttle should be able to bring her back. On approach to the Midway, Anderson congratulates us on taking out those cap ships. I wonder what the cost for Confed pilots will be to destroy that dreadnought.
Kilrah 4
I enter the briefing room to see what plan is put into play to destroy the dreadnought. We’re tasked with taking care of the defenses of the dreadnought. Any fighter cover along with the turrets of the dreadnought are our targets. Commodore Blair makes a suggestion to use training missiles to distract the dreadnought. The CAG compliments Blair for his idea, and tells us to expect those missiles to be launched along with our fighter wing. We look over the briefing information in detail to make sure there is nothing missed for our mission objectives. We launch in Vampire fighters and head for the dreadnought.
Once we arrive, Spyder suggests attacking the turrets first since the training missiles are drawing the Squid fighters away. I gun down two of the Squids with one of our wingmates contributing with a kill. A pilot on our wing warns us of inbound fighters, and the bugs kill him. I take out two Squids, and check the radar for close targets. The fighters are wisely staying close to the dreadnought to take advantage of its turrets. A Squid comes straight at me, and I turn on its tail in pursuit. I take care of the Squid, but notice that I picked up an alien shadow. I see the Moray that was attacking me, and it soon joins the Squid as squash. Two more Morays are eliminated, and I see a turret of the dreadnought that would be a good target. The turret takes a few hits, and there is one less stinger on this bug. A Squid tries a direct frontal attack, but the guns of the Vampire are too much for it to survive the pass. I see a damaged Squid, and chase it down to finish it off. Another Squid is blasted from behind, and another wing of defenders comes to help the dreadnought. This wing has some heavy guns from Mantas along with Stingrays. Two of the Mantas go into the blackness, and I also take down a Stingray. Three Stingrays join together into a cluster, but I break it apart quickly. I put a missile into the rear end of one Stingray to quickly get rid of it. Another Stingray segment follows the same fate as its friend. A Manta is attacking me from behind, but I turn around to make it into mush. Two more Mantas are destroyed, and the dreadnought prevents me from shooting down a Stingray with a missile. I finish off that Stingray with point-blank blasts from my guns. Two more Mantas fall to my fighter, and it looks like only the Stingrays are left. There are not enough Stingrays left to merge into a cluster, and I blast another to bits. Our fighter wing takes care of the final Stingray, and now we can focus on defanging the dreadnought. It takes a few minutes to trash all of the turrets, and we head back for the Midway. No doubt that our bombers will be going after it on the next mission. After landing on the Midway, I see Maestro still trying to make a move on Stiletto. I’m surprised he has not learned his lesson yet that she’ll just keep giving him a cold shoulder.
Kilrah 5
The CAG comes to tell us to stay ready for our next attack on the dreadnought. Maestro bemoans having to face the dreadnought, but Stiletto does note that it now has no turrets for defense against torpedoes. As soon as we take out this capital ship, we can make an attack on the Wormhole Gate itself. Anderson comes over the intercom to alert us about approaching enemy ships. We make a run to launch in bombers and fighters.
I’m in the Devastator again, and I manage to take down one of the Mantas attacking. Another Mantas dies from multiple hits from my plasma cannon. Our fighters take care of the Squids that came along with the Mantas. The CAG comes on the communication line to tell us that our bombers will be targeting the bridge and engines of the dreadnought with a recon group to check out the Wormhole Gate. At our arrival to the dreadnought’s position, there is a renewed fighter presence along with an alien Devil Ray ace. I keep my eye on close targets, but decide to make my attack against the Devil Ray. A combination of missiles and the plasma cannon takes down the ace. The frontal armor of my Devastator is completely gone though, so I’ll have to be careful for further direct attacks. A Manta falls to another combination of missiles and plasma shots. I manage to take down a missile that a Moray launched directly at me. That Moray is taken care of by my bomber, and another Manta pilot experiences the void of space. A second wing of alien fighters comes to defend the dreadnought. This force seems to be composed mostly of Mantas. I check my radar for any targets heading for me, and then move in on a Manta within close range. That ship is destroyed with two direct hits from the plasma cannon. A missile along with a plasma shot shatters another Manta. Three more Mantas are finished by my bomber, and I head for the engines of the dreadnought. One of the other bomber pilots has blasted the bridge, and I have an attack vector on the engines. The engines take a few direct hits, but I have to pull out of my attack and then turn back to finish off the dreadnought. One lone Moray is left to deal with, and I make a combined kill with our fighter wing. We head back for the Midway, and Anderson congratulates me for my work. He also says that we got the needed reconnaissance on the Wormhole Gate.
Kilrah 6
I check the killboard before heading into the briefing room. We’ve lost fifteen pilots to the alien forces, but they have paid with over 8400 kills from our crew. I walk into the briefing room, and Finley explains that seven stabilizing towers are keeping the Wormhole Gate open. The wormhole will collapse with all of the towers destroyed, and the CAG takes over the briefing to explain that the Midway will act as bait for the alien forces. Two Vampires will clear out any alien forces guarding the gate, and the Marines will help out by boarding the platform to kill the shields of the towers. The Marines will split into two teams to get the towers down, and then we’ll all clear the area to avoid the implosion of the gate. The CAG tells us all that we’ve come a long way to reach this point, and wants us to make the Midway proud by pulling the plug on the Wormhole Gate.
Stiletto and I reach the position of the gate in our fighters. She takes down the alien Devil Ray ace, and I turn my attention on the multiple attackers here. My Vampire takes some hits to its core, and more Vampires join the attack. After clearing out the Mantas, I turn my attention on other alien ships still defending the gate. Looks like Squids, Stingrays and Lampreys for this wing and I go after the Stingrays as the priority targets. Dekker then communicates the news that they have made it into the control room for the Wormhole Gate and has started work to take down the shields of the towers. Stiletto wants me to attack the gate towers once Dekker has lowered the shield on the first tower. I decide that attacking the alien fighters is more important since only one tower is open to attack at the moment. Several of the alien fighters are shot down before Dekker can drop the shields on another tower. The defensive cover for the towers has thinned enough for me to make an attack. Two of the towers are destroyed, and I turn my attention back to the alien fighters. A few more bugs bite the bullet before Dekker can get the shields down on three more towers. I head for another attack run on the towers and take serious damage. The eject warning is flashing for my Vampire, but I can still take a few more hits. Those towers are all brought down, and more alien fighters are finished off. Dekker tells us about more bad news about not being able to reach the final tower. There’s also a huge fleet approaching from the other side of the gate. With no way for me to help out Dekker, all I can do is to keep killing fighters around the gate. After more bug blasting, Dekker tells us that he’s pinned down and needs reinforcements. Unless the shields of that last tower are brought down, the gate will stay open and the Midway will have to deal with any ships that get thru. Some more bugs are brought down, but Dekker then tells us that he could not take the tower down. The Midway calls a retreat to a nearby nav point where I can get rearmed and refueled. I get news from the CAG that Blair will be along to assist in taking down that final tower. There is the matter of clearing out the remaining alien fighters before I can head to the rendezvous point. Only a clustered Stingray presents a challenge to getting there without further damage. After getting refueled and rearmed, Commodore Blair expresses his confidence that I am up to the task of finishing this mission. All of us head back for the Wormhole Gate, and there is another alien ace in a Devil Ray with other fighters for backup. Two MIRV tracker shots do some damage to that Devil Ray, and I finish it off with my guns. Blair makes it to the seventh tower, and I have made more bugs experience the vacuum of space. It takes about another minute for Blair to get the shields down on that last tower. He emphasizes to attack the tower since he believes he can get out in time before the collapse of the Wormhole Gate. I take the tower down, and Blair congratulates me on a great job. We’re clearing from the collapse of the gate, and another dreadnought is trying to get thru before the gate is gone. The dreadnought does not get thru the gate before the collapse, and I get to see a nice explosion of the entire structure with this gate gone.
I head back for the Midway to land, and see that SAR rescued Maestro after ejecting from his fighter. I ask about Blair, but he did not make it back so something must have gone wrong. After a bit of time, I get to receive a medal award for my work on stopping the bugs. I’m pondering over the award along with its costs to Confed in the Rec room. Stiletto comes in to ask why I’m not celebrating on the flight deck with most of the crew. I tell her that I was thinking about Blair and what he would have said if he was still around. Stiletto says that she knows that Blair would have been proud, and then shows me the contraband bottle of booze that Maestro brought aboard when we first arrived on the Midway. She opens the bottle to pour both of us a drink, and I state that the bugs will be back. She knows this as well, but we might as well enjoy the moment. We make some toasts to Blair and to our friends. We look off into the void of space to reflect over the past, present and future.