I thought I'd save this journal for Thanksgiving Day today in the US. I wish everyone a happy Thanksgiving(even if you don't observe the holiday). I wonder how Lorien will fare in the Shrikes, but I'll have to wait for things on his end to get sorted out after that storm he mentioned in week 3. I hope things are better off down there!
T’lan Meth 1
There’s nobody in the Rec room to talk to, so I enter the briefing room to find out about our first mission in this system. Limited intelligence in the system has determined that the Kilrathi planet E’loy is being blockaded by the bugs. There is an unknown jamming source preventing us from getting a full scope of the situation. Other wings are to help in the defense of E’loy, while our wing looks for that jamming device. We’ll have to make individual close scanner sweeps to identify the jammer. Once the jammer is found, an SAR team will retrieve and dismantle it. Hawk catches Maniac sleeping during the briefing and wakes him up. The CAG tells him that he’s in command of the Black Widow squadron. Maniac is surprised by this since it has been many years separating his command of this squadron versus his last one. Maniac will now have to deal with all the responsibilities and the blame if his squadron fails on missions.
Stiletto and I launch in Panthers, and proceed on our mission. At the first nav point are Morays, Mantas, and a group of fighters that merge into a ship that can rapidly shoot plasma bolts. I go after the Mantas first since they are the closest targets. The guns of the Panther are more effective than the ones in the Tigershark, and it takes only a few hits to the rear to dispose of the first Manta. A second Manta soon follows the first in extermination. I then go after the Stingray cluster with a head on approach. I have to weave around to make sure I don’t present an easy target for those plasma shots. The Stingray cluster breaks apart, and I destroy two of the cluster segments. Stiletto uses a missile that tags a Moray, and I help her out to finish it off. Together, we combine to make short work of another Moray. There is one last Stingray segment left, but it’s no match for the combined firepower of two Panthers. At the second nav point, Maniac comes on the communication channel to tell us that he has an unusual reading at his third nav point. Stiletto and I head off for the third nav point, and she warns me of the enemy fighters here. It looks like another presence of Mantas and Morays to harass us. The first Manta I target is handled easily, and I make a Moray my second target. That fighter takes a beating before it goes down, and there’s another Manta very close. That Manta does not use all of its firepower which gives me enough of a break to make it pay for that mistake. Two of the Morays work together to penetrate my shields and do some damage to the Panther’s armor. I rapidly vaporize one of the Morays, and go after another. One of the Morays launches a missile, and it hits me in spite of a decoy. I take out the Moray I’m pursuing, and destroy the last fighter in the area. I then look for a close unknown container to begin the hunt for the jammer. Each one I identify as containing unknown contents is destroyed to make sure I don’t identify the same one twice. I do that process for three more of the unknown items, and then find the jammer on my fifth attempt. Anderson comes on the communication channel to congratulate me for my good work. After heading back to the Midway and landing, Rachel also congratulates me on my performance here.
T’lan Meth 2
Hawk’s sharpening his knife at the bar, and I accidentally bump into Maniac on my way over. Maniac gives me a playful shove, and I ask Hawk what happened. One of the pilots from Maniac’s wing did not make it back from the last mission. Hawk walks over to Maniac to rub in the loss of the pilot, and Maniac laments his treatment. I ask Maniac if the SAR team found the pilot, but he ejected in the asteroid field where all of those unknown containers were. Maniac has been given orders to go off the flight rotation for eight hours, so he can’t head out to look for the pilot. Maniac then says that he’s heard that all pilots are being picked up by the aliens. I then give Maniac a reminder of what he said about my ‘smell’ when we first met, and I say that this ‘plebe’ will be heading out into the asteroids to save the ejected pilot.
Upon launching in a Panther, the CAG says that she’s letting this mission proceed despite the small chance at a successful rescue. Anderson tells me that I’ll be along with an SAR shuttle to head for the first nav point where the pilot is believed to be. As soon as we arrive at the nav point, a Manta is hot on the SAR shuttle and attacks it with a missile and some shots. I’m forced to drop two decoys to shake off a missile coming my way. I take out the Manta, and look around for other dangerous targets. I drop another decoy, and the shuttle says another hostile craft is approaching. It’s a Devil Ray, so I make that my priority target. I launch multiple missiles against the Devil Ray to make it abandon its attempted pickup of the pilot. I’m all over the Devil Ray, and it’s seriously damaged. The Devil Ray bugs out of the area, so all I have left are the Morays. I know that these ships are not equipped to pick up pilots, but they still present a threat to the SAR shuttle. I dispatch two of the Morays before the SAR can successfully pick up the pilot. Another Moray is still around, and its pilot almost makes a massive blunder by running into an asteroid. That hit almost wipes out its frontal armor, and I blast it from behind to finish it off. The SAR shuttle and my ship head back to the Midway. I watch the medics as they bring in the pilot for treatment. Rachel congratulates me on helping to bring the pilot home, and I’m hoping that other Devil Rays will start to think twice before trying to pick up pilots.
T’lan Meth 3
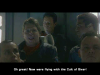
There are no fellow pilots to talk to in the Rec room, so I go to the briefing room for my next mission assignment. Thanks to my work in finding the jammer, our science and engineering divisions have been able to gather intelligence about alien operations in this system. The bugs have captured a Kilrathi starbase at Dula 7, and are using it as a base for their fleet. A significant number of alien capital ships are between the Midway’s position and the starbase. To gather more data, an SWACS will be launched to do a more detailed scan.
I launch with Maestro and another pilot on my wing. All three of us shred a Moray fighter at the first nav point. There are additional Morays here, and I’m forced to drop multiple decoys to shake a missile. Anderson comes on the communication line, and says that we are to head to the second nav point to assist the SWACS patrol and bring it back to the Midway. I blast another of the Moray bugs to bits, and engage a Manta in pursuit. The guns of my Panther punch thru the shields and armor of the Manta, and Maestro compliments me on the good work. I turn on a Moray, and it follows the Manta in elimination. All three of us combine to take out the last Moray fighter, and we head to rescue the SWACS at the second nav point. I make short work of a Moray, and see a Manta on the radar. I get that Manta off the radar for good, and my Panther gets tagged by an inbound missile. I see a Stingray cluster, so that is my next target. I break apart the cluster and hit one of the segments with a missile. I’m able to finish off that segment just as the other Stingrays are trying to merge again into a cluster. Maestro destroys an enemy fighter, and I shoot down another of the Stingray segments. Viking takes care of the last Stingray, and there is only one Moray left. That last bug is squished, and it’s time to return to the Midway with the SWACS. There are a group of more bugs seeking to stop us along the way. I take a friendly fire shot that damages my Panther’s right side. I pursue a Manta, and let it have a missile. It’s damaged, and I finish it off with a second missile. Unfortunately, my Panther takes a missile hit from the rear. I still have enough armor and shields to take more hits, and help out Maestro against a Manta. That Manta was shooting him up, but now it tries its best to evade my fire. The Manta is too big of a target as well as too sluggish to avoid annihilation. Viking takes out one of the enemy fighters, and I make a mess of a Moray fighter. Viking gets another kill, and all three of us make mincemeat of yet another Moray. The last fighter left is taken out with combined firepower between Viking and me. There are no more enemy forces to prevent us making it back to the Midway with the SWACS. They thank us for our efforts, and promise to get all of us a steak dinner. Rachel congratulates me on doing well on this mission after I land.
T’lan Meth 4
I enter the briefing room just as the CAG has started. She begins the briefing again after I sit down, and says that reconnaissance has confirmed a large enemy fleet in the system. Due to her presence, the Midway would be considered a primary target. Fortunately, the bugs have not spotted us yet, so there is a good chance we have surprise on our side. Due to the continued blockade of E’loy, the aliens won’t be able to bring the entire fleet to bear. We’ve decided to prioritize a carrier in the alien fleet for attack. Maniac will lead a diversionary strike to draw away fighters from the carrier. At the third nav point, our targets are an alien cruiser and the carrier. The CAG then tells us that the squadron we will be meeting will consist of Kilrathi forces from one of its feudal planets. Maniac expresses his dismay at having to fly with the Cult of Sivar, and Hawk complains that we should not be working with them due to raids on our colonies. The CAG stops the complaints cold by threatening to put them both in the brig. The CAG points out that we don’t have any options for allies to work with. She tells us to do our duty, and makes it crystal clear that she won’t tolerate further insubordination.
I launch in a Shrike bomber, and switch to its charging mass driver guns. I know that in a bomber, my shots are going to have to count due to the larger target profile of this ship as well as its decreased maneuvering capabilities. We link up with the Kilrathi at the first nav point, and they greet us by saying it’s a good day to die. Hawk says that cats can do all the dying they want, and I’m certainly not in a headlong rush to die today. At the second nav point is an asteroid field with alien fighters in our way. I let a Manta get within close distance and start charging my shot. With a full power blast from the guns, the Manta makes an explosive exit. My Shrike takes a missile hit from the rear, and we lose one of our pilots for good. I ask for assistance on a second Manta attacking me. With help from the fighters, my second shot takes out this Manta. I again ask for help against an attacking Moray, and one of the Kilrathi Vaktoths is destroyed by the bugs. The assistance on the Moray works to take down that enemy, and both the Kilrthi fighters and ours deal with the rest of the alien attackers. As soon as we reach the third nav point, the Kilrathi insist that they will kill the carrier and don’t want us to get in the way. Looks like Maniac’s diversion worked as well since there does not look to be much for fighter opposition here. After many moments of patience, a Squid gets in range. I miss my first shot, but the second one takes out that fighter. A Kilrathi Vaktoth dies in its attack, and I scuttle a second Squid with one shot. We lose another fighter pilot for good, and another Vaktoth is destroyed. A Devil Ray is coming after me, and I call for help. Assistance along with two direct hits brings down the Devil Ray. My Shrike has taken some serious hits though. Both my front and rear armor are gone, and my damage is over 33%. A Squid that is in my target sights is concentrated on and destroyed by our support. All remaining fighter opposition is dealt with, so now it’s only the cruiser and carrier to deal with. Due to the Kilrathi losses, I decide to help in destroying the carrier by working on the turrets. I take out a few turrets and missile launchers of the carrier. I then see a torpedo streaming in to blast the engines. That carrier is destroyed, and now its time to work on the cruiser. I again take out several of the turrets, and then go for the engines of the cruiser. I put one torpedo in its rear, and another of our bomber pilots finishes off the cruiser. We head back for the Midway, but there are more bugs to slow our return. Three Manta pilots let me get full power blasts on them, and are dispatched with one shot. I ask for help with a fourth Manta since he’s a tough target to track. My Shrike takes a missile hit and more damage, and the damage is significant against my afterburners. Fortunately, the repair systems on the ship take care of the afterburner hit. I nail the Manta with a full power shot, and take out a Moray with some assistance and my own missile. There’s one Manta left, and I call in for help again. Some missiles along with a full power shot destroy that alien. The surviving Kilrathi congratulate us on our fight together. Our group heads back to the Midway, and I get a reprimand from Rachel to fly better since my Shrike took significant damage. I do notice that I got over 10 kills in a bomber, so that charging mass driver gun was a godsend for this mission. I see Finley working late at one of the tables near the bar in the Rec room. She says that she thought all pilots like me needed good sleep. I admit to her that I’ve not slept for almost three days, and she says that I can’t afford to keep doing that since it will eventually affect my health and how I perform on missions. I ask her why she’s working late, and she says that she has made contact with the Kilrathi on E’loy. After the attack on E’loy along with the destruction of its capitol, many of the Kilrathi just disappeared. Apparently the bugs took thousands of Kilrathi as prisoners, with the few remaining able to send to Finley further data about the alien craft. As soon as her upload from E’loy was complete, Finley lost all contact with the Kilrathi. It seemed like all the cats on E’loy had been completely consumed just like in the Kilrathi prophecy concerning the Kn’thrak. I then have a nightmare vision of Commodore Blair being tortured by the bugs. Finley snaps me out of this, and asks if I’m okay. These continual nightmares are part of the reason I’ve been avoiding sleep for some time.
T’lan Meth 5
I enter the Rec room, and Hawk says that he missed seeing me at the mess hall in the morning. I tell him that I did not feel hungry, but Hawk says that it was more like I was not in the mood to eat. I ask Hawk if he has a point, and he says that he can see that I’m still blaming myself for what happened to Blair. He asks me if I’m having nightmares about Blair, and I nod my head. Hawk asks me to sit down, and he tells me a story about losing three wingmen in one of the first missions he had in the Kilrathi war. He says that his trauma over this loss caused him to also have problems with sleeping and eating. A Major took Hawk aside, and told him to get used to the loss of his friends. The Major then signed on as Hawk’s wingman for the next mission. Hawk was still recovering, and the Major took out an entire clan of Kilrathi until Hawk finally recovered. I ask Hawk if it was Blair that helped him thru this, but he says it was my father. He advises me to get some sleep, something to eat, and to forget about Blair. Hawk says that I’m a good pilot, and still alive. I should do everything I can to stay that way. After taking Hawk’s advice, I go into the briefing room to find out details of the next mission. Hawk and I have been assigned to help out more Kilrathi here. After helping the cats deal with the enemies, we’ll escort the remaining Kilrathi to a corvette. After conclusion of the briefing, I ask Hawk if he’s okay with this assignment. Hawk says that he’s not used to helping the Kilrathi. He laments that he was better off when fighting for the Border Worlds since he knew who the enemies were. I explain to him that he should put all of his personal feelings aside like I did with Blair. Hawk asks if I ever read the mission report where my father died. I tell him the details that I do know, and then Hawk tells me one detail that was not in the report. My father’s life pod was found by Blair, but the body was in pieces. This detail was left out to spare Iceman’s family, and Hawk says that both he and I owe the Kilrathi payback for their past deeds.
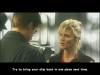
Upon launching in Panthers, Hawk says that it does not feel right to risk ourselves to save the Kilrathi. Upon reaching the first nav point, I can see that the cats have their hands full in dealing with multiple alien attackers. Hawk’s not sympathetic towards any potential losses on the Kilrathi side, but I ignore his attitude and attack a Manta. That alien is quickly off the grid, and a Kilrathi Dralthi fighter is destroyed. I again make short work of a second Manta in an attempt to prevent more losses. I line up a third Manta, and the Dralthis are getting kills racked up against the aliens. That Manta joins its friends in getting fried by the guns of my Panther. I go after and destroy one of the Moray fighters, and see another Manta that is a threat to the Dralthis. That Manta has the same lack of defense against rear attacks that the others had. The Dralthis finish off the last Moray fighter, and then Hawk encourages me to turn against the Kilrathi. Hawk says that he turned off the flight recorders to both of our ships before takeoff, so there will be no evidence if we do attack the Kilrathi. Hawk does everything he can to prod me to attack the Kilrathi, but he’s forgetting their earlier assistance against the cruiser and carrier. I follow my orders to fulfill this mission regardless of Hawk’s desire for revenge. The Dralthi fighters rendezvous with the corvette at the second nav point, and Hawk wonders if I’m really Iceman’s son by not choosing revenge. We both return to the Midway, but Hawk won’t talk to me and I lift my arms in exasperation as Rachel watches our tiff. Rachel asks me what happened during this mission, but I have no good explanation to give her.
P.S. - I don't have any of the Privateer games, so you'll have to do those without my participation. My plans are to do Wing Commander 1 along with both Secret Ops campaigns. If there is no episode 5 for Standoff by the end of that replay, I'll do StarLancer over 6 weeks.


")
