You are using an out of date browser. It may not display this or other websites correctly.
You should upgrade or use an alternative browser.
You should upgrade or use an alternative browser.
Wing Commander 3 Replay Week 2
- Thread starter Dundradal
- Start date
DaveO
Rear Admiral
Took me over nine minutes to do that duel. AND it was a bit sloppy for my flying since my Arrow took some hits, but at least I got Flash to join.
I'm doing editing and compression of the duel right now. I had a LONG Sacred session today, but I had the other two missions done before starting fortunately.
P.S. - I just did some tweaking for the first Locanda mission, and it looks like using dynamic on the DOSBox configuration works better.
I'm doing editing and compression of the duel right now. I had a LONG Sacred session today, but I had the other two missions done before starting fortunately.
P.S. - I just did some tweaking for the first Locanda mission, and it looks like using dynamic on the DOSBox configuration works better.
DaveO
Rear Admiral
Rescuing Flint turned into a furball of a struggle. Good thing I chose Ace difficulty AND avoided the Corvette. I'm not sure I could have succeeded with a higher difficulty or going after the cap ship.
I won't have time to post screen shots tonight, but I've got videos of all the action at: http://youtube.com/davecaspermeyer
P.S. - I've now flown with all available wingmen, except Maniac. I'll save him for when I really need him.
I won't have time to post screen shots tonight, but I've got videos of all the action at: http://youtube.com/davecaspermeyer
P.S. - I've now flown with all available wingmen, except Maniac. I'll save him for when I really need him.
Death
gh0d (Administrator)
Flash is easy to kill... if you play dirty.
Lock AB to keep in range, toggle all missile racks to fire at once, and salvo off all 8 missiles at him. At least at Ace setting, he can't decoy them all away, and *kaboom*.
Cheap? You betcha. But like they say in special forces circles, if you ain't cheating, you ain't trying. And it beats burning ten minutes on his silly ass.
(As an aside, the same tactic will let you kill Thrakhath after the Behemoth is destroyed, in the Loki mission set, when you're given the "get your ass back here now" countdown. However, don't do that in the Kilrathi Saga version, as it will have the Victory automatically jump out the second he's dead, even if there's still time on the countdown. Note also that even if you don't get stranded, waxing him doesn't kill him off. You still wind up facing him around Kilrah.)
DaveO
Rear Admiral
I did try a salvo launch against Flash and he decoyed them away. Well, I never said I was a very good pilot. 
Take a look at how many times I got damaged or complained about getting de-Blaired in WC2. My poor Thunderbolt was definitely beat up after rescuing Flint. I never doubted that there would be challenges here, so that's part of the game. I'm not sure how well I will fare in the more enemy intensive missions. I know there is one(if not several) where you have to fly against a whole slew of Kilrathi.
Take a look at how many times I got damaged or complained about getting de-Blaired in WC2. My poor Thunderbolt was definitely beat up after rescuing Flint. I never doubted that there would be challenges here, so that's part of the game. I'm not sure how well I will fare in the more enemy intensive missions. I know there is one(if not several) where you have to fly against a whole slew of Kilrathi.
DaveO
Rear Admiral
Ok, sorry for the minor delay on the screen shots. I got hyper active on shot taking and I had to do a few minor deletions on the upload for duplicated or slightly better shots. Grand total: 49 shots! That's the equivalent of my count for two or three weeks of WC2.
I'd advise anyone interested to check out the other 44 shots that are not posted in this reply at: http://s204.photobucket.com/albums/bb15/DaveO-MM/Wing Commander/
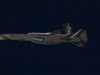
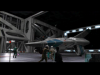
P.S. - That's right, Flint is RAMMING the Vaktoth in picture #3...
I'd advise anyone interested to check out the other 44 shots that are not posted in this reply at: http://s204.photobucket.com/albums/bb15/DaveO-MM/Wing Commander/
P.S. - That's right, Flint is RAMMING the Vaktoth in picture #3...
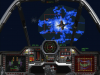
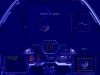
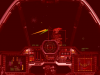
Attachments

Flying Target
Swabbie
Banned
Anybody ever not gone out and saved Flint? What happens (apart from making getting in her pants tougher)? Does she die?
AD
Finder of things, Doer of stuff
Anybody ever not gone out and saved Flint? What happens (apart from making getting in her pants tougher)? Does she die?
I think Cobra goes out and gets her if you don't
DaveO
Rear Admiral
Tamayo 1
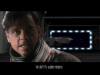
I walk into the Gunnery Control area on the bridge, and I happen to catch a glimpse of Flash showing off in the Excalibur fighter. Maniac does not notice me, and he feels that he could teach Flash the lesson he badly needs with his insubordination. Flint compliments Maniac on his brainless solution to the problem, and he feels a need to boast that he makes it a priority to keep flying, and that the only way that he will stop flying is if he is killed in action. Flint’s not impressed by his bravado, and says that I’ll take care of Flash. Maniac is about to mouth off a really derogatory comment about me, and I decide to interrupt him by saying he better watch his words. Maniac tries to backpedal a bit to save face by saying that he really meant that he wanted to know when Flash will start making ‘consequential’ contributions on the Victory. I tell Maniac that one way or another, we’ll find what Flash is made of. I head back to the bridge and notice Eisen and Hobbes are there. Eisen is wishing that the Academy would not keep sending hotshot pilots to his ship. Hobbes comments that youth and wisdom are a rare combination, and I remind Eisen that it’s HIS ship and HIS rules. Eisen’s getting a bit frustrated since Flash only answers to Admiral Tolwyn. I see a video feed of Flash taking a leisurely walk from the Excalibur in the hangar, and then the alert klaxon goes off.
Looks like the Kilrathi got the jump on us with a fighter group heading inbound fast! Eisen wastes no time in ordering a scramble, so this is going to be a magnum launch. This is one time I wish that darn lift elevator would go faster since time is of the essence here. Once out of the lift, I make a fast sprint to the nearest available fighter which happens to be an Arrow. I only have time to switch to full guns and takeoff. The Kilrathi fighter wings are coming towards the rear of the Victory. Oh no you don’t, you cunning cats! One of our fighters patrolling near the Victory is blown to bits by the surprise attack. I go after the nearest fighter which happens to be a Darket. After multiple amounts of missed shots, I compensate for the Arrow’s speed and nail that fighter. I let loose with a missile as soon as I see another fighter. That Darket is tagged, so I turn my attention to one of the bombers. A Paktahn is in my sights, but somebody shoots it down well before I get in range. I target another Paktahn and match speed with his fighter since my Arrow can easily overtake him. There’s an approaching Darket that is in my line of fire, and I start shooting at him. The Paktahn moves right into the line of fire, and he’s dusted. I’ll take that lucky shooting, and return my attention to my original target. In pursuit of that Darket, I notice that the maneuverability of my Arrow can easily keep that fighter in sight. That enemy is shredded by gun blasts, and I go after another Darket. He also follows his friend’s demise by my fighter’s firepower. At close range, I let another missile fly and the targeted Darket is destroyed before he has a chance to use decoys. I see another incoming Paktahn and get behind him. He has taken significant damage to his shields, and it’s a simple matter to mop him up with blasts from behind. Now some Dralthi are joining the fray. Suicide is the only option I see for those fighters, so I get on that Kilrathi’s tail and give him a quick death before he can try doing some damage to the Victory or me. Another Paktahn is on my radar and in view. This fighter must have had some beefed up shields or perhaps was a Drakhri since he takes a lot more hits to his rear than the others. Unless you have infinite shields, you’re not going to be returning from this encounter in one piece! His ship finally goes down, so any Kilrathi Search and Rescue is only going to find kibbles and bits. There’s one Dralthi fighter left, but the Victory gunners smoke that cat. I request clearance to land on the Victory and Rollins tells me that Flash sat out this fight! Boy is he going to get his rear chewed by me as soon as I get a chance!
Tomayo 2
I head straight to the berths and kick the cot Flash is sleeping on HARD. I ask him what he was thinking, and he has a lame reply that he’s waking up now. I press him on whether he heard the scramble alarm, and he admits that it woke him briefly. I yell at him that we were under attack! He just shrugs it off and says that his ‘talents’ won’t be wasted on little fights. I’m sorely tempted to slug him right there, and explain that his presence might have prevented the death that happened. Again Flash just shrugs off any sense of compassion or commitment by saying that there’s a war on and that people die all the time. I finally figure out that he’s never had the experience of having a wingmate getting killed in action. Flash says that he’s already doing his part, and I express my surprise in seeing somebody as frightened as him. Flash just responds by saying he has his orders, and I respond by stating that he’ll stay in the safety of those orders as long as he can. I express my disgust and leave in a foul mood. After exiting the berths, I see Rachel at the bar and she is admiring her up-close contact with the Excalibur. Flash is acting VERY overprotective of ‘his’ ship, and Rachel laments that’s she’s not getting a chance to make the ship be better. She then says that if he keeps that attitude up, he’s not going to be getting good service when his ship is in need of serious servicing. Rachel tempts me with the offer to fly the Excalibur. I accept the offer, knowing full well that Flash is NOT going to be happy if another pilot touches his ‘precious’. I head down to the flight level and see Eisen for my next briefing. He explains that the Kilrathi have not followed up with another attack due to a transport attack group heading for the second planet. He wants me to quickly eliminate the fighter cover so that I can attack and destroy the transports. I know the perfect fighter for this job, and Rachel delivers with the Excalibur.
As I board this flashy fighter, I wonder what the hangar crew are thinking at seeing somebody else other than Flash taking a spin in it. I notice the six cannons and twelve missiles for this fighter, so this thing sure has a bunch of firepower! At our first enemy encounter are some Kilrathi Vaktoth heavy fighters. As soon as that enemy gets in range, I let him have it and the guns of the Excalibur shatter the Vaktoth into shards. Another targeted Vaktoth is taken down quickly. I go after a third Vaktoth, and he’s a bit more resilient than the others. Then the pilot makes a BAD mistake by doing a frontal pass and those cannons on my fighter are waiting for him. I split the Vaktoth in two with my cannons. Some Darkets jump into the fray, and one dies quickly from his attempt to succeed on the forward pass where that Vaktoth failed. The maneuverability of those fighters can’t save them if they keep up these types of tactics. I nail a nimbler second Darket, and Hobbes reports his takedown of a Corvette cap ship here. The third Darket quickly joins his comrades in elimination. A fourth Darket makes a futile effort at resistance. He’s assimilated into the afterlife too. Now there are multiple Dralthis here. The first two are slightly beefed up in terms of shields and armor, but that does not save them on our encounter. I then take down a third, and Hobbes helps out in dusting the last one. At Tamayo 2, there are four Kilrathi transports approaching the planet. I get within gun range, match speed, and start shooting. I have to let up from my fire due to Flint getting in the line of fire. She’s hammering that transport with her Thunderbolt guns. Flint finishes the transport, and Hobbes asks if he can go after the other ones. I let him break and attack and he makes REAL short work of the second transport. I get in range of the third one, and wipe him out with full gun barrages. Seeing no need to hold on to missiles, I let loose with one after it is damaged by Flint and Hobbes. The transport explodes in a flash, and it’s time to head back to the Victory. At my landing approach, Rollins loves that he now has a taste of the Excalibur’s capabilities. I notice that Flash’s ‘baby’ has taken some damage, so if flying it won’t draw his ire I bet seeing it banged up WILL. As expected, Flash comes storming towards me as soon as I leave the cockpit. He accuses me of being out-of-line, and I tell him that it’s beyond time to see how the Excalibur fares in combat. He thinks that I put the Excalibur in unnecessary risk, but obviously did not care to read about how I’ve handled the Rapier, Crossbow, and Morningstar. Those ALL were state of the art for their time, and I’ve brought them back in one piece. I express my wonderment at Flash for spewing so much silliness and wonder if the Academy bothers teaching pilots like him how to fly. Flash has had it and wants to teach me a lesson. He challenges me to a duel in the simulator to settle this score. I decided it’s time to teach this punk a lesson on how to fly in combat, with the condition that if he loses he will transfer to the Victory as a combat pilot.
Flash challenge(aka Tamayo 3)
Eisen is here at the simulator along with Flash and some other pilots who want to see the action. Eisen explains that as a general rule he does not condone these displays of dominance. He says that I’m taking a big risk in terms of ship morale, especially if I lose. He gives me the advice to kick Flash’s butt in the simulator.
I have enough time to do the standard power configuration in my Arrow before Flash gets in range. He does shoot and hit me with two missiles at close range, so I need to evade and use decoys quickly if I want to win this duel. I have to use decoys multiple times, and then finally get a chance to use a full salvo missile launch. Flash decoys all the missiles away, so I’m going to have to keep trying. I’m able to launch two more missiles at the same time, and one does hit and damage Flash’s Arrow. Flash taunts me and says that I’ll soon be flying a wheelchair and that he’s surprised at my reputation. No more missile launches of mine hit Flash, so now I playing the waiting game in letting him exhaust his afterburners. After a final desperate full afterburner frontal attack, Flash has made his mistake. With no afterburner fuel left, I pursue him aggressively from behind. After many successful hits to his rear shields, I take a chunk off his Arrow. His rear is definitely damaged, so it’s time to finish him off. I again systematically blast those rear shields, and after several more successful hits I finally hit him enough to deal the final blow. Flash says that he’ll honor our bet, and Vaquero says fighting the Kilrathi is definitely a different experience from test piloting. Maniac turns away in disappointment since he thought that I was overrated and expected me to lose the duel.
I think Cobra goes out and gets her if you don't
I remember that Flint dies....
DaveO
Rear Admiral
After all the playing you'd think I'd know the really useful stuff. I just looked and found that Ctrl+F4 puts a rear view on the left VDU. I'll be using that from now on for the missions since I've started taking damage that likely would have been avoided if I had a rear view to pay attention to as well.
P.S. - Looks like the same stuff can be done for WC4 and Prophecy.
P.S. - Looks like the same stuff can be done for WC4 and Prophecy.
Mincemeat
Doomsday's Neighbour
In the Flint retrieval mission, I find that destroying the Fralthra II cruiser first helps with her chances. Her barrage of IFF missiles seem to do an adequate job of keeping the Darkets off her back, but those anti-matter guns on the cruiser will bypass shields and tear her longbow to shreds.
DaveO: What settings are you using for your VirtualDub transcoding? The FLV encoder that I'm using seem to be producing quite a few glitches. I might try to encode video your way and see how that goes instead...
DaveO: What settings are you using for your VirtualDub transcoding? The FLV encoder that I'm using seem to be producing quite a few glitches. I might try to encode video your way and see how that goes instead...

DaveO
Rear Admiral
As compensation for my really late reply for the second half of the missions, I'm sharing five more special screen shots from those 49 I got earlier.
Locanda 1
A Kilrathi battlegroup is in the Locanda sector. Melek and Prince Thrakhath are debating the value of continually raiding this system since there basically no useful natural resources left. The system is a source of Kilrathi slave labor, but they have made difficulties for the Kilrathi. Thrakhath points out that they don’t have a shortage of slaves, so they’ll let Confed recapture this system. Melek thinks that this is equivalent to surrender, but Thrakhath tells him that since this system is useless to the Kilrathi it’s now time to make it useless to Confed. Melek compliments the Prince on his wisdom.
I notice Flash moping on the flight level, and he offers an apology for the things he said to me. Flash thinks he might have been able to beat me in the simulator challenge if he had more attempts. I ask him if he wants to try his luck again, but says that he’ll take the choice of proving his capabilities in combat. He asks if I think he’s good enough to be my wingman, and I tell him that he’s on the roster and that he will get his chance to fly just like all the other pilots. I turn away for the lift, and Flash thanks me. I see Cobra in the berths, and she’s sharpening the hunter’s knife again. She asks me if I’ve heard that the Kilrathi may be using bioweapons in this system. I tell her that I’ve not heard about that until now, and she states that the cats have been preparing and using weapons like this for years. If the Kilrathi don’t use bioweapons in this system, Cobra thinks they certainly will elsewhere. I ask her how she knows so much, and she thinks it does not matter if I believe her. I decide that she knows something, and I explain that she’s wrong in thinking it does not matter and that one day I’d like to get the rest of the story from her. I see Flint hanging around in the gunnery control area on the bridge. I tell her that I’ve flown in this system before, and that there are a lot of places to hide here. I ask Flint if this is her first time here, and she explains that this is her home system. Her father taught her everything he knew about flying since the Kilrathi killed her brother. I tell her that I’m sorry about her loss, and she’s right that everyone in this war has lost somebody close. Shadow and Spirit come to my mind again, though Spirit is the deeper loss for me. I ask her if this is her first time returning home, and wonder which one is her home planet. She’s able to point it out, and explains that it’s a beautiful place with dark purple nights and burnt moons. The insects sung different serenades depending on how close the moons were, and she remembers the peacefulness before the war when she and her brother would spend hours listening to the insects. She asks me if I remember times before the war, and I inform her that I don’t let myself. She then says that there are scores for her to settle here, and that she does not want to be on the sidelines for any Kilrathi engagements. She definitely wants to be a part of the takedown, and I decide to give her a shot. I do ask her if she’s going to be my wingman or her brother’s wingman. I head back down to the flight level in the lift and enter the briefing room for my next mission. Eisen explains that the Kilrathi intentions are unclear, so I’ll be heading out to corral the cats and prevent their access to the planets and asteroid field. If I do my sweep duties well enough, we might succeed in putting the Kilrathi raiders out of business for good. I tell Eisen that I’m ready to go, and he likes seeing my enthusiasm. I give the briefing to the other pilots and select Flash as my wingman.
Expecting some sort of Kilrathi cap ship in the area, I select the Thunderbolt. After my standard takeoff procedure, Flash and I head out. On our first Kilrathi encounter, there are two Vaktoth fighters here. I give Flash the ok to break and attack. He makes fairly short work of one Vaktoth. I have to continually make opportunistic attacks on my targeted Vaktoth. I finally hit him enough times for his fighter to explode. A wing of Dralthis jumps in, and Flash again ices one before I can do enough damage to my target and finish him off. Flash eliminates the other Dralthis before I can do much to assist. We head off for the asteroid belt, and there are some Darkets waiting for us. I take down one on my first pass, and systematically eliminate the others without too many difficulties. The Kilrathi spring a surprise with Strakha stealth fighters, and I let Flash break and attack. I happen to see a Strakha directly in front of me, and I pound him to particles with my guns. Flash makes a kill as well, and I get another Strakha in my sights. Another stealth fighter explodes, and the last one keeps cloaking and uncloaking to make his elimination more difficult. Flash gets that final fighter with blind shooting, and we head along with our sweep. My suspicions of a Kilrathi cap ship are confirmed with a destroyer at the next nav point. There is a wing of Dralthis trying to protect the destroyer, but I wipe out one and Flash gets three kills. The destroyer launches another wing of Dralthis, so I decide to target it for a torpedo. I let loose with the torpedo while doing some minor evasive maneuvering. I hear the destroyer go up, and go after one of the Dralthis. I shred one with guns, and Flash follows suit pretty quickly. I launch a missile, and finish the Dralthi with my gun blasts. Flash makes another kill, and this area is now clear. At the next nav points, there are several Darkets with the Kilrathi ace Fireclaw. Fireclaw taunts us right away, but I expect this fight to be like the others where I’ve faced aces: take down the little kitties first and then get the big cat. The first Darket is one heck of a flyer, and I’m forced to use a missile in frustration to destroy the fighter. A second goes down from my guns fairly quickly. I’m able to eliminate a third Darket, but Fireclaw took advantage of my pursuit and caused some damage to my Thunderbolt. The communications system has taken a hit, and two more Darkets fall quickly. Flash fries Fireclaw, and I check damage control. The communications system is significantly damaged at 60%, so I’ll need multiple attempts to establish a link to the Victory on my return. On my landing approach, Rollins tells me that we’re heading for Locanda IV in this system due to increased Kilrathi presence. He tells me that Flint was flying a little wildly, and wonders if she’s been getting pointers from Maniac.
Locanda 2
I see Vagabond again in the living area, and he says that he’s been hearing that the Kilrathi have left this system with little natural resources. I explain that this has been a hotly contested area, and then Vagabond says that he heard a story of a fringe system the Kilrathi raided. The rumor is that this system was dusted with a bioweapon after the Kilrathi took everything of use to them. This bioweapon was so virulent that nobody can get near the system, and another rumor is that Confed has quarantined the system. I tell him that nothing the Kilrathi does surprises me, but that if we do our jobs well enough we should not have to worry about bioweapon use. I find Hobbes in the gunnery control area on the bridge. He admits that he used to raid these planets, and that he’s puzzled at why the Kilrathi are surrendering the system. Hobbes can’t make a guess at what the Kilrathi really will do, and that the cats are most dangerous when they are unpredictable. I head to the flight level for my next briefing. Captain Eisen gives me the scoop that there are more questions than answers on what the Kilrathi are doing here. Some forces are heading for Locanda IV, where Confed intel believes that the Kilrathi are prepping to use a new type of bioweapon. If this intelligence is correct, the half-life of the virus is over 500 years which would make the planet uninhabitable for a very long time. We can’t afford to let any warheads hit the planet, since a bio attack would mean slow deaths by the people on the planet. I choose Vagabond as my wingman, and choose the Thunderbolt again to make very short work of any Kilrathi cap ship that could launch those warheads.
At the first nav point is a Kilrathi cap ship with some Strakha fighter escorts. I had my torpedo already selected as my missile, so the lock on is quick. Vagabond frags a Strakha just as I shoot and scuttle the cap ship. I notice that it launched a missile, and go after it on full afterburners. I have to make several attempts but successfully destroy the missile. A Strakha futilely attempted to prevent my interception, so now it’s time for me to turn my attention to any remaining fighters. Vagabond gets the entire Strakha contingent, and we head back for the Victory. Upon my approach, Rollins says that Confed intel did confirm that the warhead launched by the cap ship was a bioweapon. Just before I can autopilot into the landing bay, Eisen says that Flint went renegade and is undertaking her own private war with the Kilrathi. I’m given the choice to go after her or not, and decide to do the rescue mission since she could die out there without some help.
Locanda 3
No mission briefing here since I elected to attempt to rescue Flint. I have to do my ship adjustments and go on my way. On my first nav point, there are Dralthi fighters with a Corvette. I gun down one Dralthi without much trouble, and a second one quickly follows the first in destruction. I go after the final Dralthi from the fighter wing, and he’s no problem in pulverizing. That Corvette sends in a wing of Darkets, but my Thunderbolt should be able to handle them. One goes down quickly to my guns, and another taunts me. He’s eating a missile for that! The missile tags the taunter, so I turn my attention on a third Darket. My guns grind him into space shards. The fourth one proves to be slightly more challenging in crunching, but I torch him with multiple gun barrages. The Corvette brings in another wing of Dralthi, and I quickly eliminate one fighter. A second fighter fares no better against my guns, and the third Dralthi soon joins his buddies. I dust that final Dralthi, and the Corvette can’t bring in any more fighter reinforcements. I autopilot away from the Corvette and head onwards since time is of the essence if I’m going to successfully rescue Flint.
I finally reach the nav point where Flint is at, and it’s an immediate furball. There is a cruiser here with multiple Darkets seeking to fry Flint. I decide to use some missiles here to help out Flint. A Darket successfully decoys away one, but my second missile launch destroys that fighter. I shoot off a third missile, and another Darket joins the debris field. I go after a third Darket, and he’s pretty elusive for a while. I shatter his ship with my guns though, and I get enough time to get confirmation from Flint that she’s ok. I shoot down a fourth Darket, and the cruiser sends another wing of Darkets to deal with us. I’m approaching a Darket too fast and attempt to gun him down quickly. Fortunately my shields deflect the damage from the Darket collision. I gun down a second Darket, and a third soon follows. The cruiser decides to get serious, and brings in a wing of Vaktoths. I take missile and gun hits from the Vaktoths, and my frontal display is damaged. I finally take down that troublesome Vaktoth I was targeting, but it took quite some effort. Flint gets VERY aggressive and rams into the second Vaktoth. I finish him off with full gun barrages, and bring my banged-up Thunderbolt along with Flint’s dented Longbow back to the Victory. Rollins congratulates me on my successful rescue, and Flint talks to me after I get out of the cockpit. She correctly says that I might have died in that rescue attempt, and I explain that it was my choice to rescue her. She guesses that she should be impressed, but does thank me at saving her. I tell her that we’re not in this war to fly suicide missions. We’re here to fly with our head and not our heart. She asks me if I’ve ever flown with my heart, and I explain that if I did I’d expect to get chewed out by the brass. I do mentally note that there have been occasions where I flew with my heart on multiple previous missions back when I was on the Concordia. Flint explains that her father read from the regulation manuals when she was only a child and knows that she deserves punishment. I decide to give her a break, but adamantly state that all bets are off if she goes renegade again. She understands that another rescue would be an indulgence. Our Confed battlegroup jumps onward into the Blackmane system, so I’ll soon see what sort of missions I’ll be flying.
Attachments
Lorien
Rear Admiral
Well, those tweaks were a bust, so I went with plan B. Set the flight mode graphics to VGA. Now it's running a lot more smoothly.
Tomayo 1:
Maniac and Flint are watching the Excalibur go through it's paces on the Gunnery Deck. Flint spots me but I motion for her to keep my presence a secret. We both know that Maniac will put his foot in his mouth sooner or later. With a little nudge from Flint, he starts on a rant about me which I kindly interrupt to keep him from saying too much. Maniac does have a good point, though, we've got the hottest fighter in the galaxy on board, we should be putting it through it's paces. We did that enough for the Rapier and Morningstar. Eisen and Hobbes seem to share my sentiments with Eisen not happy at Flash reporting only to Tolwyn. Any further conversation is cut short by the attack alarm.
The battle around the Victory isn't too intense. Fortunately, the Kilrathi insist on sending their bombers through piecemeal to allow Maniac and I to gang up on them and blow them up. They only attack with multiple Paktahns once and, true to form, Maniac refuses my order to engage the bomber that I'm not attacking. Arming my missiles I afterburn behind the first Paktahn and try to take it down as quickly as possible with Meson blasts lighting up my shields from behind. It dies to a HS and I dart after the second bomber, which is already deep into a bombing run. An IR missile from a distance soon convinces it to evade and lose it's lock and I repeat the process of taking it down from behind, using slashing passes so that the Arrow spends as little time in front of the turret as possible. As I land, Rollins, informs me that the Excalibur just sat our the attack on the flight deck and I resolve to do something about this.
Tomayo 2:
The encounter with Flash goes just about as well as could be expected. He not only was asleep when I found him the barracks but his only recognition of the attack alarm was that it woke him up for a minute. I trade verbal blows with him for a little before I realise that he's never seen combat and is deathly afraid of it. I let him know that I know before stalking out of there to the bar. Fortunately, there's a much friendlier face there in the form of Rachel. She's a little sore that Flash won't let her try to tweak the Excalibur and hints that she may be able to arrange a joyride for me. In the heat of the moment, I decide to take her up on the offer, though it may cost me later.
Today's mission is especially important. The Kilrathi are making a major move on Tomayo 2 and we're the only one who stand in their way. The plan is to punch through their fighter cover and take out the transports, leaving the cats no way to achieve their goal. To that aim, Rachel has a little suprise ready for me, one Excalibur gassed up and ready to go. I get a quick feel for the controls in the space around the Victory before engaging the autopilot. I almost feel sorry for the Kilrathi fighters as we engage them. The heavy guns on the Excalibur cuts through even a Vaktoth with ease and the auto-aim feature means I can concentrate on mauevering over aiming. Leaving Hobbes and Flint to engage the single corvette, I proceed to demolish everything and anything the cats throw our way. The transports barely last a few minutes once we show up inside their screens. On landing, Flash challenges me and says that I was way out of line. Considering the Excalibur's paintwork wasn't even scratched and a planet's been saved from invasion, I don't think HQ would agree with him. He decides to teach me a lesson and I agree with one condition, if I win the duel he has to sign up on the Victory.
Tomayo 3:
There's a big crowd waiting outside the simulator for our match including, to my suprise, Captain Eisen. He tells me that he's not fond of macho displays like this and that I'm taking a big risk with the crews morale. The chewing out continues with one piece of advice "Kick the little twerps ass". With a grin I hop into the simulator.
Flash begins the fight talking about taking it easy on me but I certainly have no intention of doing the same to him. I start off the fight by lobbing my IR missiles at him from long range. As he begins evasive maneuevers I continue to close on afterburners, salvoing off my HS missile when his back is turned. It's a bit of a dirty trick and no good in the field but Flash proves his skill by evading all the missiles. He's not able to evade me, though, and I settle in behind him and open up with full guns. He tries a few tricks including afterburning away followed by a kickstop, but I simply loop up and around his motionless fighter. As he attempts to bring his fighter up to speed my guns finally crack his rear armour and his simulated Arrow bursts into flame.
Locanda 1:
We say goodbye to the Excalibur and jump into the Locanda system, looking to put a stop to the Kilrathi raiding once and for all. Flash attempts to bury the hatchet with me, apologising for what he said and even attempting a little humour. Mostly, though, it seems he wants to make sure that he'll get a chance to prove himself. I tell him that he gets the same chance everyone on the roster does. I find Cobra in the barracks, she informs me that the Kilrathi may be using bioweapons in this system, which is a suprise, you'd think Intel would have mentioned something like that in the briefings. I try to find out a little more about Cobra's past, but she remains closed up. Flint also seems to be affected by this system. She informs me that it's her home system and where she learned to fly from her father, after her brother was killed by the Kilrathi. She says she needs to be a part of what goes down, but I need to know who's wing she'll be flying on first.
Today's mission will be a intel gathering in force. We're still not quite sure what the Kilrathi are up to, but we know we want them away from the planets and the asteroid belt. I select Flint as my Wingman and a Hellcat as my ship, I'm not sure what we'll encounter so the balance seems like a good idea. It certainly starts off as a good idea as we encounter a mix of fighters across the Kilrathi spectrum, Vaktoths to Darkets. They even attempt an ambush with Strakha in an asteroid field after we clear out some Darkets. They have no luck, though, and Flint and I sweep through the Nav points with ease until the second-last one. There we find a destroyer on our radar and I suddenly wish I'd picked a ship with torpedoes. Nothing to do now but take it down the old-fashioned textbook way. We scrape off the Dralthi escorts before pressing our attacking, splitting our attack vectors to divide their fire. A missile from Flint penetrates through the hole we've made in their armour and the Destroyer's reactor goes up in a giant flash. The Darket ace, Fireclaw, is waiting for us at the final nav point. Flint take care of his wingmen while I head for Fireclaw. His Darket is stronger than the usual one, but it still doesn't hold up long under my guns. I turn from the debris and help Flint. Returning to the Victory, I hear the first really positive words out of Rollins that I ever have.
Locanda 2:
Vagabond is repeating the same bioweapons story that Cobra was. He also repeats the tale of a backwater Confed system that the Kilrathi surrended they way they're surrendering this system but, just before they pulled out they used a bioweapon on the planet and rendered it uninhabitable. Confed's blacked out the system and now no one talks about it. This sounds just like Rollins and I chide Vagabond for falling for the story. On the gunnery deck, Hobbes is reliving the times he used to raid this system as a Kilrathi. He's puzzled by the cat's behaviour here and is worried about what I unpredictable Kilrathi might do. I'm a little worried about that myself.
Today's mission briefing makes me eat my words to Vagabond. The Kilrathi are suspected to be launching a bioweapona attack against Locanda 4 with a plague so virulent the only thing we could do would be to fall back. The Victory is to make sure this doesn't happen. Since I expect they'll be using capship missiles to deliver the warhead, I select a Thunderbolt for this mission with Flash as my wingman. My expectation proves to be correct as we encounter a Destroyer escorted by Strakha launaching missiles against the planet. I order Flash to ignore the Strakha and follow me in firing in the Destroyer's engines. I'm unable to kill it on my first pass but Flash puts the final blows in and the Destroyer detonates behind me as I afterburn after the two missiles it released before blowing up. Flash keeps the Strakha busy as I chase down one, then the other, capmissiles in a straightforward tail chase. Once the Strakha are done with we return to the Victory and an excited Rollins. We've struck a major blow against the Kilrathi today.
Just before I land, Captain Eisen comes on the comm and gives me some bad news. Flint has set off to pursue her own private war against the Kilrathi and he wants to know if I can go fetch her. I don't hesitate in replying yes. There's a heavy Kilrathi presence on the way to Flint's suspected location, with many wings of fighters and a Corvette impeding my progress. Finally, I break through the screen and find Flint trying to take out a Fralthi II all by herself in a Longbow. She's got the Darket CAP busy at the moment without putting herself at much risk, so I decide to take out the distracted cruiser. I deliver my torpedo into it's rear where the guns are weakest and follow up with the rest of my IR missiles and guns. The Fralthi is badly damaged and it only takes a more passes before she blows up. I help Flint deal with the last of the Darkets and head back to the Victory. Once there, I try to stay calm with Flint but she reminds me of my duties as Wing Commander. Though we can hardly afford to lose pilots now, I'm forced to ground her before we jump into the Blackmane system.