You are using an out of date browser. It may not display this or other websites correctly.
You should upgrade or use an alternative browser.
You should upgrade or use an alternative browser.
Wing Commander 2 Replay Week 5
- Thread starter Dundradal
- Start date
DaveO
Rear Admiral
Finished flying today. Is it just me, or do Broadswords seem to be asteroid attractors? Like last week, the final mission was one that required three attempts. I guess I still have to work on being a better flyer. Due to the short week, I may have the journal earlier than my previous post.
Lorien
Rear Admiral
Wow, this was a short week.
Enigma 1:
I head to the Observation Deck to hear some terrible news. Downtown is dead, ambushed by 10 Drakhri. Apparently he fought well, but 10 to 1 odds aren't something most pilots can handled. Jazz attempts to console Hobbes by sharing his experience of losing a brother at Goddard. Suddenly his attitude towards me makes a bit more sense. We did all we could to save Goddard but it wasn't enough. Several hours later I catch Hobbes in the pilot's barracks. He regrets never telling Downtown how he loved him as a son. We share the rest of Paladin's kilrathi booze to commemorate Downtown.
The briefing brings more bad news. The Concordia is badly outnumbered in this system. Our escort, the William Tell, was destroyed on her trip out-system. I can't help but wonder if I could have done more to save her. We're going to try a double-jump to get out of the Kilrathi way followed by an extensive repair period without the aid of a dry-dock. The situation is dire enough to pull Angel out of the desk she's been flying and onto my wing. We're to clear the Concordia's jump area.
We definitely picked the right area to jump. There wasn't much resistance on this mission, a couple of Drakhri on the way to the Jump Point and a Kamekh with Sartha escort on the other side. The danger of double-jumping is evident, however, when Angel's fighter jumps too close to mine. I survive the collision mostly intact but it damages Angel's broadsword enough that the Kamekh's flak makes her eject. After the Sartha are killed, I pick Angel up and destroy the Kamekh with a single pass from my guns.
Enigma 2:
The mood on the observation deck hasn't improved much since the last time I was here. Hiding in an asteroid field without power is doing none of us any good. Stingray's feeling very twitchy, all of a sudden the adrenaline rush is getting real, as Jazz points out. We can't afford any mistakes here. Jazz also informs us of some information passed on by a friend in security. Nobody is to enter the communications room unless cleared by the Admiral and that order will be enforced with lethal force. If the mandarin spreads the word of our location now, we're all dead.
Today's mission underscores the need for secrecy. Angel and I are to destroy a Kilrathi Listening Post on the edge of the asteroid field. Taking off in the middle of an asteroid field is a trick I don't want to try too often, though I'm sure the flight directors make sure it's clear before I launch. The Listening Post is heavily guarded with both Drakhri and Jalkehi ready to take us on before we can attack it. It also has a formidable array of defensive guns as Angel finds out. I pick her ejection seat up after the fighters are cleared and put the last torpedo into the listening post. Hopefully the Kilrathi won't match the disappearance of this post with the Concordia's departure from the Tesla system.
Enigma 3:
The pilots all take their minds off the situation with a game of poker in the Barracks. Conversation even turns to what we'll do after the war. I haven't thought much about it, maybe farming? At least I'm better off than Hobbes in that regard. His friends and family are all back on Hhallas and likely won't want to talk to him after the war is over for one reason or another. Maybe Ghorah Khar? Doomsday must be loving our situation, he certainly seems bleaker than usual, though we don't let it drag us down.
The Admiral's plan is revealed at today's briefing and it's as cunning as it is dangerous. The destruction of the listening post has drawn a Destroyer strike out from K'Tithrak Mang. If we can force it to retreat, we can follow it back and launch a strike on K'Tithrak Mang. We set out from the Concordia as the Confederation's best hope for the Enigma sector. Fortunately, the Ralatha only had a light escort of Jalkehi and their removal force the captain to panic and return to base. Angel and I follow it through and put the destroyer down before it can alert the base. Fortunately, this captain didn't think to use his main guns on us. Angel is jubilant as the destroyer goes down. We've turned a retreat into a chance to attack!
Lorien
Rear Admiral
Finished flying today. Is it just me, or do Broadswords seem to be asteroid attractors? Like last week, the final mission was one that required three attempts. I guess I still have to work on being a better flyer. Due to the short week, I may have the journal earlier than my previous post.
I find the asteroids easy in the Broadsword, actually. They're slow enough that your guns play a huge part in clearing the field instead of maneuvering.
DaveO
Rear Admiral
Enigma 1
In the Observation Room, I meet up with Hobbes and Jazz. Hobbes tells me that Downtown is dead, and that he was ambushed by ten Drakhri. Hobbes wonders why he feels the way he does, and Jazz sympathizes and tells him that he felt the same way when he lost his brother on the Goddard colony. I try telling Jazz that I understand why he’s bitter, but he says I don’t really understand his feelings. Hobbes tells me that he’ll be on the flight deck. I meet up with him again later in the barracks, and I ask him if he’s ok since he spent the time on the flight deck just staring into space. Hobbes tells me that even though he treated Downtown like a friend, he really loved him as a son and regrets that he never told this to Downtown. I tell Hobbes that there is still some of the Kilrathi Sukhar May’ya that Paladin brought and that now might be a good time to finish the bottle. In the briefing room, Angel tells us that enemy fighters have been pursuing us for several hours. We must not let them find us since they would bring more reinforcements, and we lost our support from the William Tell which was destroyed after it jumped out of the system. The Concordia will be forced to do a very dangerous double jump. All fighters will be launched to do a patrol sweep after the first jump. Due to the importance of this mission, Angel will be flying on my wing in a Broadsword. After clearing any resistance, the Concordia will jump again to its designated second jump point. At the first enemy encounter, there are a few Drakhri. I take out this wing with just my forward guns. After we jump, Angel and me see a wing of Sarthas along with a Kamekh. It’s hard to tell if I destroyed any fighters with my rear guns since there is flak going off around us. Angel takes down the shields of the Kamekh, and I finish it off with a barrage of guns. I establish communication with the Concordia, and tell it that the jump point is clear. I then give a kill count score for the mission and land.
Enigma 2
I meet Stingray, Hobbes, and Jazz in the Observation Room. Stingray says that there is not much information coming from the bridge but that our carrier is hiding in an asteroid belt. Jazz says that the communications room is under ‘shoot to kill’ orders to keep people out. Stingray wonders why, but Jazz correctly states that we can’t afford to make mistakes since it would mean losing everything. I tell Jazz that we will succeed here, and Hobbes expresses his hopes that I am right. I meet Angel in her office, and she tells me that our mission will be to destroy a listening post just past the asteroids. We’ll be flying a roundabout course to obscure the Concordia’s position. Upon takeoff, I notice the large number of asteroids in my way. I do my best to pilot thru them, but one hits and I lose my side armor. I make it thru the remaining asteroids without further damage. At the next nav point are even more asteroids, but I get thru them without a scratch. We autopilot to the listening post, and there are two waves of fighters that defend it. The first wave are some Drakhri fighters. After destroying the first fighter, I notice that the remaining Drakhri are swarming Angel in an attempt to finish her off. I taunt and successfully draw off one of the fighters, and make short work of killing him. Angel is forced to withdraw from this fight, and I take down the remaining Drakhri. The next wave are Jalkehis, but my forward guns do them all in. My shields are a bit low after this, so I get out of range of the listening post and let the shields recharge. On my first pass, my shields get very low but I again get out of range for the second run. My second torpedo destroys the listening post. I head back to the Concordia, land(though I have no idea how that Broadsword missed the asteroid during the landing), and meet Angel again in her office. She tells me that she was glad to have me on her wing. I tell her that we make a good team, and she says that her trust of me is why we do well together.
Enigma 3
Hobbes, Stingray, Doomsday, and me are playing some cards in the Barracks. Stingray asks if I’ve given any thought to what I would do if the war was over and left military service. I tell him that I’ve not really thought of it since this war has already been going for 40 years without an end in sight. Stingray agrees that it is too early to make plans for things to do if the war ends. Doomsday wins this hand of cards against Hobbes. Hobbes says that we are fortunate to have a home to return to, and that he does not have this option since the Kilrathi would not let him return. Doomsday chimes in that he thinks it is foolish for any of us to have future plans. I ask him why he has such a pessimistic attitude, and he says he’s just being realistic. Hobbes states his belief that the Kilrathi empire can’t win because it is corrupt and decadent. I express my hopes at seeing the defeat of the Kilrathi, and Doomsday thinks I probably won’t live long enough. In the briefing room, Angel says that a strike force has been detected past the asteroids and that we will use one of the Kilrathi Ralathas to lead us to K’tithrak Mang and enable us to find a location where we can strike behind the battle lines. Stingray says that it would be hard not to kill all the Kilrathi, and Angel says that is why he is not on this mission. If the whole strike force is destroyed then there would be no way to locate the base. Our Broadswords will be equipped to track the Ralatha’s destination. Once the destination is located, we’ll finish off the Ralatha and rendezvous with the Concordia at another jump point. Upon launching, I have to get thru two points filled with asteroids. I get thru the first one without a hitch, but at the second point an asteroid hits me and I lose all front armor this time. I let my shields recharge after clearing the asteroids, and we make it to the Ralatha. There is a wing of four Jalkehi guarding it, so I concentrate on those fighters. I destroy all of the Jalkehi, and the Ralatha jumped away during the battle. Angel is able to locate the destroyer, and we jump after it. I see the Ralatha fairly close and peel off to get some distance. Angel distracts the Ralatha, and I make two successful torpedo runs. She again says that we make a good team, and that with this information we can jump into Kilrathi territory and attack their base at K’Tithrak Mang.
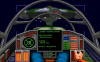
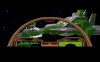
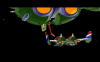
P.S. - I should have screen shots later today including the asteroid landing one referred to by Skanks. I'll include earlier shots of Caernarvon and Niven at minimum.
In the Observation Room, I meet up with Hobbes and Jazz. Hobbes tells me that Downtown is dead, and that he was ambushed by ten Drakhri. Hobbes wonders why he feels the way he does, and Jazz sympathizes and tells him that he felt the same way when he lost his brother on the Goddard colony. I try telling Jazz that I understand why he’s bitter, but he says I don’t really understand his feelings. Hobbes tells me that he’ll be on the flight deck. I meet up with him again later in the barracks, and I ask him if he’s ok since he spent the time on the flight deck just staring into space. Hobbes tells me that even though he treated Downtown like a friend, he really loved him as a son and regrets that he never told this to Downtown. I tell Hobbes that there is still some of the Kilrathi Sukhar May’ya that Paladin brought and that now might be a good time to finish the bottle. In the briefing room, Angel tells us that enemy fighters have been pursuing us for several hours. We must not let them find us since they would bring more reinforcements, and we lost our support from the William Tell which was destroyed after it jumped out of the system. The Concordia will be forced to do a very dangerous double jump. All fighters will be launched to do a patrol sweep after the first jump. Due to the importance of this mission, Angel will be flying on my wing in a Broadsword. After clearing any resistance, the Concordia will jump again to its designated second jump point. At the first enemy encounter, there are a few Drakhri. I take out this wing with just my forward guns. After we jump, Angel and me see a wing of Sarthas along with a Kamekh. It’s hard to tell if I destroyed any fighters with my rear guns since there is flak going off around us. Angel takes down the shields of the Kamekh, and I finish it off with a barrage of guns. I establish communication with the Concordia, and tell it that the jump point is clear. I then give a kill count score for the mission and land.
Enigma 2
I meet Stingray, Hobbes, and Jazz in the Observation Room. Stingray says that there is not much information coming from the bridge but that our carrier is hiding in an asteroid belt. Jazz says that the communications room is under ‘shoot to kill’ orders to keep people out. Stingray wonders why, but Jazz correctly states that we can’t afford to make mistakes since it would mean losing everything. I tell Jazz that we will succeed here, and Hobbes expresses his hopes that I am right. I meet Angel in her office, and she tells me that our mission will be to destroy a listening post just past the asteroids. We’ll be flying a roundabout course to obscure the Concordia’s position. Upon takeoff, I notice the large number of asteroids in my way. I do my best to pilot thru them, but one hits and I lose my side armor. I make it thru the remaining asteroids without further damage. At the next nav point are even more asteroids, but I get thru them without a scratch. We autopilot to the listening post, and there are two waves of fighters that defend it. The first wave are some Drakhri fighters. After destroying the first fighter, I notice that the remaining Drakhri are swarming Angel in an attempt to finish her off. I taunt and successfully draw off one of the fighters, and make short work of killing him. Angel is forced to withdraw from this fight, and I take down the remaining Drakhri. The next wave are Jalkehis, but my forward guns do them all in. My shields are a bit low after this, so I get out of range of the listening post and let the shields recharge. On my first pass, my shields get very low but I again get out of range for the second run. My second torpedo destroys the listening post. I head back to the Concordia, land(though I have no idea how that Broadsword missed the asteroid during the landing), and meet Angel again in her office. She tells me that she was glad to have me on her wing. I tell her that we make a good team, and she says that her trust of me is why we do well together.
Enigma 3
Hobbes, Stingray, Doomsday, and me are playing some cards in the Barracks. Stingray asks if I’ve given any thought to what I would do if the war was over and left military service. I tell him that I’ve not really thought of it since this war has already been going for 40 years without an end in sight. Stingray agrees that it is too early to make plans for things to do if the war ends. Doomsday wins this hand of cards against Hobbes. Hobbes says that we are fortunate to have a home to return to, and that he does not have this option since the Kilrathi would not let him return. Doomsday chimes in that he thinks it is foolish for any of us to have future plans. I ask him why he has such a pessimistic attitude, and he says he’s just being realistic. Hobbes states his belief that the Kilrathi empire can’t win because it is corrupt and decadent. I express my hopes at seeing the defeat of the Kilrathi, and Doomsday thinks I probably won’t live long enough. In the briefing room, Angel says that a strike force has been detected past the asteroids and that we will use one of the Kilrathi Ralathas to lead us to K’tithrak Mang and enable us to find a location where we can strike behind the battle lines. Stingray says that it would be hard not to kill all the Kilrathi, and Angel says that is why he is not on this mission. If the whole strike force is destroyed then there would be no way to locate the base. Our Broadswords will be equipped to track the Ralatha’s destination. Once the destination is located, we’ll finish off the Ralatha and rendezvous with the Concordia at another jump point. Upon launching, I have to get thru two points filled with asteroids. I get thru the first one without a hitch, but at the second point an asteroid hits me and I lose all front armor this time. I let my shields recharge after clearing the asteroids, and we make it to the Ralatha. There is a wing of four Jalkehi guarding it, so I concentrate on those fighters. I destroy all of the Jalkehi, and the Ralatha jumped away during the battle. Angel is able to locate the destroyer, and we jump after it. I see the Ralatha fairly close and peel off to get some distance. Angel distracts the Ralatha, and I make two successful torpedo runs. She again says that we make a good team, and that with this information we can jump into Kilrathi territory and attack their base at K’Tithrak Mang.
P.S. - I should have screen shots later today including the asteroid landing one referred to by Skanks. I'll include earlier shots of Caernarvon and Niven at minimum.
DaveO
Rear Admiral
I decided to post a bit of a remembrance on some of the interesting sites along the way in the campaign. I added a total of 12 new shots to my Photobucket account, so feel free to take a peek at the ones I did not add here in this reply.