Wing Commander 2 Replay Week 4

Dundradal

Frog Blast the Vent Core!
Going to keep this short this week. I'm literally in the middle of moving so if I don't post this now who knows when it would get up.

This week covers the second half of Heaven's Gate as well as Tesla 1-4. This is the 2nd to last week for WC2. We really are moving through! Remember to get some screenshots for Chris and others not playing should really feel free to interject on other's battle accounts. We've got some great stuff in here.
 
Got thru the missions a few minutes ago. Watch out on Tesla 4 though, since those Grikaths at the beginning could be quite problematic. I got 5 out of 6 for the videos. Due to having to fly Tesla 4 a total of three times, I don't feel very bad about missing that last Tesla mission from Fraps.
 
I didn't have any troubles this week, most of the missions I landed without a scratch. It was still a tough week, though. I still find myself a little sniffly after Heaven's Gate 4 :(

Heaven's Gate 3:

The chatter around the poker table revolves around the upcoming assault on Heaven's Gate. Scuttlebutt says that it's going to be very difficult, if not impossible. Jazz is confident about his abilities, though, and I wouldn't mind a crack at it either. I thank Jazz for the assist yesterday and after a little kill-board bickering he says that he'd just finished off a Kilrathi carrier and it's Sartha escorts before coming to assist. A carrier? In an Epee? I find that a little hard to belive.

Spirit isn't feeling well today, so I'm flying today's mission alone. Apparently, the Kilrathi have heard of our plans to take the Heaven's Gate starbase and have brought in heavy re-inforcements. This means that all we can do is destroy the starbase and get out of here. I'm to rendezvous with a supply transport carrying missiles for the upcoming assault. To re-inforce our need for missiles, my Epee isn't loaded with any. I follow the route to the Agincourt and run into a sight only I would find familiar. Kilrathi Stealth Fighters. Fortunately, they're just as fragile as before and blow up even faster under the Epee's particle guns. I take out 7 of them without a single scratch on my paint on the way to the Agincourt. As I admire the lines of the Waterloo-class cruiser a glitch in my flight recorder stops me from receiving the updated Nav Data. I shut it down and head back to the Concordia with the Mama's Boy in tow, dreaming of vindication. My dreams are shattered, though, when I find that shutting down the flight recorder has erased it's data and Angel doesn't believe me. I think half of my anger was at myself for not transferring the proof at the first opportunity, but all of it come out at Angel.

Heaven's Gate 4:

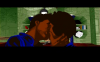
I stalk the hangar deck to clear my head. There's something about the deck operations that soothes a pilot's soul. Spark's is also part of that, I think. Her frank attitude towards me really helps me keep a level head. She also passes word that Spirit is on the O-Deck. On the O-Deck, I find the impossible has happened. Spirit's fiance, Phillip, in alive and on the Heaven's Gate starbase. The traitor was trying to use the knowledge to turn Spirit but by staying true to the Confederation she's betrayed her fiance. I want her to take this to Angel or Tolwyn, but she refuses, saying that she'll deal with it in her own way.

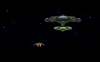
Spirit is delivered a blow a today's meeting. Apparently, the traitor has leaked word to the Mandarins about our attack and there is a large strike fleet moving towards the Concordia. Most of our fighters will be tasked with attacking that fleet which leaves Spirit and I to attack the Heaven's Gate starbase. I try to speak up, Spirit shouldn't be asked to deliver the torpedoes that will kill her fiance, but Spirit keeps me quiet. We're in Sabres for this mission. It feels like the Rapier did back in the old days. A hot fighter with plenty of firepower, torpedoes and a rear turret. It was certainly enough to deal with Rakti BloodDrinker. Spirit and I are heading towards the base when disaster strikes. Something blows up in the rear of her fighter, killing her gunner. I try to get her to return to base but she won't listen. Saying that she'll wait for me in heaven, Spirit rams her Sabre into the starbase killiing it, herself and her fiance all at the same time. I'm not sure if it was grief or rage driving me as the base's defending fighters tried to take me out, but they didn't stand a chance. I return but can't bring myself to leave the repair deck. Again, Sparks helps straighten me out. She also send me to see Angel, who is probably even more sad than I am. She's correct, Angel is focusing herself on everything she's lost to the war, I remind her that she's still got some things left and we kiss. I'm not sure at the moment if bringing our relationship back to life is the best idea but it's just what happened. We certainly need each other's strength to get through Spirit's funeral.

Tesla 1:

Two weeks later, the Concordia jumps into the Tesla system. The time has just flown by and Sparks comments that she hasn't seen me much lately. I'm really coming to appreciate her no-nonsense approach to the situation as she checks to make sure the thing with Angel is for the right reasons and re-assures me about my importance to the Concodia. After all, Tolwyn hasn't sent me home yet.

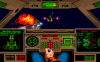
Today's mission promises to be an exciting one. There's a Kilrathi listening post in the system and we're to take it out using the single torpedo on an Epee. Delivering a torpedo run in the fragile Epee will be a challenge, but I'm up for it. No, wait, that's someone elses mission. Instead I get to patrol the system with Stingray. Yay. We set off in our Rapiers to find some Jalkehi in the asteroids, I still don't like dogfighting in asteroids but the Jalkehi like it even less. Nav 2 contains a suprise, a Free Trader being bombed by Grikath. Stingray engages one as I swoop in on another in the middle of a torpedo run. My shots arrive just as the torpedo drops off it's mount and detonate it, taking the Grikath with it. Stingray and I double-team the remaining Grikath with Stingray claiming the kill. The Free Trader turns out to be Paladin's Bonnie Heather and we escort it back to the Concordia. No doubt something big is happening. Angel seems distracted as well, keeping herself busy in her work.

Tesla 2:

Paladin joins Downtown, Hobbes and I for a poker game. I'm suprised at how well he and Hobbes get on, with Hobbes poking fun at Paladin's tale-telling. It seems that Hobbes saved Paladin's life back on Ghorah Khar, which sounds like an interesting tale to hear. I express my worries about Angel to Paladin but he reassures me that she's a good girl and that those who know me know that I'm not using her to get ahead. Lord knows it would a futile gesture with Admiral Tolwyn on board.

I receive a blast from the past today, with Stingray and I called to an emergency launch. Two troop transports have strayed from their convoy and it's our job to take them out before they can get back under protection. Stingray is certainly very keen, no doubt motivated to take out the thousand Kilrathi marines per transport. The wing of Sartha between us the transports barely slow us down and we're working our way through their Jalkehi escorts when Jazz uses afterburners at the wrong time and slams into a cat fighter. Luckily, he managed to eject before his ship detonated. With no cover, the two transports are quickly taken down along with a third one that jumped in mid-fight. Knews the Stingray needed the SAR seems to have shaken Angel, she expresses worry that the mission was too difficult and that every time she sends me out, she is sending me out to die. I hope she doesn't go back into the "never existed" frame of mind.

Tesla 3:

I have an eye-opening chat with Stingray on the flight deck about Hobbes. Apparently, Hobbes supplied likely Kilrathi attack strategies to use during the battle for Ghorah Khar. Without that information, we may not have been able to save the station. I can understand the Admiral's opinion of him now a lot better. Hobbes has also proven to be a reliable and capable wingman.

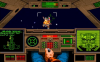
Paladin needs an escort outsystem and, being the gentlemen that we are, Stingray and I offer to give him an escort. Same Drakhri try to stop us but they offer little resistance. After the Bonnie Heather jumps the Concordia contacts us with urgent news. The jump traces that we were to investigate after the Bonnie Heather jumped were the jump traces of two Fralthra bearing down on us. Stingray and I are sent to sweep some of their escorting fighters away. I get a little thrill when the targeting computer identifies one of the Jalkehi escorts as belonging to a member of the Kilrathi Royal Family, Khasra. The last two times we tangoed with the Kilrathi Royal family were Operation Thor's Hammer and the missions in the Firekka system. Both were target-rich environments to say the last. Khasra is a good pilot and his ship seems tougher than the usual Jalkehi but he still falls to my guns. Stingray bugs out after taking one too many hits, leaving me clear out the rest of the escorts. The Broadswords should have an easy time of it when they hit the Fralthra.

Telsa 4:

The O-deck is buzzing with news about the Kilrathi carriers in the system. Jazz's analogy is pretty lame, I have to agree with Downtown but being up against all these heavy fighters certainly isn't good news. Yes, we went up against worst odds in the Firekka mission but there were some hairy moments there that I'd rather not face again. Jazz's warning is a little unusual. Of all the pilots there, I'm the only one who participated for the duration of the Firekka engagement.

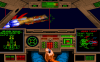
Today's normal patrol are interrupted by a Kilrathi strike fleet moving in on the Concordia. Stingray and I are to take out their advance fighters and then escort the William Tell in a strike on the Kilrathi flagship, a Ralatha. By the time we're in the air, the Grikaths are already swarming. I find that the key to taking out the Grikaths is to wait for them to start their torpedo runs as it makes targetting easier. None of the Grikaths I'm attacking managed to fire a torpedo off but when the battle clears the Concordia has still taken a hit. We escort the William Tell to the Ralatha and being clearing out her Jalkehi escort. Stingray gets a little to close to the Ralatha has to eject. Once the fighters are cleared I make attack runs on the Ralatha hoping to distract it's fire away from the William Tell. It's a close battle, but in the end a salvo from the Tell's forward guns finishes off the Kilrathi capital ship. I escort the Tell back to the Concordia and am instructed to land quickly. The William Tell will be jumping out of the system shortly to try and draw Kilrathi fire. I wish them the best of luck, I know they took some hard hits during the battle.
 
Heaven’s Gate 3
Jazz, Downtown, and me discuss the challenges in retaking the starbase in this sector. Jazz thinks he’s up to the challenge, but Downtown expresses his doubts and Jazz mocks his attitude as being like Doomsday. I thank Jazz for his assist on the previous mission. He thinks he is the best pilot on the Concordia, but I mention that my kill count is higher than his. Since I’ve had a ten year break from combat action, I suspect we’re talking about the Concordia’s kill board. Jazz explains that he took out a capital ship and its fighter escort with the Epee. When I saw him, he had no damage to his ship. That makes him either an incredible, lucky, or lying flier. I meet Angel in her office, and she lets me know that Spirit is ill and won’t be flying this mission with me. The Kilrathi have learned of our plans to take the starbase, and our only option to take it out without heavy resistance is a quick strike. I am assigned an escort mission to retrieve missiles and other ordnance from a freighter and return with it to the Concordia. Angel reminds me that this freighter will be a very tempting target for any Kilrathi patrol. I launch in my Epee and head on my designated patrol points. At the first nav, more intermittent blips show up on my radar. More stealth fighters come against me three strong. I don’t take out any of the fighters directly on their first pass, but the second one gets a little too close and kamikazes into my ship. I lose front and aft shields along with the armor. This is not a promising beginning to start a fight. I keep my composure and eliminate the remaining two fighters with my guns. On the next enemy encounter, there are five more of these stealth ships. I do some damage to the first two fighters, and take out the third on the first pass. On the next run, I manage to take down one of the fighters while it is still cloaked. I turn on another fighter near the destroyed debris, and gun him down very quickly. The remaining two decide to make a better effort to kill me. I take a missile hit and lose my front shields again, but I manage to take down yet another fighter. The last one tries to make another hit with a missile shot but he misses his mark. I destroy him before he can launch another missile. I autopilot to the Mama’s Boy freighter, and wait for it to send me nav data for the trip back to the Concordia. I get a technical glitch in my ship and am forced to shut down my flight recorder. I ask the freighter to resend the nav data. I return to the Concordia without further fighter intercepts. I meet Angel again in her office with my second tale of seeing the stealth fighters. Angel again refuses to believe my story, and I tell her that my ship is all the proof she needs since I could not willingly damage my own fighter. The flight recorder is blank due to my shut down of it. Angel has a point when she states that no other patrols have run into these ships. She tells me to come back if I have a better story. Piecing together the two stealth fighter encounters, I realize that somebody must be communicating some of my patrols to the Kilrathi. That would explain the stealth fighters, the aces I’ve run into, and some of the heavy opposition. The mystery to solve is to figure out who has the best motive to cause all of the sabotage and murder somebody.

Heaven’s Gate 4
I meet up with Sparks in the hangar bay, and she recognizes that something is bothering me since she has seen other pilots do the same stalking of the bay. I explain that Angel thinks I’m crazy, and I express my belief that I’m reasonably sane considering my occupation. Sparks tells me to not worry too much about Angel’s opinion since she’s under a lot of pressure. She also says that everyone’s in the pressure cooker with the traitor loose. Sparks tells me that Spirit said that she would wait for me at the Observation deck. I do manage to meet here there before she leaves. She tells me the incredible news that her fiancé Phillip is still alive. This was the lure to try to make Spirit betray the Confederation by returning Phillip to her. Spirit explains that the data pod I retrieved had the proof that she would not switch sides. A virtual hammer blow hits me when she says that Phillip is on the starbase. I urge her to talk to Angel or Tolwyn about this, but she says that she does not want to share the burden of this knowledge and will handle the situation in her own way. She begs me to not tell anybody else of this. Spirit and I meet in Angel’s office, and she explains that the Mandarin leak about our plan of attack has brought a large strike fleet. By doing this though, Heaven’s Gate is undefended. Stingray, Jazz, and Doomsday are to fly against the strike fleet while Spirit and I go for the station. Angel tells us to save our missiles for the starbase since our guns won’t damage it. Angel also gives us the warning that ejection will mean that search and rescue won’t be able to recover us. I attempt to tell Angel about Spirit’s dilemma, but she interrupts me on each try and says that she is ready to fly. Angel asks me if there is a problem, but due to my promise to Spirit I let the matter drop. On our first enemy encounter, there are a few Sartha but they are completely outclassed by the Sabers we are flying. Upon our approach to the starbase, an explosion rocks Spirits’ ship. I tell her to bail out due to the damage, but she says she will wait for me in Heaven. Spirit takes her ship to full afterburners and kamikazes into the starbase killing herself, Phillip, and hundreds of Kilrathi. I don’t have the luxury to mourn with a wave of Jalkehi coming in. I destroy one quickly during the first pass. I stick on a second and continually give damage to the fighter. It also is destroyed, with a pretty close call from a missile shot. The final fighter tries to keep his rear in my direction to employ his turrets. I take a few hits, but not enough to get thru the shields and do damage. The fighter goes up in a ball of flame from well chosen shots. Several Drakhri fighters come in the next wave. The first two are destroyed without issues. The next one manages to launch and hit me with a missile. I destroy him without more damage. I take some damage from the remaining fighters but they too are destroyed. In perhaps a sense of irony, I noticed that my ejector system had taken a hit. I land on the Concordia, and Sparks tries to console me about the loss of Spirit. I explain my helplessness in watching her ram into the starbase and knowing that I could not save her. I tell Sparks that I’ll never forget her farewell to me. I also tell her that I knew about Phillip being on the starbase before we flew the mission, but that I did nothing to stop Spirit. Sparks says that she has seen other pilots besides Spirit not wanting to return. Sparks tells me that I should talk to Angel since she was very upset by the news of the loss of Spirit. I meet Angel in her office, and she tells me that she feels so much from the losses caused by this war. Angel has seen so much loss that she feels that there is nothing left to give of herself. I tell her that I’m still alive, and I don’t intend to leave. We both share a long and passionate kiss. During the funeral services for Spirit, Angel says that Spirit lived and died by her own code. The loss of Spirit is going to be an emotional black hole for both Angel and me for a while.

Tesla 1
I meet Sparks again in the hangar, and she points out that I’ve not been in the hangar as often as usual. I explain that I’m busy, but Sparks knows of my romance with Angel and she sees nothing wrong with it as long as I’m not using Angel to advance my career. I tell Sparks that I would never take advantage of Angel, and that I still believe that Tolwyn is determined to not let me have a long career. Sparks does point out that the Admiral has had a number of chances to send me but has not done so. Even though Tolwyn does not want to admit it, I’m a good enough fighter pilot to keep around. Sparks reminds me that I’m very needed for the upcoming action and to relax. She tells me some good news about marines retaking the Niffleheim system. This was one of the sectors hit back when we were in Novaya Kiev. I express my relief that it looks like a chance again in this fight with the Kilrathi. In the briefing room, Angel almost gives me an assignment to take out a listening post. She changes her mind and gives me a standard patrol sweep mission with Stingray. I ask to see her in her office, and I ask why she is doing this to me since I feel that I can do the listening post mission. Angel explains that if she gives me the choice missions, the other pilots will talk and believe that my relationship with her is the reason I get those missions. Angel has already heard some grumbling about us, and I ask her if she really cares about these other opinions. She does not answer my question, and sends me off to the hangar where Stingray and my own fighter have been waiting. The first enemy encounter is a few Jalkehi in an asteroid belt. I take serious damage to my front armor, after I get a bit careless and run into one of the Jalkehis. Stingray and me destroy the remaining two Jalkehis with guns. Another asteroid belt is at the next nav point. I take the far safer approach of going full speed thru the belt instead of using afterburners. I autopilot to the next nav point, and there are two Grikaths trying to do some damage to Paladin’s Bonnie Heather. Stingray and me even up on the trashed Kilrathi fighter count here. We both safely escort the ship back to the Concordia, and I land. When I enter Angel’s office, I tell her the action at each of the nav points. She expresses her relief that I came back unharmed, and I invite her to the Observation deck. I tell her that Paladin will be there, but she tells me that she will be too busy. Angel says that I should definitely go see Paladin without her. I ask if there is something wrong, but she says that nothing is bothering her.

Tesla 2
Paladin is relating one of his flying stories to Hobbes in the barracks. Hobbes has heard this story a few times before, and he tells Paladin it gets taller with each repetition. Paladin takes some offense at this, but Downtown tells me not to worry since they always go on like this to each other. I express my surprise that Paladin and Hobbes are getting along pretty well. I deal a hand of cards, and Paladin tells me that Hobbes saved him at Ghorah Khar. Hobbes says that he had nothing better to do at the time. Downtown wins this round of cards, and Paladin asks me if there is something wrong. I tell Paladin that Angel seems a little distracted, and Paladin tells me not to worry since Angel is not one to have a problem with thinking straight. I tell Paladin that some people think I am using her, but Paladin rightly tells me that those who know me well would not think that way. Paladin does point out that Angel is a good pilot as well as attractive and that I’d be a fool to let my relationship with her slip away. Hobbes expresses his wonders on why he saved Paladin, and he tells Hobbes that it is because of his way of seeing a person’s character. Paladin says that I have this same trait and to follow my heart. Upon takeoff on my next mission, Stingray and me receive a communication from the Concordia. We are to destroy two Dorkathi troop transports that have been detected. Apparently, those transports left their capital ship protection for some reason and we’re to make sure they won’t rejoin the convoy. Stingray is quite gung ho about going after the transports, and the Concordia tells him to keep his enthusiasm under control. Since each transport has the capability of holding a thousand troops, any that we destroy will mean less resistance for the marines. The Concordia communicates that these transports should have fighter protection, but we are to eliminate the transports at all costs. After completion of the destruction of the transports, we are to rendezvous with the Concordia. Our first wave of Kilrathi are Sartha fighters. I kill all of the fighters here, and even a missile hit from one of the Sarthas is not enough to damage me. At the next enemy encounter, there are four Jalkehis guarding the two transports. The first one goes down, but not without some front and rear armor damage. While pursuing a second, my shield generator takes a hit. It is damaged enough that I have only have enough to take one hit from the rear turrets. A direct hit with those forward guns would surely finish me off. I take one hit, and the eject warning comes up. I steadfastly ignore it and eliminate the second fighter. Stingray destroys one of the transports, but is forced to eject. Two fighters and one transport with little for shield defense is not good for my odds of survival. I decide to use my missiles here since I’ve little left to lose and desperately need anything to quickly take out the remaining two fighters. Each fighter takes one missile hit each, and I destroy them both without more damage to my ship. I approach the remaining transport, intending to use one of my Darts against it. Unfortunately, I take too much damage and lose the missile and a gun and get another eject warning. Down to two guns, I approach the transport from the rear. I successfully destroy the transport, but I’ll be forced to afterburn if there are any Kilrathi on my return trek. I return to the Concordia without another enemy encounter, and Angel greets me in the hangar. I tell her of the enemy encounters and that this was a tough mission. Given how long that Rapier is going to be worked on to get it fully functional, I had some luck in getting thru this mission alive. I’m sure Sparks isn’t going to be happy with the extensive repairs on the Rapier but I may be surprised at how quick that ship will be ready for action again. Angel says that it was a very difficult mission and that she should not have sent me. I tell her that I’m alive, which is what matters most. Angel expresses her concern that each mission she sends me on might be a death sentence.

Tesla 3
In the Observation room I meet up with Stingray, and he berates himself for thinking that Hobbes is the traitor. I tell him that we all have reasons to hate the Kilrathi. Stingray says that Hobbes has given intelligence on the probable attack plan for Olympus. Without this vital information, the Kilrathi would have likely taken Olympus already. Stingray wonders if there are other Kilrathi like Hobbes. I tell Stingray that after seeing the destruction of Goddard by the Sivar, I felt that all Kilrathi were evil and that we should kill them all. I express that I don’t feel that way any more due to Hobbes, and Stingray hopes that perhaps one day we will find peace with them. I remind Stingray that for the moment, we are still at war with the Kilrathi.
In another sector, Prince Thrakath tells of his desire to lead warriors into combat. Thrakath feels shame at the continual news of the glories and honors that Khasra is receiving. The Emperor reminds him that Thrakath’s father also sought glory with the raid on Goddard by commanding the Sivar. This ambition caused the loss of an entire strike fleet, and the Emperor explains that failures like that are unacceptable regardless of rank or family. The Emperor gives Thrakath permission to go back into combat action, and mentions that Khasra’s next challenge will be against the Concordia where he may find the glory he is seeking. The Emperor says that if Thrakath fails like he expects Khasra to, then one of fifteen cousins will be the next heir to the throne.
Back on the Concordia, Angel gives Stingray and me an assignment to escort Paladin out of the system. I tell Angel that I would hate to see Paladin try to defend himself in the old Bonnie Heather. Paladin says it’s a ‘classic’ design, but I suspect that part of the appeal might be due to the ship being almost as old as Paladin. After leading the Bonnie Heather to its jump point, we are to investigate a possible jump trail left by the Kilrathi. I tell Paladin that I do hope to see him again, and Paladin says that he’d bet on us meeting again. Upon launch, we head out towards the jump point. Our first Kilrathi wave are Drakhri, and I make very short work on the first fighter. The others give a good pounding to the Bonnie Heather, but Stingray and me eliminate the other fighters. At the jump point, I establish communication with the Concordia and I’m informed that two Fralthra with a fighter escort have jumped into the bogey area Stingray and me were about to investigate. We autopilot to the area, and see the Fralthra and four Jalkehis. One of them identifies himself as Khasra. I concentrate again on the little ‘kittens’ before taking on the big cat. I destroy two of the Jalkehi with minor armor damage. Stingray calls out that he’s retreating due to damage, but Khasra shoots him down and Stingray ejects. I concentrate on the remaining kitten and destroy him as well. Khasra takes advantage of this focus, and causes some rear armor damage. I turn my full attention to him with only the flak shots from the Fralthras being an easily ignored deterrent. His ship has better shields and armor than a regular Jalkehi, but I shoot him down without taking any ship damage. Upon arriving back at the Concordia to land, I get a communication that some Broadswords are being sent to take down the Fralthras. I hope that the Broadswords don’t take long for Stingray’s sake!

Tesla 4
Downtown, Jazz, Hobbes and I discuss the increasing presence of Kilrathi in this area. Downtown states the obvious about us being outgunned and outmanned here. I explain that this situation is somewhat similar to missions I participated in to liberate Firekka. Jazz has to keep rubbing my nose in my disgrace from the Tiger’s Claw incident. Downtown is not concerned about an operation that happened ten years ago, and explains that the incoming carriers are likely to be defended by heavy fighters. Jazz warns me to be careful, or I won’t likely return from this mission. During the briefing, Angel is almost finished handing out mission assignments when she gets an emergency communication from the bridge. She explains that there is a large strike force of fighters and a capital ship heading our way. The mission for Stingray and me is to intercept those fighters and escort the TCS William Tell to take out the capital ship. Angel reminds us that this will be a dangerous mission and that all fighter wings are to guard the Concordia against attack. Upon launch, there are four Grikaths looking to make short work of our fighter defense as well as the other ships. Stingray and me work well together to eliminate the fighters. We then pick up the William Tell and go on to the next enemy encounter. There are four Jalkehis with a Ralatha. During the fight, Stingray is forced to eject but not before I take down two of the Jalkehis. The remaining two try to make a harder fight for me, but Jalkehis are not as maneuverable or dangerous as Grikaths. The William Tell engages the Ralatha, and destroys the ship with its guns. Upon my landing approach to the Concordia, I give an account of the action and the kill counts. Concordia tells me that the William Tell is jumping out in an attempt to draw away the Kilrathi.

P.S. - I'll be able to upload more screenshots and post into this thread tomorrow. I'll also endeavor to fly better since Lorien managed to get thru the whole series without too many troubles.
 
I figured out a slightly better method of getting the screen shots from Virtual Dub. Five more pictures of various scenes in the missions.

P.S. - My Photobucket account has multiple folders besides WC2 screen shots, so anybody is welcome to take a look at those too.
 

Attachments

  • WC2_Angel_Love.PNG
    WC2_Angel_Love.PNG
    70.4 KB · Views: 88
  • WC2_Classic_Design.PNG
    WC2_Classic_Design.PNG
    17.4 KB · Views: 150
  • WC2_Close_Call.PNG
    WC2_Close_Call.PNG
    97.2 KB · Views: 91
  • WC2_Khasra.PNG
    WC2_Khasra.PNG
    16.7 KB · Views: 97
  • WC2_Spirits_End.PNG
    WC2_Spirits_End.PNG
    39.6 KB · Views: 96
Thanks for the screen shot comments! They're not in sequential order, but it gives people the added incentive to figure or find out which missions they are from.
 
What we need is some wingmen for you! Where is everybody that wanted to join the replay? I want to try and jump back in but schoolwork has me swamped.

Don't leave these guys hanging out there alone wingnuts!
 
Hey, it's ok if there only a few right now doing the replay. I completely understand schoolwork taking top priority. I'm well past that stage, but I've recently decided to get back into shape. It's a challenge with my multiple time commitments with work, leisure time, and now exercise. It leaves a bit less leisure time, but my body has given me several warnings so for my long-term health it is important to make this commitment now.

Perhaps with the enthusiasm of this group we might be able to recruit some more people to join the fight. Or there could be a huge throng once we reach the Windows friendlier versions of Wing Commander. Besides the next two weeks are the short ones, so perhaps a few others might catch up.
 
We've still got a few months before we hit WC3. Which reminds me I need to "jump" ahead a bit and breakdown the weeks for SO1 and SO2.
 
I figured out a slightly better method of getting the screen shots from Virtual Dub. Five more pictures of various scenes in the missions.

These are noticeably better, thanks. Another good thing to shoot for would be all the diverse locations shown in cutscenes.
 
Thanks for the suggestion. I could post another reply with the landing points. Caernarvon, Concordia, and Niven are good locations. Again, to re-emphasize that since I've also been recording videos along the way, anything that is part of that mission I could post as a shot too.
 
Landing points are cool. There are also a number of somewhat more rarely seen backgorund areas in more of the plot-oriented cutscenes.
 
Back
Top