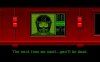
At the trial of ‘Jazz’, Admiral Tolwyn is showing a flight recorder replay of my defeat of the traitor. With this evidence against him, the military tribunal has reached a verdict. ‘Jazz’ is found guilty of murder and high treason, and his sentence is death. ‘Jazz’ thinks history will be the judge of whether he is a hero or villain, and he’s confident that the Kilrathi will be writing this history. Tolwyn certainly despises this response and orders the guards to get ‘Jazz’ out of his sight.
Somewhere in Confed space on a Waterloo cruiser…
A Mandarin is telling a Kilrathi contact that the Morningstar project is nearing its final stages of prototype testing. A squadron of test pilots is being transferred to the Concordia for this testing. The Kilrathi emphasizes that he MUST have the Morningstar, and asks the Mandarin to obtain one even if it means killing people to get it. The Mandarin answers, ‘Preferably.’
Canewdon 1
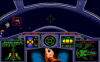
On Akko station outside the Deneb sector, I’m climbing into a Rapier for a patrol. On takeoff, the station relays a communications message that I’m to escort the prison ship Bastille to rendezvous with the Alcatraz prison ship. The Alcatraz will be taking ‘Jazz’ back to Earth for his execution. I express my pleasure in being able to assist ‘Jazz’ in getting his just rewards for his traitorous acts. Akko station asks me to return to the Concordia after the escort is complete. On my way to the prison ship, I receive a communications message that two Confed freighters are under attack AND the Bastille has been taken over by the Mandarin. The Mandarins are trying to activate the jump drive to escape. I head after the Kilrathi welcoming committee, which consists of four Jalkehis. I drive off and damage one enough for flak from one of the freighters to finish him off. I go after a second Jalkehi, and pummel him to particles with gun blasts. I set my sights on a third Jalkehi, and shoot off a Friend-or-Foe missile to keep him or his buddy busy. I stick on that fighter, and he tries to run after taking too much damage. I let him have it while dodging shots from his rear turrets. I head for a fourth Jalkehi, and he’s certainly doing his best to keep his rear turrets shooting at me after a frontal pass. I shoot another FF missile, and it nicely does its job of blowing the Kilrathi to bits. I make sure that the freighters look ok, but I also notice that the Bastille is long gone. I head back for the Concordia, and make a landing. I’m notified that the Admiral wants to see me immediately. Tolwyn wants to know how ‘Jazz’ could have escaped. I tell him that I could not leave the freighters undefended, and I could not have anticipated what happened on the Bastille. The Admiral assures me that nobody is blaming me for what happened, but he is concerned due to a broadcast made by ‘Jazz’ before his escape. Tolwyn insists that I need to hear the transmission now, and I see ‘Jazz’ saying that he is ‘touched’ by my escort. ‘Jazz’ brags that I was lucky on our fighter duel, and that the next time he’ll shoot me to shards.
Canewdon 2
The Emperor is having a heated meeting with Prince Thrakhath. The Emperor wants to know why the Prince attacked civilian targets, and Thrakhath explains that the civilian attack was done after demolishing the Confed 6th battle fleet. These civilian casualties are meant to remind Confed of what will happen with each Kilrathi victory, and also this suffering is meant as a tribute to the Emperor. The Emperor is touched by this tribute and asks for any other news. Thrakhath tells the Emperor of the escape by ‘Jazz’, and the Emperor wants the Prince to use ‘Jazz’ in obtaining the Morningstar. After the next Mandarin meeting, Prince Thrakhath will report to the Emperor again. The Emperor reminds him that fear is the most important Kilrathi weapon of this war, and to use this weapon well.
The Concordia makes a jump in Canewdon, and Angel is giving a briefing on the situation. Currently, the location and status of any Kilrathi here are unknown. I’ll be flying a standard recon patrol with Stingray on my wing. Angel tells us to engage the enemy with caution so that we can return to report what we’ve found. I launch in a Rapier, and we head off on the patrol. At the first nav point, there are Gothri fighters here. It will be interesting to see how the Rapier fares against them in comparison to the other Confed fighters I’ve tumbled against Gothris with. The first Gothri fighter I pick to chase makes things a little interesting, but the Rapier’s maneuverability and firepower take care of him after repeating barrages of guns. A second Gothri fighter I go after is destroyed much easier than the first one was. A third Gothri is also taken care of quite easily. Stingray and I head off to the next nav point. I see several Sarthas on the scope, and I cut Stingray loose with orders to break and attack. I switch between targets and find a good one to go after. Only a few gun barrages take down the first Sartha. I set sights on and pursue a second Sartha. After a few stray shots, I get him lined up and destroy his fighter with only a few hits as well. The third Kilrathi Sartha I go after is a bit hardier than the other two, but he proves no match for me. I pick and choose the final Sartha, and take him down with little effort. Stingray decides to get aggressive, and go after a Dorkathi transport. Knowing how deadly friendly fire can be to my fighter, I let Stingray have his transport kill. Stingray says the transport went up like a tinderbox, and I admire the nice explosion from his efforts. I can see his Rapier sparking a bit, so it looks like his focus on that kill led to valor overriding discretion. On my way back to the Concordia, we run into more Gothris lurking in an asteroid field. Dogfighting in this dangerous area will certainly be a challenge. I keep focused on one Gothri, and let loose with a FF missile. Those Gothris are trying to return the favor with two missile shots against me. I manage to lose both missiles in the asteroid field, and I’m not sure if mine hit an enemy fighter. I finally destroy my targeted Gothri, and choose another Kilrathi fighter to go after. During the pursuit, I definitely notice that fighter bounce off the asteroids. His fighter can’t be in good shape now, so I keep up the gun barrage. He finally decides to try taking off, but I head after him. I engage afterburners to keep him in sight, and get clear of the asteroid field during pursuit. Blasts from behind eliminate that Gothri, and it’s time to make my return to the Concordia. Upon landing, the techs are overjoyed at my pristine Rapier which came back without a scratch. I mention to Sparks my admiration over the fuselage of the Sabre, and she mistakes my comment for talking about her. Sparks says that the new Morningstar will certainly be a sight for my eyes. I ask her what this ship is, and she tells me that it is supposed to be a new fighter that will be put on the Concordia for shakedown. I ask Sparks where she heard this news, and she just says that she knows what to listen for. Sparks asks how I did on the patrol, and I tell her of fighters and transport we ran into. I say that it does not feel to be enough to make up for losing ‘Jazz’ to the Mandarin. I express that I wish that I had killed him when I had the opportunity. As the saying goes, be careful what you wish for because you may get it.
Canewdon 3
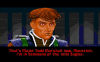
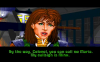
On the landing bay, I see a sight that I’ve not had for a long time. Maniac is here on the Concordia! Maniac tells me of his rank of Major as well as the news that he is now in command of a squadron called the Wild Eagles. Maniac says his group has the hottest pilots in the galaxy, and their mission is to put the Morningstar thru its paces. He arrogantly says that maybe he’ll let me watch as they punch a hole in the galaxy. I’m a bit impressed at how Maniac makes the Morningstar seem to be the sure thing to win this war in plenty of time to have lunch. On the bridge, Admiral Tolwyn tells us that one of Maniac’s squadron members did not make the jump in the Morningstar. Maniac says that this ship had jump problems before, but they were supposed to be fixed before the Morningstar left on its patrol. The Morningstar does not have the capability to rescue ejected pilots, and Maniac thinks this pilot is certainly lost. I tell the Admiral that I know there is a Sabre ready on the flight deck and volunteer to rescue the ejected pilot. Maniac also wants to fly the Sabre, but Tolwyn does not think Maniac is a good rescue choice since he made the mistake of losing track of a member of his squadron. I take off in the waiting Sabre, and Stingray is along to help out. We both spot Grikaths in an asteroid field looking to delay the rescue. I stick with a targeted Grikath, dodge a few asteroids along the way, and then pound his fighter to particles. I take on two Grikaths flying a close formation, and one goes down to multiple gun barrages. The other one I also take care of with focused flying. Stingray makes a kill as well on the remaining Grikath. Knowing how dangerous using afterburners in the asteroids can be, I go to full throttle and thread my way thru this hazard. At the next nav point are Drakhris, and I engage the fighters. The first one crumples easily, and I take on a second. I lock on to that fighter and shoot off a missile. The Drakhri releases a chaff pod, but it is not enough to save his fighter from being hit and destroyed. I go after a third and also shoot off a missile against the fighter. He tries to get away, but my barrages of gun fire keep him slow enough for the missile to finish off the fighter that was weakened by my guns. I see the ejected pilot on my scope and do the standard retrieval process by getting very close and using my tractor beam to bring them in the hold of the Sabre. I head back to the Concordia, and there is not much danger from going back thru the asteroid field. I land on the Concordia, and talk to the ejected pilot. She thanks me for rescuing her, and I tell her that I was glad to help. The pilot says that thanks to the self-destruct on the Morningstar that activated on her ejection, the fighter did not get into Kilrathi hands. She then introduces herself as ‘Minx’, and I ask her what went wrong with the jump drive. ‘Minx’ tells me that the engineers have not yet traced down the cause of random jump failures with the Morningstar. I express my sympathies for ‘Minx’ having to deal with these gremlin problems. Despite Maniac’s claims, the Morningstar is not quite ready for prime time on the front lines.
Canewdon 4
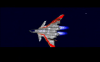
I meet Maniac in the Observation lounge, and he’s telling the story about how he got the two capital ships to collide. He asks if I ever heard the full story, and I tell him that I did hear that news. After this mission, Maniac was promoted to Major. Maniac was given a chance to become a Colonel, but he turned down that promotion to command the Wild Eagle squadron. I ask Maniac what his squadron is all about, and he says that they are elite pilots who have been given the challenge to fly like he does and survive. I find it a bit hard to believe that Confed would approve another fighter squadron to head down the same road that ‘Knight’ took way back before he joined the Tiger’s Claw. ‘Knight’ was a pretty aggressive risk-taking pilot nicknamed as ‘Ripper’ due to the body count that occurred when other pilots tried the same tactics. Maniac says that this fighter squadron may be the model for other pilots to emulate in the future too. I try telling Maniac that he can’t believe everything he hears, but he’s so full of his abilities that he specifically requested the Morningstar to be built according to some of his specifications. He thinks that this new fighter design will be a very successful fighter that may even be used longer than the Scimitar. The Morningstar also has special capabilities that Maniac can’t tell me of. He assures that I’m watching history in the making, and I can only cringe at the almost certain crash landing Maniac will have to endure to his ego. I meet Angel in her office with Maniac, and she wants me to accompany a Morningstar on a test jump. My ship will have a jump recorder to give the engineers more data that may correct the problem. Angel wants ‘Crossbones’ from the Wild Eagle squadron to fly the mission, but Maniac insists on flying the Morningstar since he would rather have something bad happen to him first. Angel agrees to let Maniac take the Morningstar on the test jump. I’ll watch him jump out at nav point one, do a standard patrol, and return to the Concordia. I take off and rendezvous with Maniac at the first nav point. I happen to get a good look at the Morningstar, and it certainly looks to be a bit like the Sabre. The whole thing looks like a combination of a rocket for the front part, and a Sabre for the rear half. After Maniac jumps out, I head off on the rest of my patrol. At the second nav point, I get a message from a Kilrathi ship called the Gamal Gan. The captain of the ship says he came from Khallas, and is having severe engine problems. He says his ship is unarmed and surrenders. I communicate with the Concordia to ask them what to do with this ship. Major Edmond tells me that I’m to leave the freighter alone while a patrol heads out to retrieve it. I go off to the next nav point, and see that there are five Jalkehi fighters here. I target the lead of the group and go after him while dodging his buddies. I do a glancing blow by running into his ship with mine, but the shields take the damage. I continue my pursuit, and take that first fighter down. I go after a second, and the other kitties are certainly trying to kill me with multiple missiles launched after my ship. I manage to evade one, but another does some damage to the starboard and rear armor. I use afterburners to keep the other kitties off of me, and I eliminate a second Jalkehi. I go after a third, and it’s quite fortunate that the other two playmates are bad shots. They do narrowly miss my Sabre, and another Jalkehi is wiped out. I go after a fourth fighter, and he does a little damage to my forward armor before joining his litter mates in oblivion. The final Jalkehi takes a little positioning thru afterburner thrusts, and his fighter is blown to bits by my barrage. I head back to the Concordia, and land without further fighter encounters. I meet Admiral Tolwyn in his office, and he congratulates me on assisting in the capture of the Kilrathi freighter. The crew was rescued and the ship was searched. Whatever cargo the ship was carrying was jettisoned into the sun, and the ship logbook is a total forgery. There was one important discovery on the ship though. It was carrying a human crew member, and I think that he must have been captured and forced into slavery. The Admiral tells me that this crew member was a Mandarin working with the Kilrathi. The Mandarins have also changed their tactics from pacifism to treason and now aggressive collaboration. Confed now has proof that the Mandarin are getting assistance from the Kilrathi. I tell Tolwyn that the Mandarin must be stopped.
P.S. - Is it my imagination, or did Wing Commander 4 make a clever reference with Maniac's line of, "You're either an earthworm or an eagle"?