K’tithrak Mang 1
The Concordia jumps into the system, and I meet Jazz, Stingray, and Doomsday in the Observation room. Jazz says the obvious that we’re now in Kilrathi territory. I tell the others that I’ve been here before but the stealth fighters changed what should have been a victory into a defeat. Jazz says my stories about the stealth fighters are like a child’s belief in Santa Claus. Stingray express his hopes that the Concordia will fare better then the Tiger’s Claw but he also thinks the more probable outcome is our destruction. Doomsday thinks Stingray’s negative attitude is being realistic. Jazz believes the Admiral is smart enough to find the traitor, and hopes their cover is blown before more people die. In the briefing room, Angel re-emphasizes that we are in Kilrathi territory in an effort to take out the strike fleet base in this sector. Not having any backup means that we can’t afford to fail any missions here. Angel reminds all of us that an attempt was made to destroy the K’tithrak base by the Tiger’s Claw which ended in its destruction. Angel expresses her firm belief that we will succeed since the alternative would mean the Kilrathi getting within strike range of Confederation home worlds. Other pilots are assigned patrol sweep missions to assist in our goal of reaching the base undetected. Angel gives me and Jazz a mission to intercept a Kilrathi Ralatha destroyer. She warns us about the likely heavy fighter defense for the destroyer. After eliminating the destroyer, we will rendezvous with the Concordia. Angel correctly says that the Sabre I’ll be flying in is the best Concordia fighter with excellent weapons and armor. The Sabre does outclass the Raptor since it can carry torpedoes and has rear turrets, but the guns on the Raptor were better in my opinion in comparison to the Sabre’s. Jazz promises to not let me get into too much trouble, so I hope he stays true to his word. We both take off in the Sabres and autopilot to the Ralatha. Looks like there are four Drakhri Jalkehi providing cover for the destroyer. The armor and shields on these fighters are beefed up in comparison to normal Jalkehis. I take out the first two Jalkehi while receiving frontal armor damage. While pursuing and working on the third, Jazz sends a communication that he’s returning to base. So much for his help here, and while Jazz begins his return trek I ice another Jalkehi. My scope is showing two remaining targets, but I’m not certain which one is the destroyer. I keep my eye on the radar, and see the remaining lone Jalkehi coming in hot to avenge his comrades. He tries to kill me on his first pass with a barrage of guns and a missile. The guns miss, but the missile gets thru the shields and damages my communication system. That final fighter goes down faster than the others, so I wonder if his friends or Jazz did some damage. I get just within range of the Ralatha, go to zero throttle, and wait for my torpedo to acquire a lock. A few moments before lock, I turn up the engines to full throttle and then afterburn a bit on my run towards the destroyer. The first torpedo shot hits, and I again afterburn a time or two to get out of range of the flak and provide some distance in case they decide to shoot at me with those anti matter guns. I do the same thing on my second torpedo attack, and launch at close range. I watch the fireworks of the Ralatha’s destruction and head back to the Concordia. Upon approach, I get a communication that they need assistance. Three Grikaths are doing attack runs on the Concordia. I get behind one and let him have it with a full barrage of guns. He manages to get one return shot that hits me, but it’s not enough to do more damage. It takes a few moments to locate my next target, and I approach him from the front. Fortunately, he’s gunning more for the Concordia than me and his fighter goes up in a ball of flame. I notice a missile or torpedo launched from that Grikath, but it’s up to the Concordia to take care of it. Due to my distance it is hard to tell if the sole Grikath left is either pummeled by the Concordia’s flak or he kamikazes his ship into the Concordia. Upon landing, I meet up with Sparks in the hangar. I tell her that Jazz and I took care of the destroyer, but she wonders why Jazz did not get any kills on this mission. She also expresses her hopes that the other patrols did their jobs in keeping the Kilrathi from spreading an alert that we are in their system. Once the Kilrathi know that we’re here, they’ll send everything they have against us so the longer they are in the dark about our activity the better our chances of success.
K’tithrak Mang 2
I meet up with Jazz in the Observation room. He wonders if my relationship with Angel is why he does not see me more often. I tell him that even though I know that he does not like me, our duty is to work as a team and he should watch his remarks. Jazz says that he’s trying to take his mind off from our dangerous situation with a little humor. Jazz correctly states that it is only a matter of time before the Kilrathi learn that we are here, and that they won’t lose the base without a fight. In the briefing room, Angel explains that we’re readying for the final assault on the base. Our mission is to sweep some asteroids for fighters. Jazz does not want to be on this mission due to what happened with the Tiger’s Claw, but Angel forces him to fly with me. We are to patrol four nav points to make sure our approach is clear. At the first nav are just a bunch of asteroids that I go thru at full throttle. At the next nav point, those now familiar blips are on the radar: Kilrathi stealth fighters! Jazz and I engage them, but they’re really no match for the firepower of two Sabres. I take out two of them with little damage, and harm a third. Jazz pursues that ship and blows it into kitty litter. The next nav has more asteroids, and I get thru without a scratch. At the final point, I see five targets at far distance not yet on the scope. More stealth fighters. They manage to swarm around and do a bit more damage to my ship, and I get one with the others bugging out from the fight. I head back to the Concordia and land. I go to Angel’s office with the news and proof that the stealth fighters do exist. Angel finally believes my story, and will take the flight disk to Admiral Tolwyn. I offer to celebrate my vindication with Angel in the Observation room and she accepts it. She’ll meet me there after talking to the Admiral and debriefing Jazz.
K’Tithrak Mang 3
I immediately take off in a Sabre on a standard patrol mission. Angel meets Jazz in her office and wants to know more about K’tithrak Mang. Jazz tells her that it will be simple to explain once the Agincourt jumps in. Angel wonders how Jazz knows about the Agincourt’s whereabouts and then realizes that HE is the traitor. Jazz admits his guilt and his hopes that Stingray would have been court-martialed like I was for the Tiger’s Claw. Fortunately, Stingray was with Sparks at the time of McGuffin’s death so there is no way that he’d be blamed for the murder. Jazz has MY flight disk as his little souvenir and warns Angel to not flip on the communications switch in her office. He pulls a gun on Angel and tells her why he has betrayed the Confederation. His brother was killed at the Goddard colony due to the actions of the Tiger’s Claw, and he felt everyone on that ship should die for his loss. Angel makes a quick move to disarm Jazz before he can shoot. He runs out of the office, heading for the nearest fighter to make his escape. During my patrol, I receive a communication from the Concordia that Jazz is the traitor and that he’s trying to make a run for the Kilrathi. I receive news that he attacked Angel in her office but that she’s alright. My orders are to pursue Jazz and make sure he never makes it to a rendezvous with the Kilrathi. I’m given Jazz’s flight path from the Concordia tracking it to intercept him. I encounter some asteroids along the way, but I’m not going to let any obstacles get in my path to keep him from escaping. At the next nav point, I give Jazz one warning: Surrender or be destroyed. Jazz thinks he can kill me, so I taunt him to prove he’s the hot shot he thinks he is. Jazz just uses a few missiles against me and makes one sloppy pass with his guns. I do some damage to his ship and notice that I’m fighting with only particle cannons. While this is certainly a challenge, I can’t afford to let this fight drag on forever. It would be like trying to destroy a Sabre with an Epee. Not promising odds, and there is no reason to hold back. I switch to full guns and a few barrages blow up his Sabre. Jazz ejects and pleads for his life saying that he’s the only way I can prove my innocence of what happened with the Tiger’s Claw. I tell him that his survival is NOT an option. Just before I can shoot the cold blooded Jazz and leave his carcass in the equally cold environment of space, Angel comes to tractor in and rescue Jazz from my justice. ‘Justice is decided in the court, not with particle cannons’, says Angel. While Angel does save me from being just as bad as Jazz, I certainly hope this act of mercy does not come back to haunt me. I head back to the Concordia and land. I see Sparks in the hangar bay, and she tells me that Security found my flight desk in Jazz’s quarters. Fortunately, it is NOT damaged so I still have the proof I need. With this proof of the stealth fighters, I wonder why the Admiral has not talked to me about this. Sparks tells me that there are more important matters for the Admiral to attend to, like our final strike against the base here. She correctly says that one way or another, our mission will be ending soon.
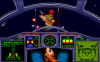
K’tithrak Mang 4
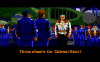
I meet with Jazz in the Observation room. He’s now under guard, and I ask him why he betrayed the Confederation. He tells me that I betrayed him by letting his brother die on the Goddard colony. Jazz feels that eliminating a Kilrathi troopship gave the Sivar enough time to deploy its weapon against Goddard. Jazz swore revenge on every one assigned to the Tiger’s Claw. He tells me that killing Spirit was so easy, and he might have made his goal since only Paladin, Angel, Maniac, and I were left on his list. I tell Jazz that he’s sick, and that he would have been dead by my hands if Angel had not saved him. I do admit that his death would not be enough of a payment for his cold-hearted deeds. I tell Jazz that he’ll be found guilty on his court-martial and that I’d gladly participate in his execution. In the briefing room, Angel gives the layout for the final strike against the Kilrathi base. She reminds us that this will decide who controls the Enigma sector and the fate of our home worlds. She’s going out on this mission to lead the strike force. Before the strike force is deployed, a patrol will be sent to destroy any attack force heading for the Concordia. Nightshade and I am given this assignment, but I do ask to be a part of the strike force. Angel tells me that Admiral Tolwyn specifically wanted me to be assigned to this mission. I convince Sparks to refit my Sabre with torpedoes. I ask her to ask give me the data for the strike force mission and not to tell my wing mate. Sparks gives me a chance to reconsider, but I tell her that I feel that Tolwyn has wanted me off the Concordia since transferring from Caernarvon. I’m giving the Admiral a very good reason to kick me off his ship. I launch and reach the first nav point. It’s filled with asteroids and a few stealth fighters. Two of them kamikaze into my ship wiping out the front and rear armor. Looks like they mean business, and I eliminate the last one before he decides to follow the example of his buddies. Upon my approach to the base, I receive a communication from the Concordia. They ask me to return to base, but I tell them they should know better. I get a warning that the Admiral will personally toast my career but I tell the Concordia that I’m willing to face Tolwyn’s punishment after taking care of the base. I’m a bit surprised when the Concordia wishes me good luck considering the earlier tone.
On the Kilrathi base, Prince Thrakath is alerted to my approach. He says he’ll deal with my insignificant threat personally. Thrakath gives an order to prepare a fighter defense of the base and to prepare his personal fighter to deal with me.
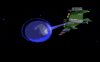
I have the Kilrathi base in my sights, and I get a communication from an incoming fighter. Prince Thrakath is challenging me in his Bloodwing fighter. He certainly gives a try on his first pass with a barrage of guns, but I’m off to his side. I manage to do some damage to his ship, and he taunts me with a threat to kill me. He does not follow thru on the threat with guns or missiles and I keep taking little chunks off his fighter. Thrakath makes one final taunt that I can’t defeat the heir to Kilrah, but my guns blow his fighter to bits. I go to zero throttle in my preparation to attack the base. Oh, furball! There are Drakhri Sarthas coming in after me. I afterburn a few times to get some speed, and increase throttle. Those Sarthas take advantage of my vulnerability and do some damage to my rear. Three of the Sarthas make a coordinated effort, and my fighter takes more damage. I desperately need to trim those odds before I get turned into space slush. I lock onto one and go after it, ignoring the others. My shields take a full hit, but no damage to the Sabre. I wipe out my first Sartha, and focus on another. I do much better on the second one since his mates have lost some of their coordination. A fellow Sartha makes a pass with the one I have locked on. The firepower of the two is enough to do some shield damage, but that second Sartha is blown into space dust. On to the third one, and he presents little challenge in destroying. One on one, that last Sartha’s hope is to kamikaze into me. The pilot does not think of that, and several successful gun barrage hits kill him too. I make sure there are no more fighters coming to intercept me. I get into range of the base and make two successful torpedo runs on it. Good thing too since I notice that I had ONLY those two torpedoes with the others ones lost during the fight. I establish communication with the Concordia and tell them the good news that the base and Prince Thrakath have been taken care of. A whole throng of people are there to meet me in the hangar including Angel and Tolwyn. Angel tells me that was a mad but magnificent stunt. I tell her that I was just doing my job. We both enjoy a kiss in front of all those people, and Tolwyn interrupts to bring a whole bunch of charges against me. Surprisingly, he just lets the charges drop with a ‘job well done’. Tolwyn also admits his pride in serving on the Concordia with my presence. Angel gives me orders to meet her in her office with a bottle of champagne to celebrate this victory.
Meanwhile, in the dark depths of space an ominous voice says, ‘I will return, HUMAN!!!’
And so the campaign of Wing Commander 2 is ended. Next week will begin a new fight on the Secret Operations campaigns, and I’m looking forward to then!
")


")
