The Hellcat V refit project

Time for a quick update! It's been slow progress recently, but I have finally finished fitting all of the engine intake detail. Some paint and general neatening is still required, but I wanted to share this in the meantime. I think it captures the look of the original quite well, and definitely adds to the authenticity of the model. Let me know what you think!

upload_2013-11-25_11-51-49.jpeg

bCafBdk.jpg

eeXB8zc.jpg
 

Attachments

  • upload_2013-11-25_11-52-9.jpeg
    upload_2013-11-25_11-52-9.jpeg
    311.8 KB · Views: 98
  • upload_2013-11-25_11-52-57.jpeg
    upload_2013-11-25_11-52-57.jpeg
    311.8 KB · Views: 105
  • upload_2013-11-25_11-52-32.jpeg
    upload_2013-11-25_11-52-32.jpeg
    311.8 KB · Views: 95
Hello all!

I was away for three whole weeks over December / January, and could not take my Hellcat with, so no progress over the holidays, unfortunately. I'm finally back up to speed again though. Here's the latest:

We finally have some thrusters installed!

DpylK9T.jpg


The nozzles are made from cardboard, which I first cut to shape in lengthwise pieces. I then measure and cut the "petals" of the nozzle, and finally it is rolled into shape and glued together.

lwdW6Mg.jpg


I was unsure for a long while how to approach the interior detailing of the thruster nozzles. Painting them a solid colour, be it black, blue or white, seemed to bland for my taste. So, I took a bit of inspiration from the Star Citizen 300i commercial (quite fitting, if you think about it..)

pdF01dd.jpg


This is what I came up with for the interior:

UT6s29K.jpg


I think the detail adds quite a bit of life and realism, without being too overstated. The coolest thing of all is, the silver paint I used catches and reflects even the faintest light, so in in a dark room these pipes positively glow!

As you can see I have yet to make the four smaller thrusters to complete the engine assembly, but that promises to be quite a tricky prospect, so I'm still experimenting to find the best solution.

Hope you enjoyed this update!
 
Hi everyone, I have a double update dosage for you!

First off, I want to show you how I went about making the smaller thruster nozzles, as well as the complete engine assembly. I ended up using regular A4 paper instead of cardboard, which is too rigid for this particular job.

1) Measure and draw the outline.

Uy0zWbK.jpg


2) Carefully cut out the nozzle "petals".

X8FB4UE.jpg


3) Cut out the nozzle and bend to shape.

mQvRzwI.jpg


4) Glue in place.

MH8TubL.jpg


5) Paint the nozzles and make some silver glowy bit to put inside.

eiD4sQQ.jpg


And here is the result!

kOurMup.jpg
 
On to the next big challenge: Panel detail!

After staring at my reference material for what felt like days, I eventually settled on a close-up of a few in-game screenshots I took as being the best guide. Having printed out a few images, I then proceeded to sketch in the lines directly on the model itself.

6CRmw6V.jpg


Next came the really tricky part: Having drawn the lines in, I very carefully and gently scored the lines into the wood using a variety of sharp metal objects. The tip of a nail seemed to give the best results. I then wiped the excess pencil marks off with a damp cloth, leaving very narrow grooves slightly darkened with pencil markings. This gives quite a good impression of fine panel lines. Here you can see the result:

11He1v9.jpg


Of course some minor damage is cause to the outer paint layer, but nothing that cannot be touched up later. Adding this detail also had the unexpected side effect of giving the ship a slightly used and weathered look, which is exactly want you want for that extra bit of authenticity.

Here is a final look at my progress thus far. I think it has turned out quite well!

ZDk80rm.jpg


More to follow soon.
 
As promised, some more updates on the panel detail. I've covered just about the whole ship; let me know what you think!

Q9tD8tW.jpg


HlKDH2Q.jpg


viEwet7.jpg


Some clean-up will be required, but I'll do that as as I move on to the painting of surface detail. Should be fun!
 
Last edited:
Hi everyone,

I'm very excited about this update. This project has been fun, challenging and extremely rewarding so far, and it's now really starting to feel like the hard work is paying off.

What am I rambling on about? Well, I started painting the surface detail. Still WIP, but the results have been... well, judge for yourself. Scroll to the top of the page and compare the "vanilla" version to what you see here.

The ship is really starting to come alive. Hope you like it as much as I do!

yBY8cDY.jpg


VsbSgE2.jpg


QYnmaH5.jpg
 
Last edited:
A few more hours of labour, and voila! The surface detail painting is done.

Note that the decals such as warning signs and squadron markings are not there yet; those are really fun to paint so I am leaving them for last. Before I can do that, I need to craft the guns, and my next update will show you more on how that was done.

For now, enjoy the pics! I've taken quite a few this time so you can appreciate the ship from more angles.

FZMpRj7.jpg


Tdc2fES.jpg


uK6VQJc.jpg


FHoNmib.jpg


rA3Vpwu.jpg


WmQgim4.jpg


VaL1ADc.jpg


m9FkUjO.jpg
 
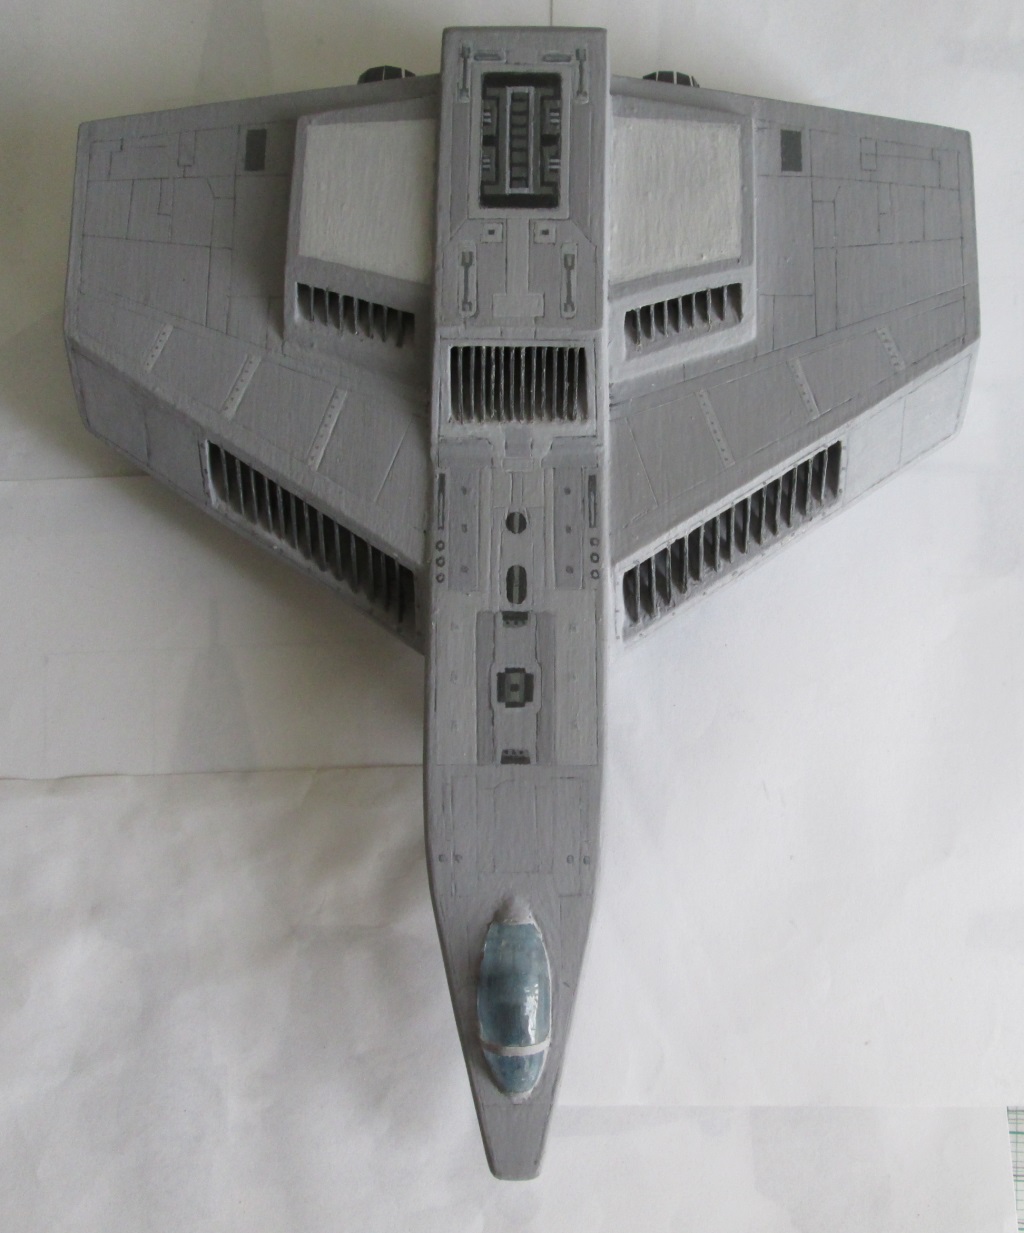
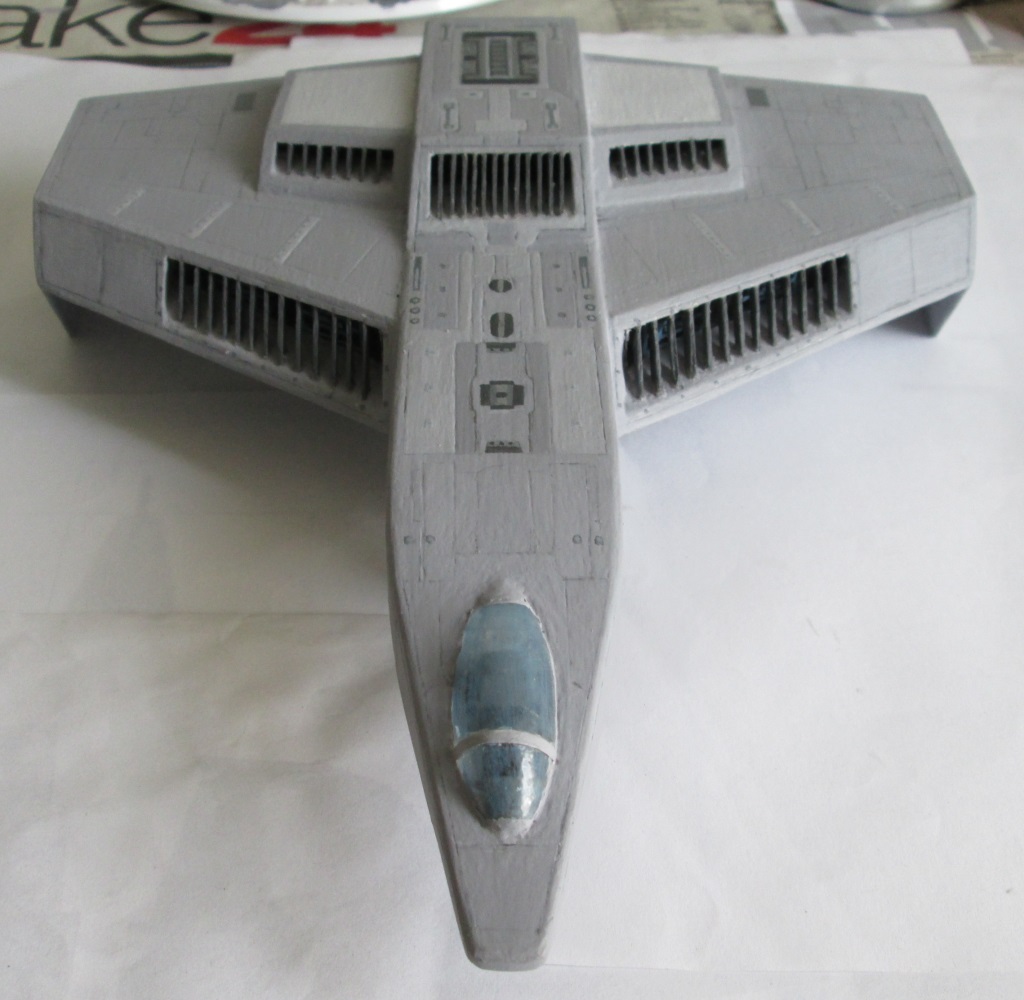
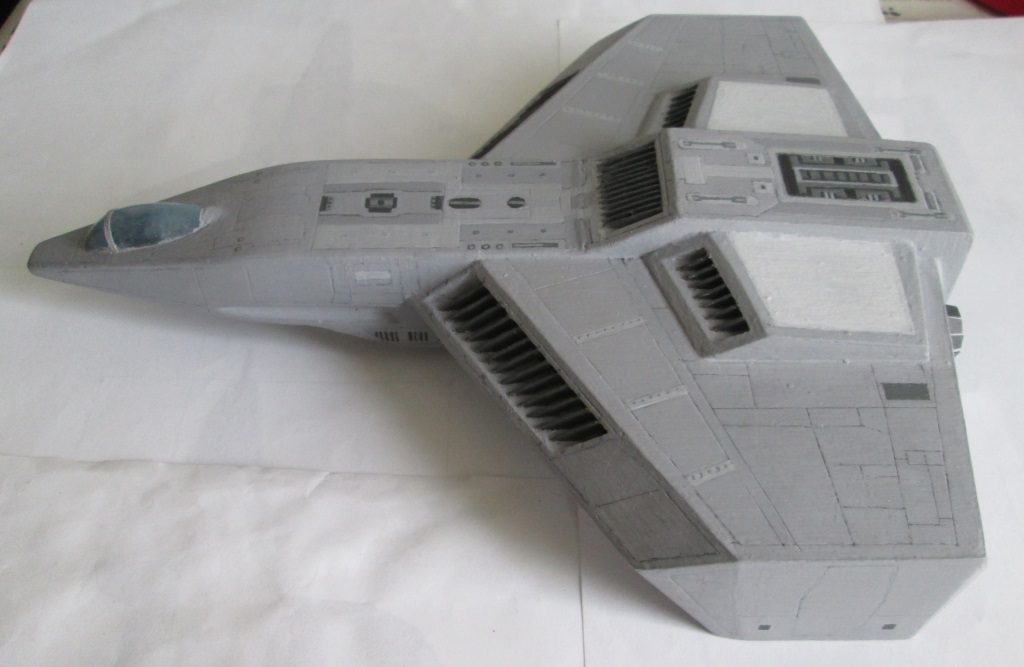
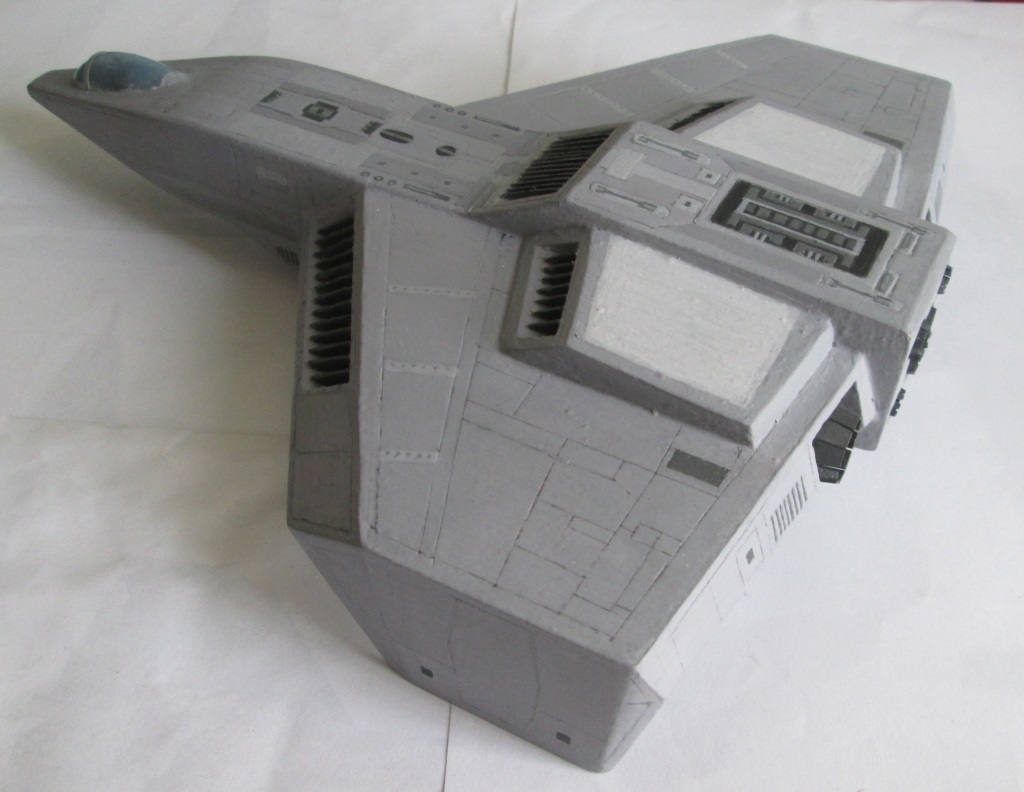
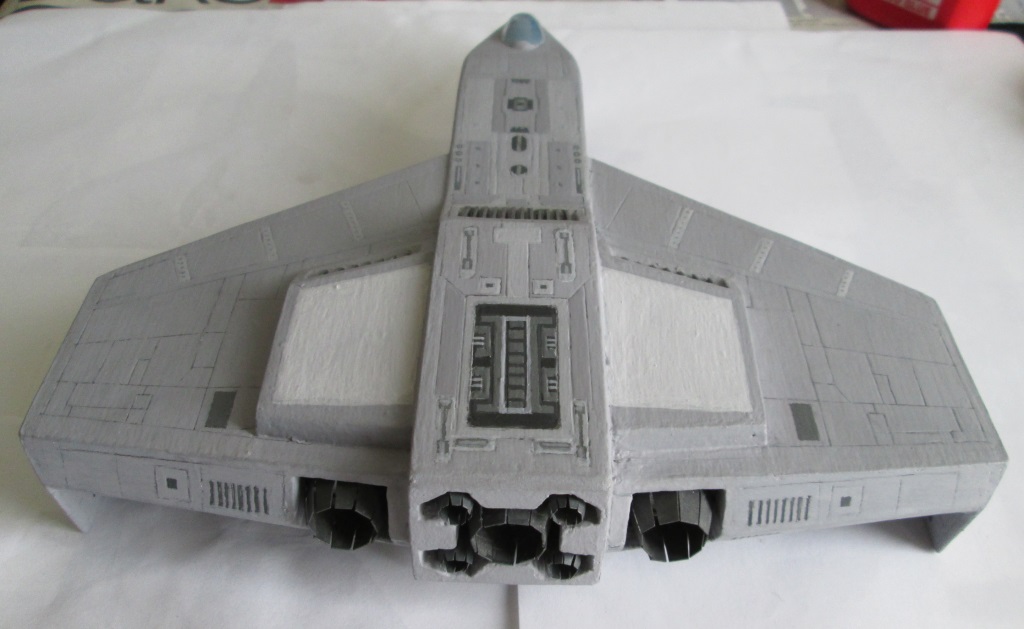
So, as promised, the Whiplash guide to putting guns on a Hellcat. :)

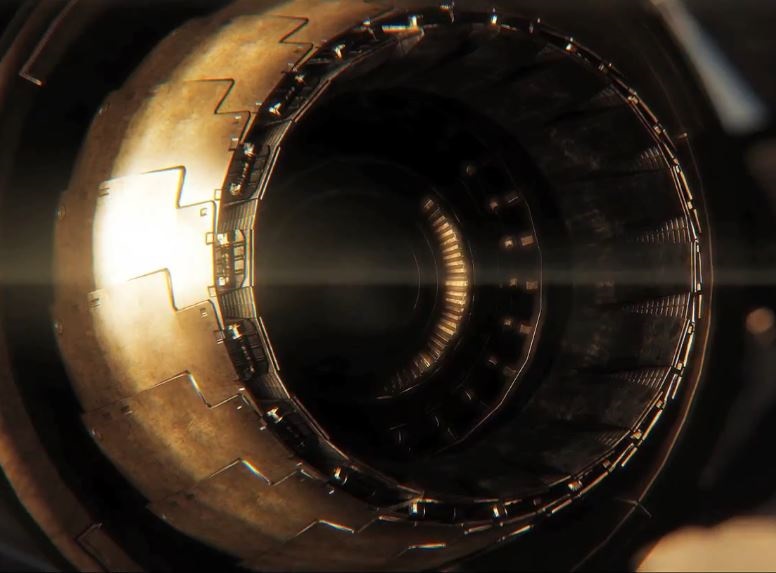
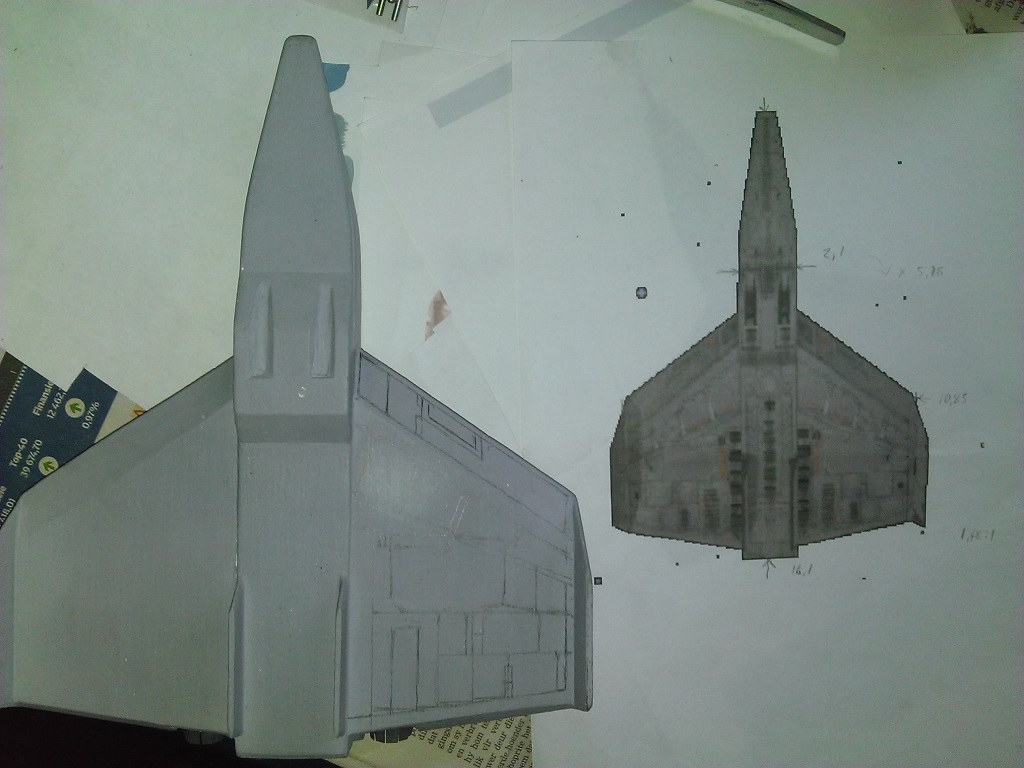
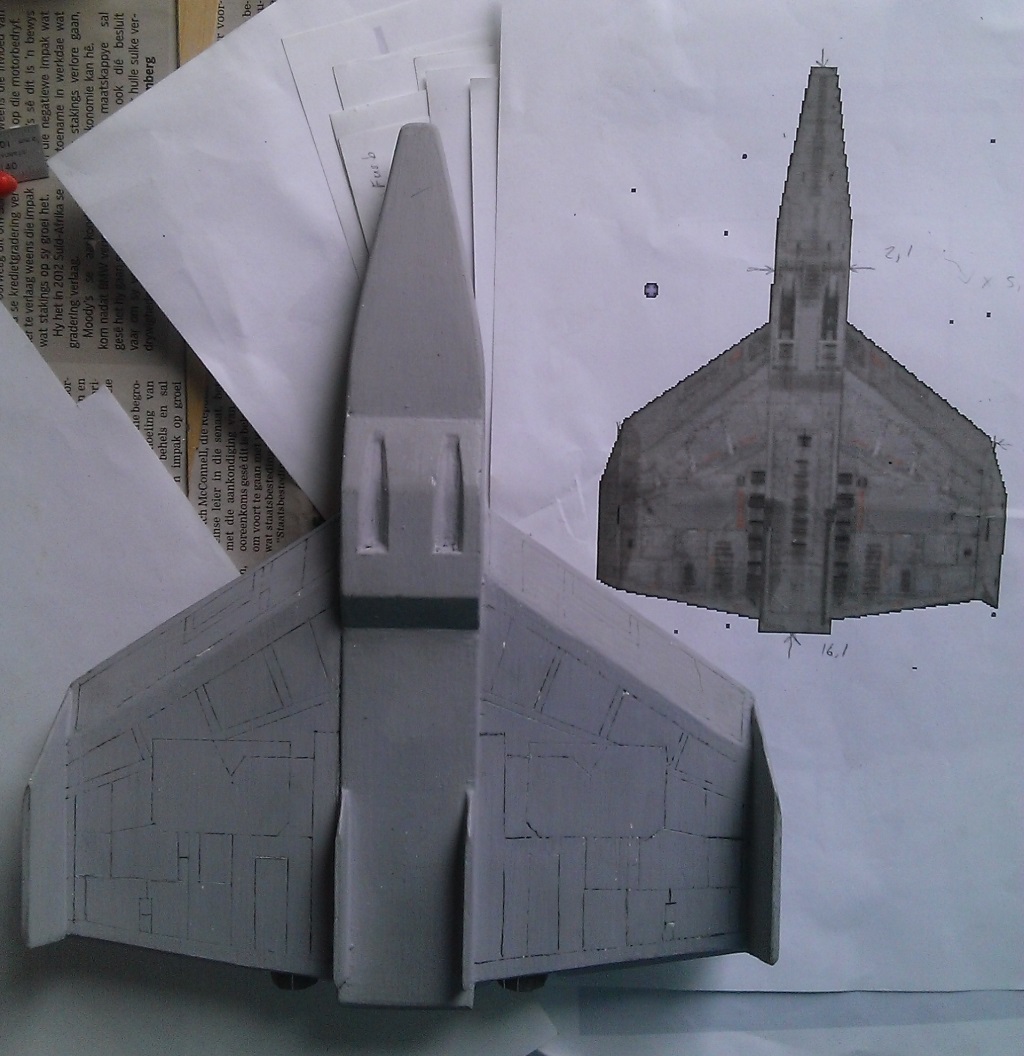
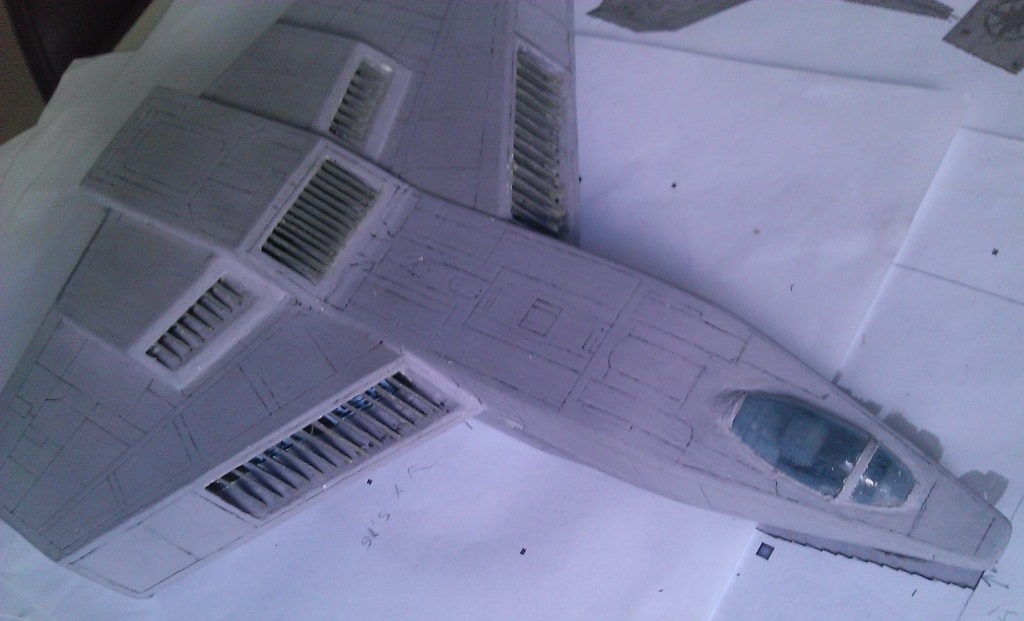
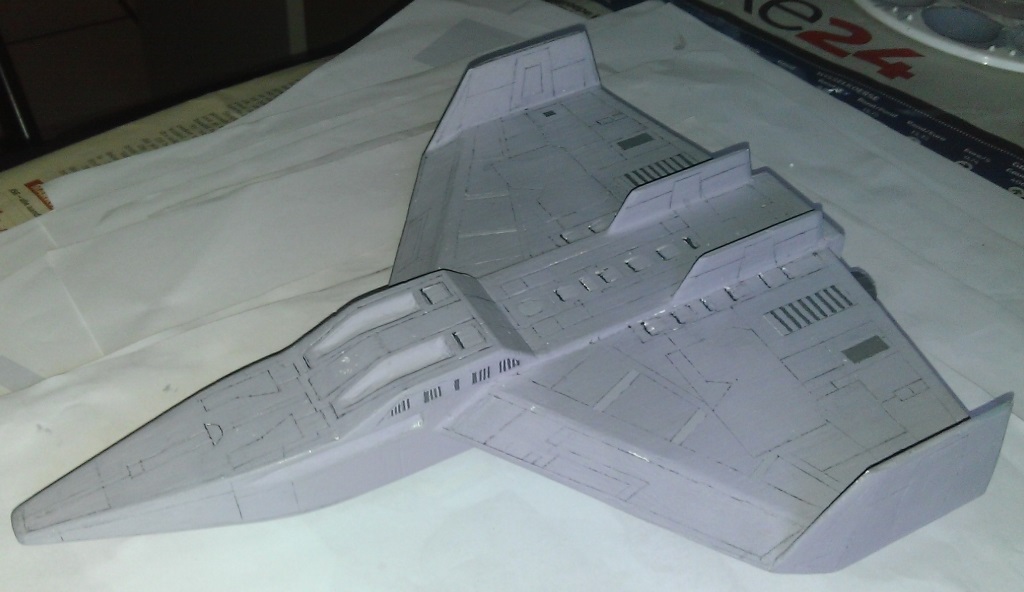
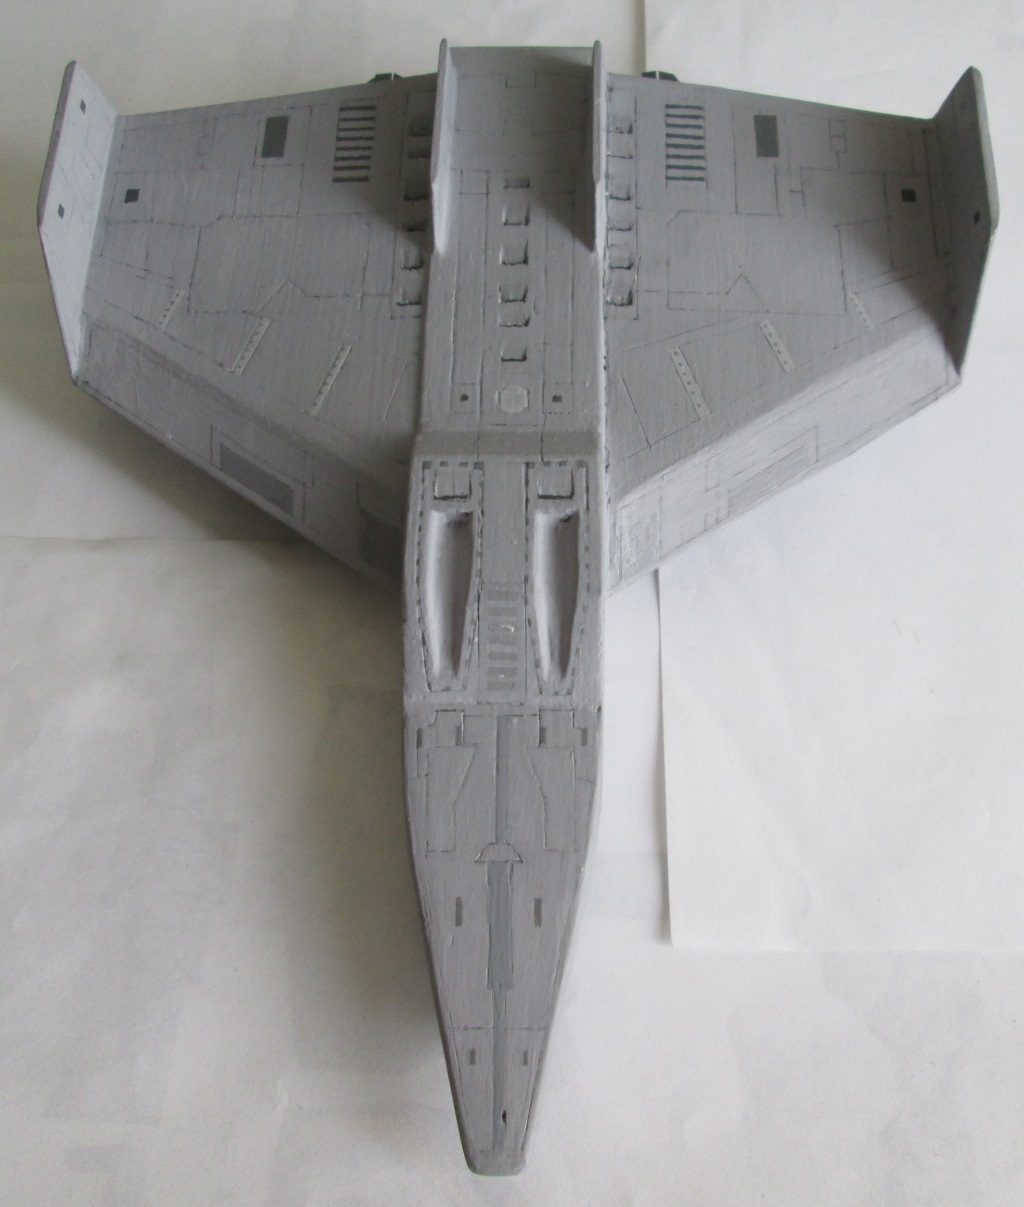
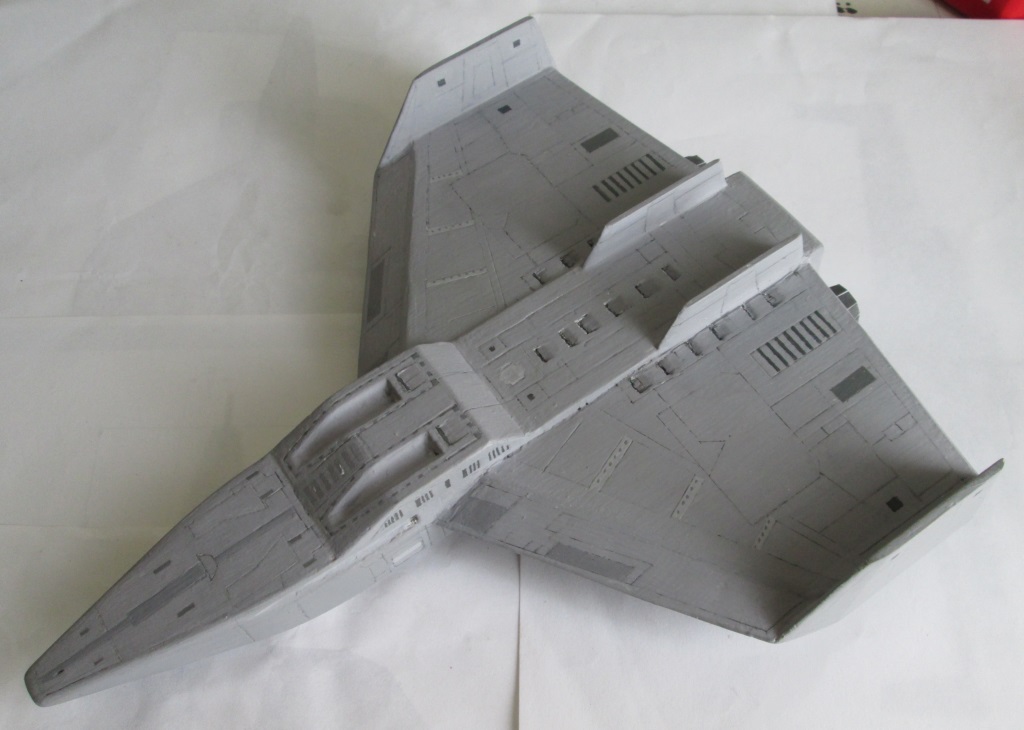
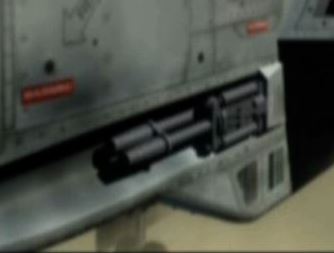
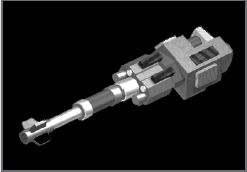
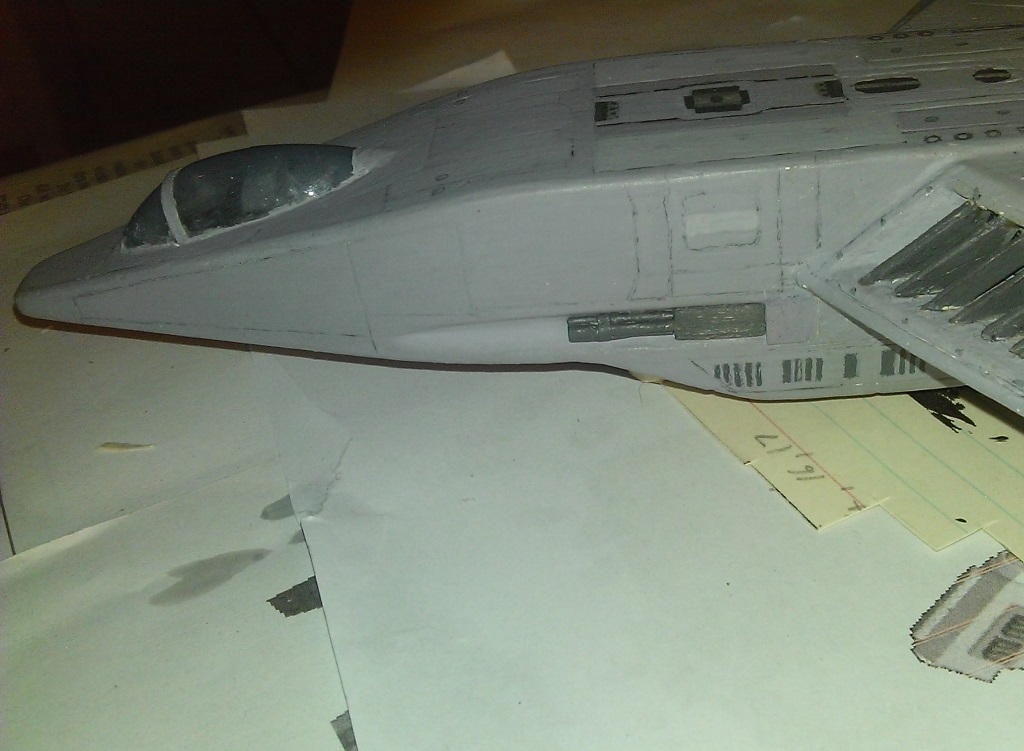
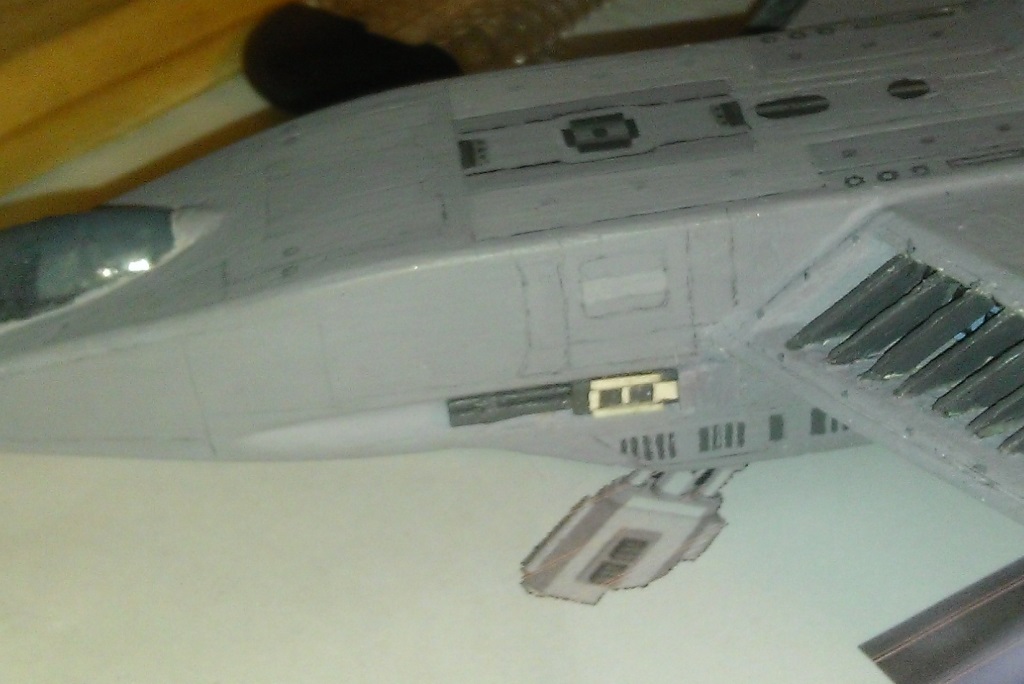
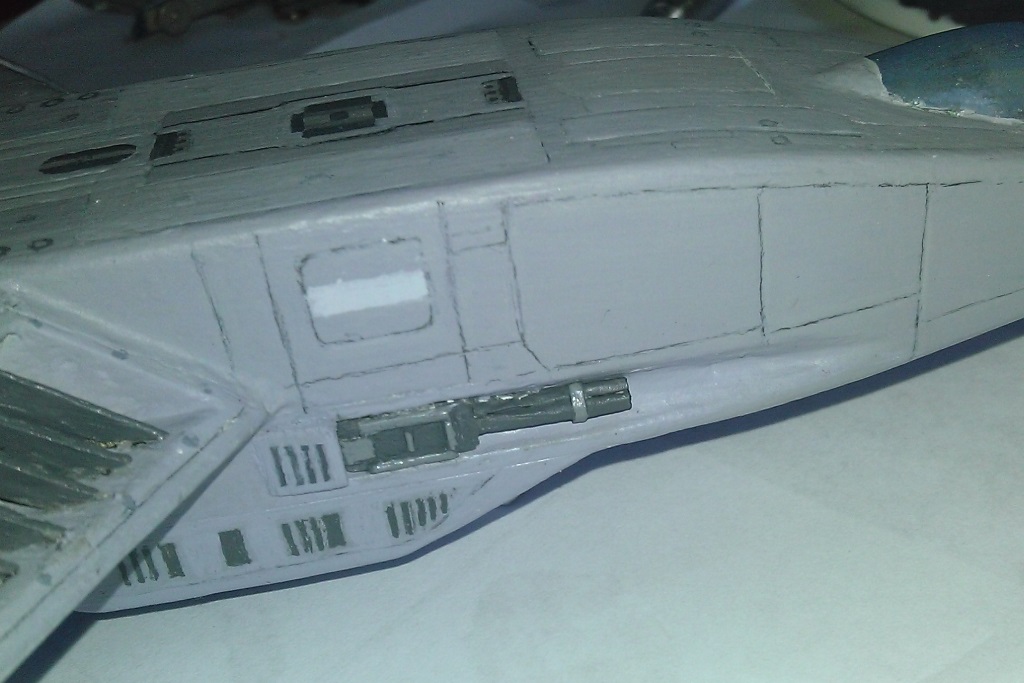
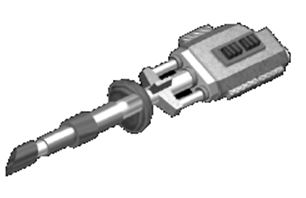
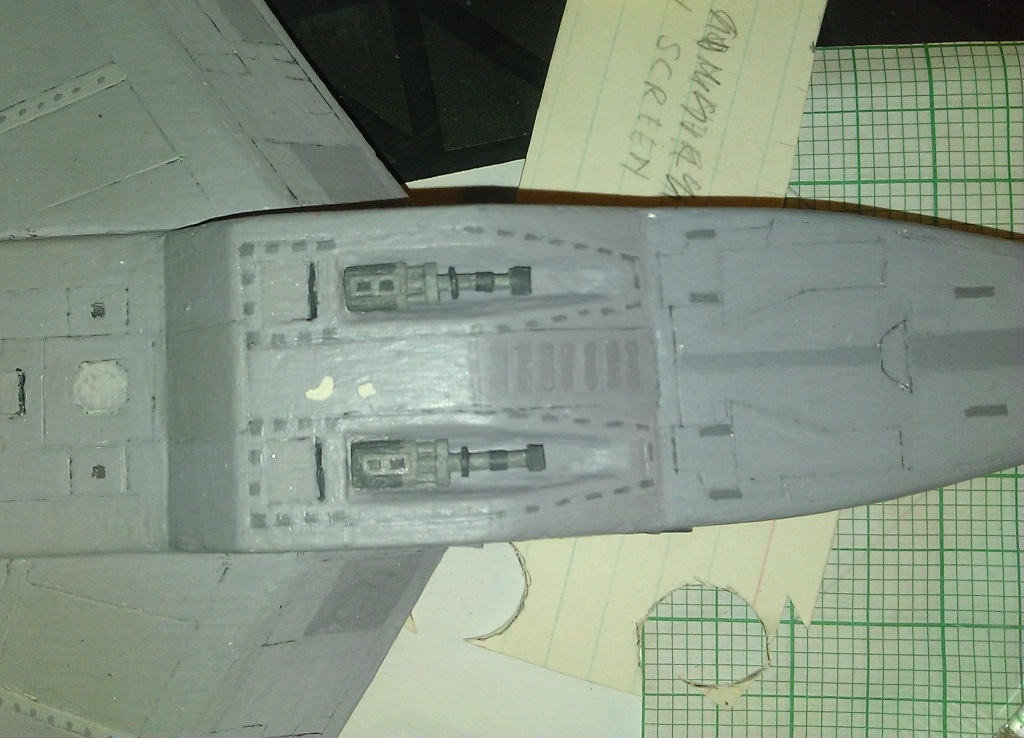
The WC4 Hellcat has two particle cannons in the side gunports, and two ion cannons in the underslung gun pod. I started off with the particles, since there are plenty of good in-game shots of them. I considered using the gun pictured in the manual, but eventually decided to stick with the ingame version for consistency. Besides, I find the triple-barrel configuration quite cool and menacing. See comparison below.

ACyB0ZP.jpg
fePl3Yj.jpg


So, here's how to build a particle cannon.

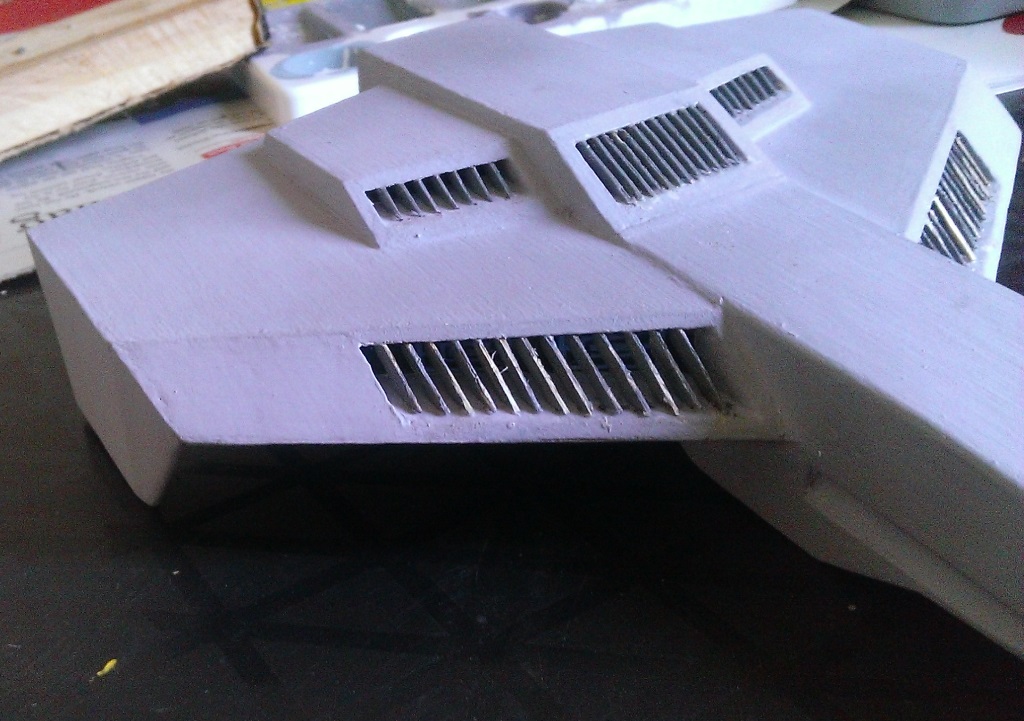
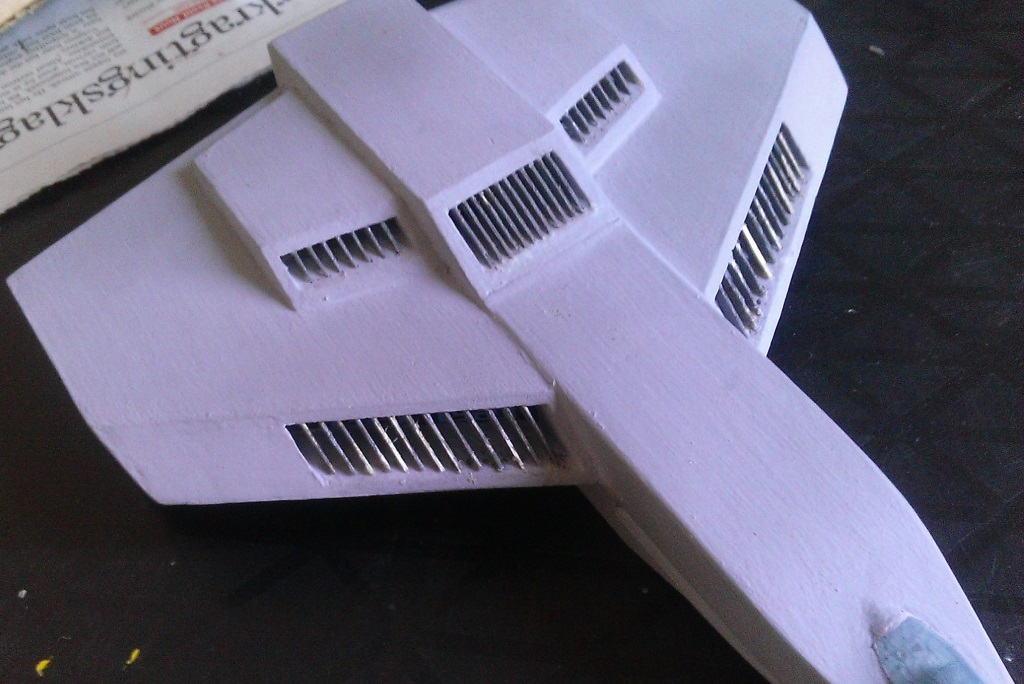
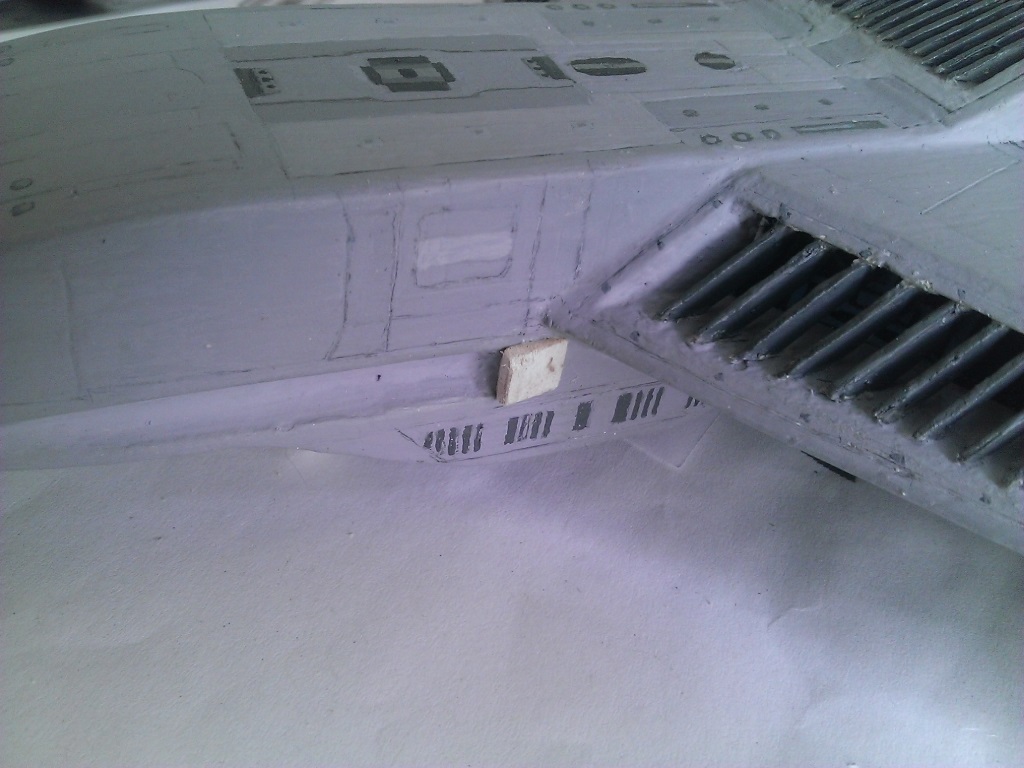
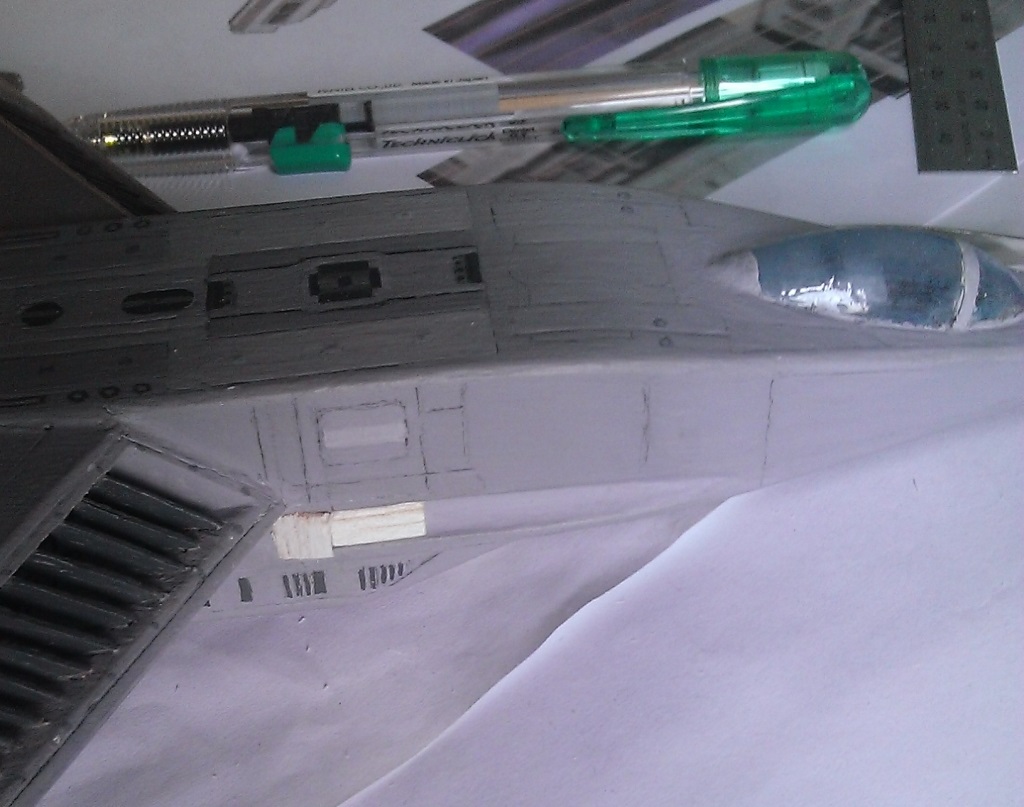
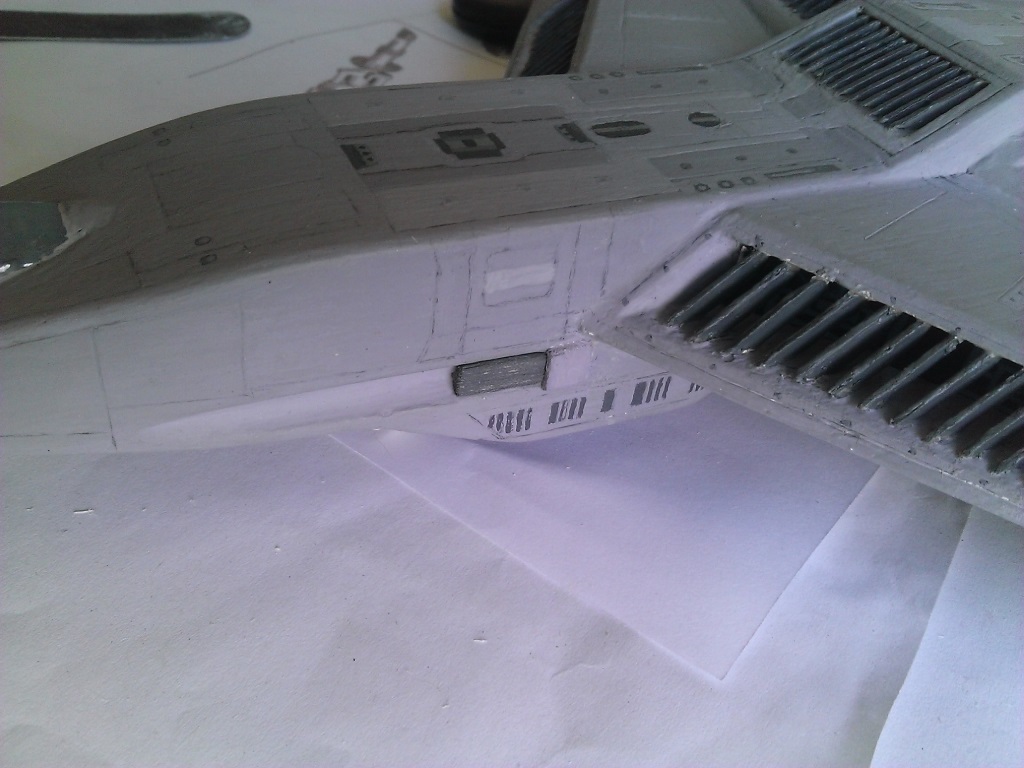
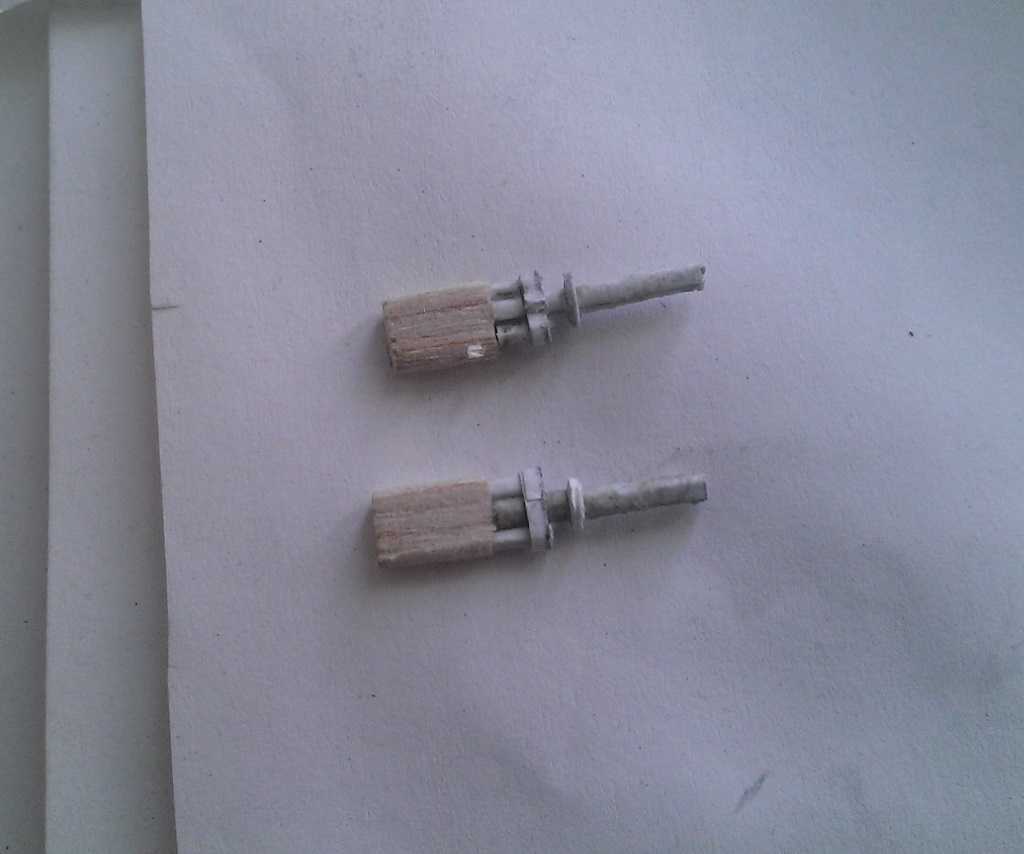
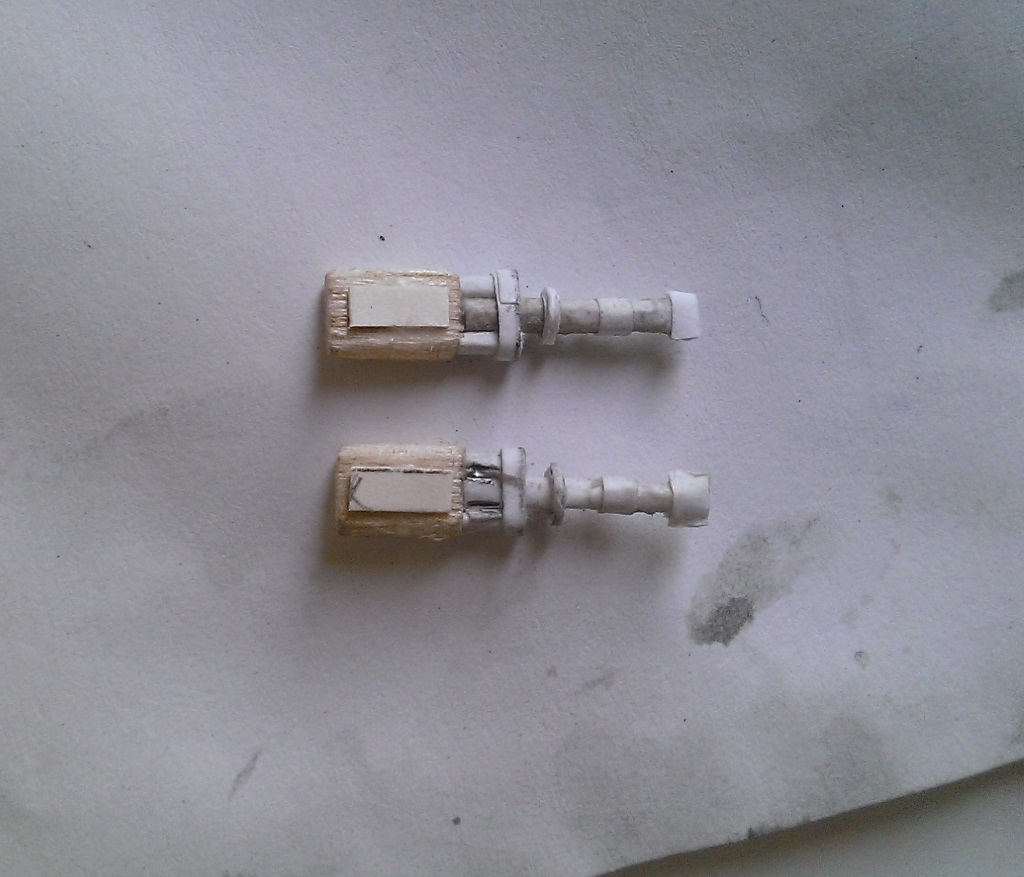
1) Added the protrusion behind the gun port (no idea what it is, looks like some kind of exhaust / cooling port )

Vb7GQBk.jpg


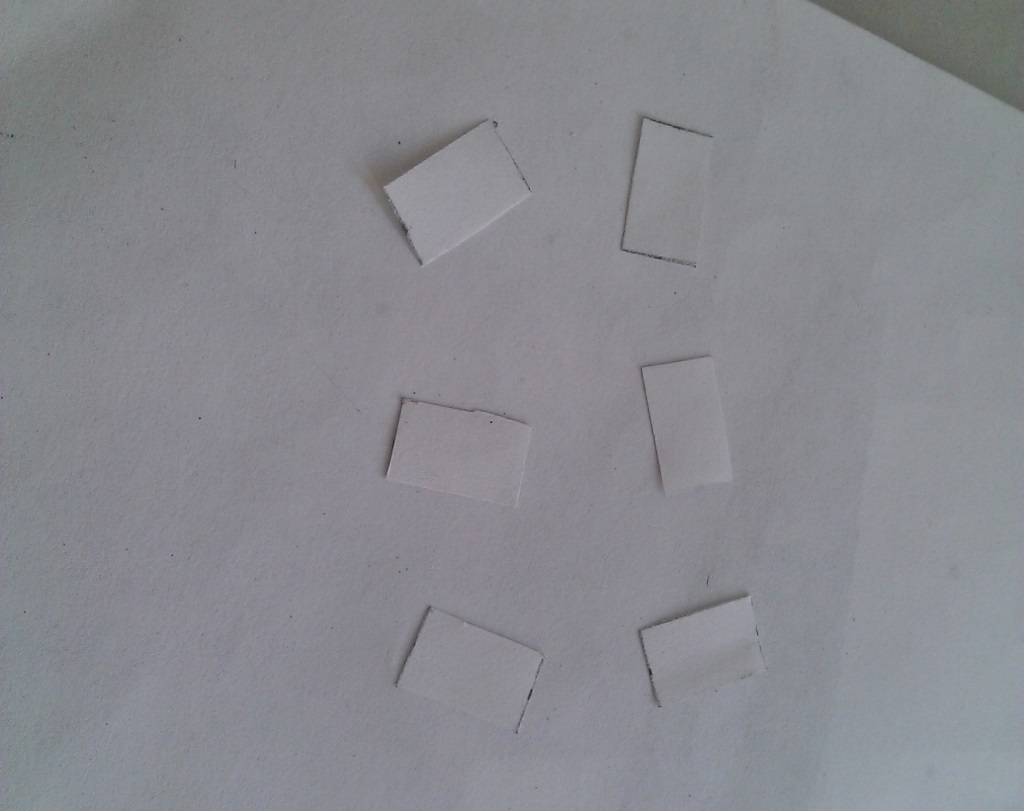
2) Made a simple rectangular cut-out of the main body of the gun.

X9uv1nh.jpg


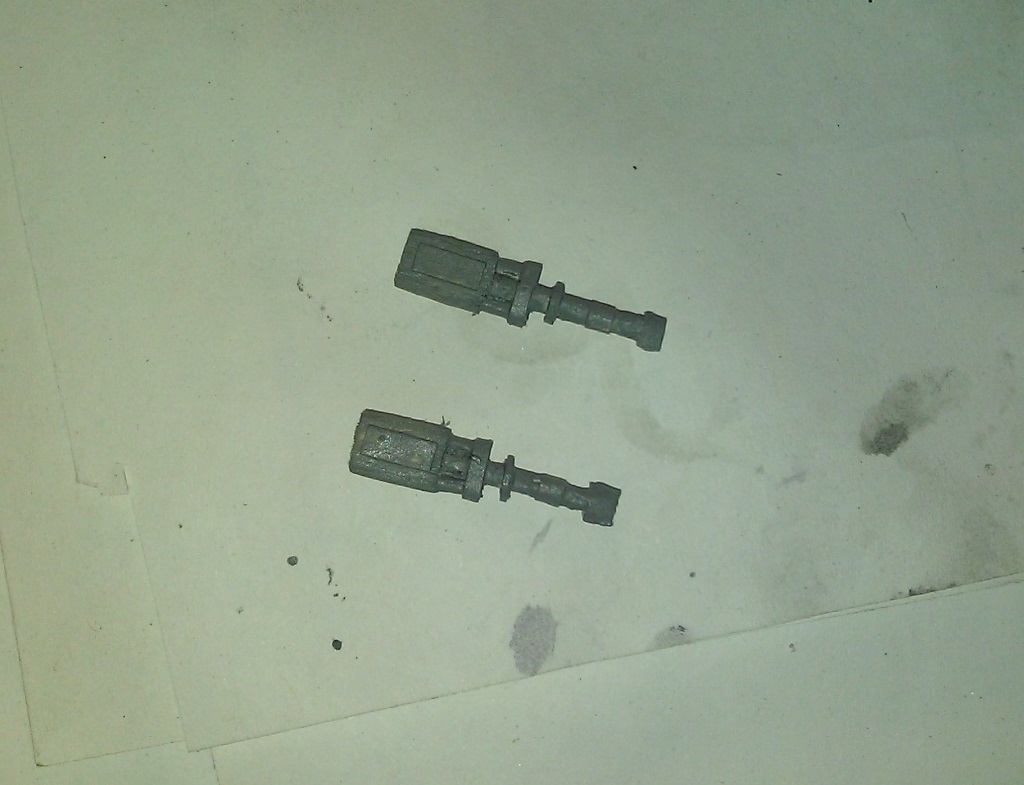
3) Both of the above pieces painted.

oQN9ZWT.jpg


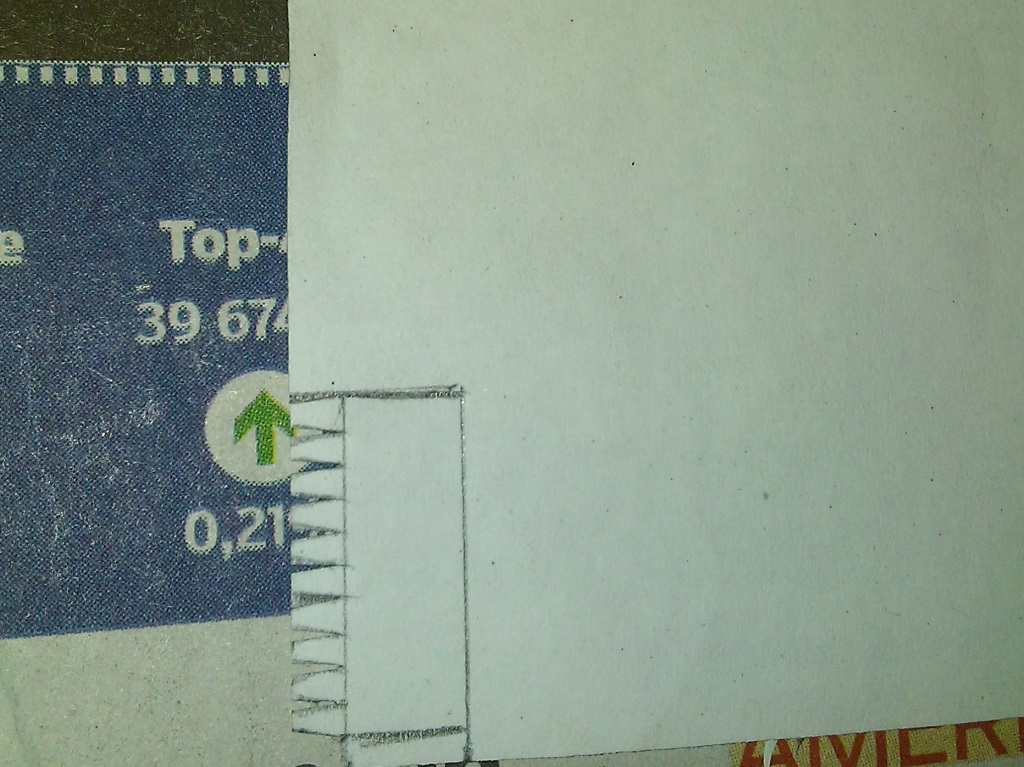
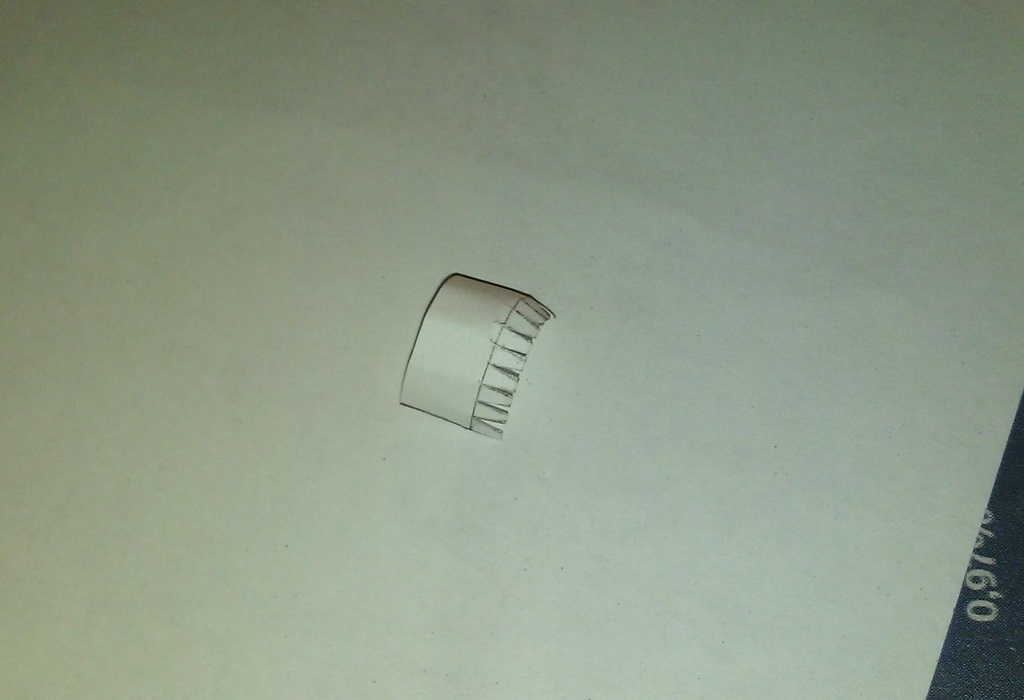
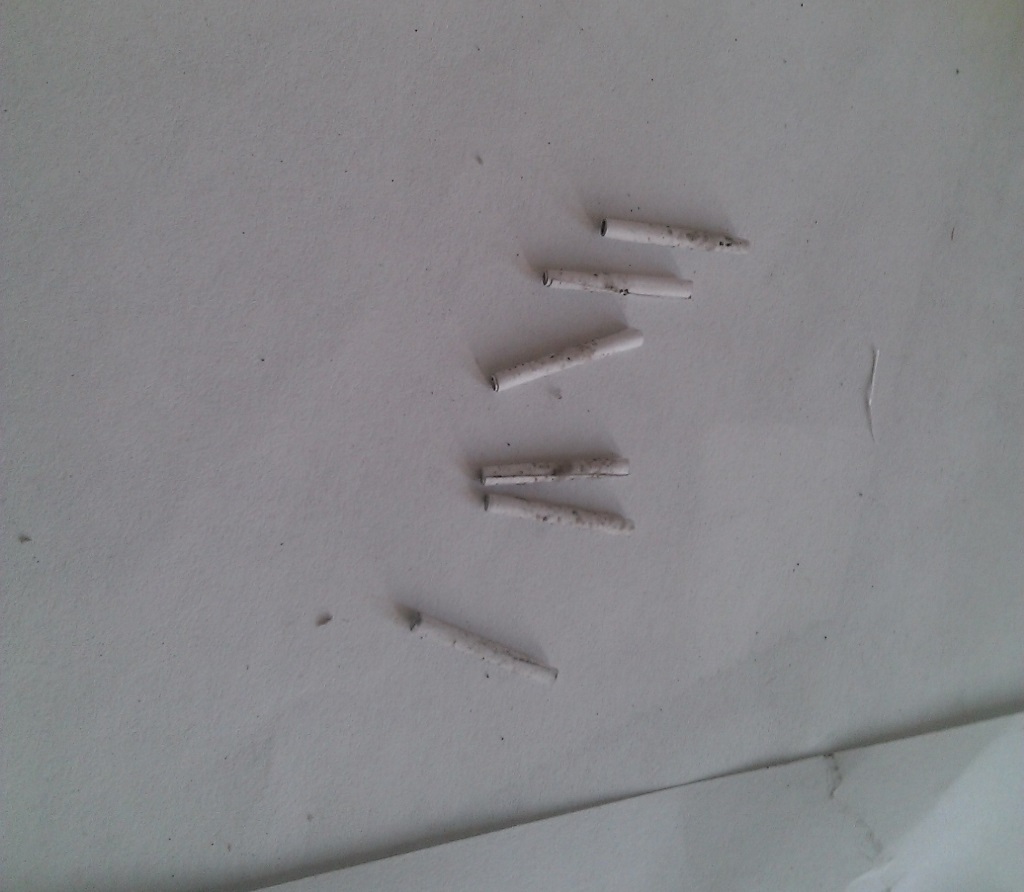
4) Next came the barrels. I cut some strips of paper to size...

iQ97VJQ.jpg


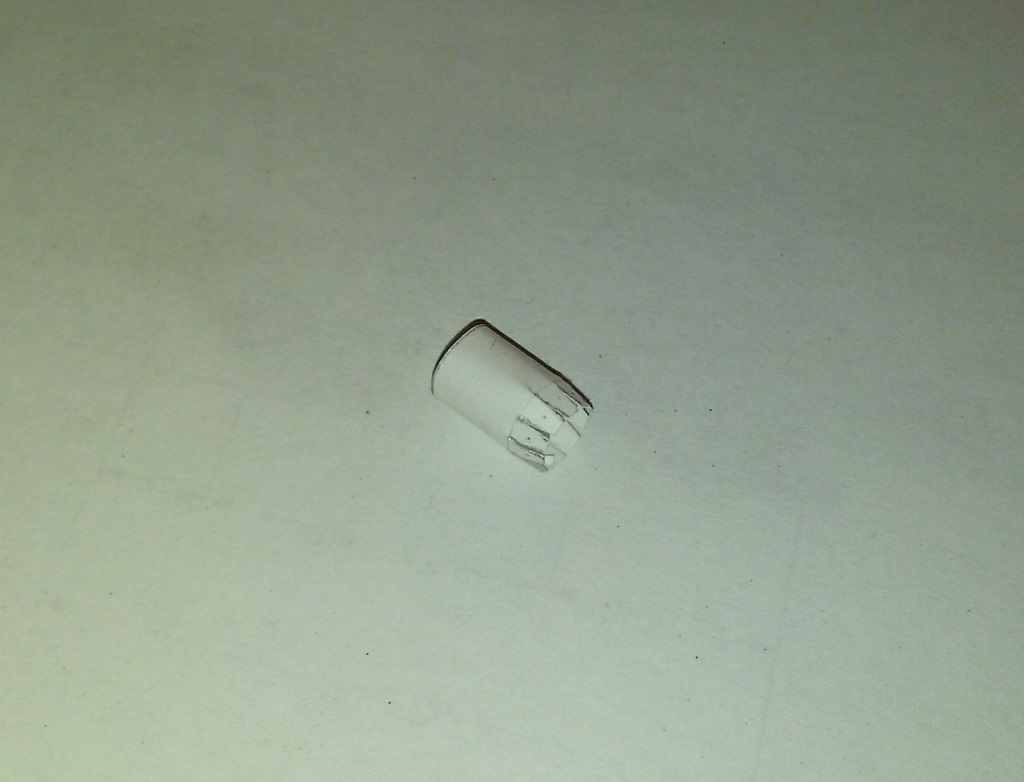
5) Then roll and glue them into shape...

eAIvxIE.jpg


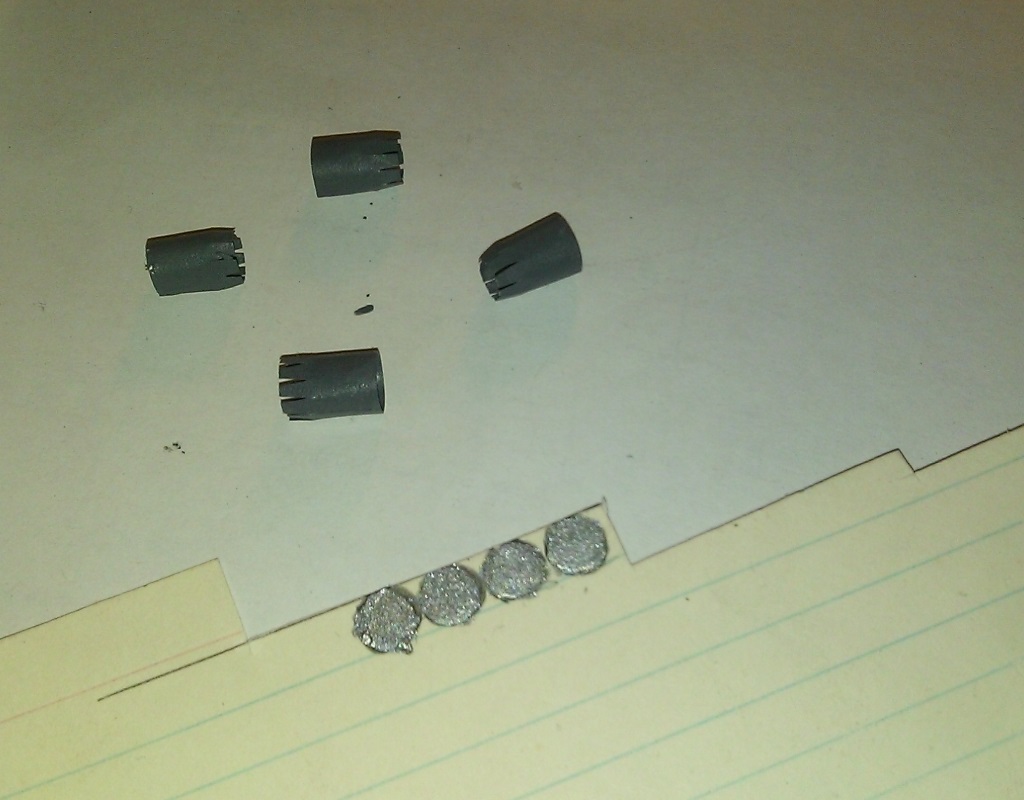
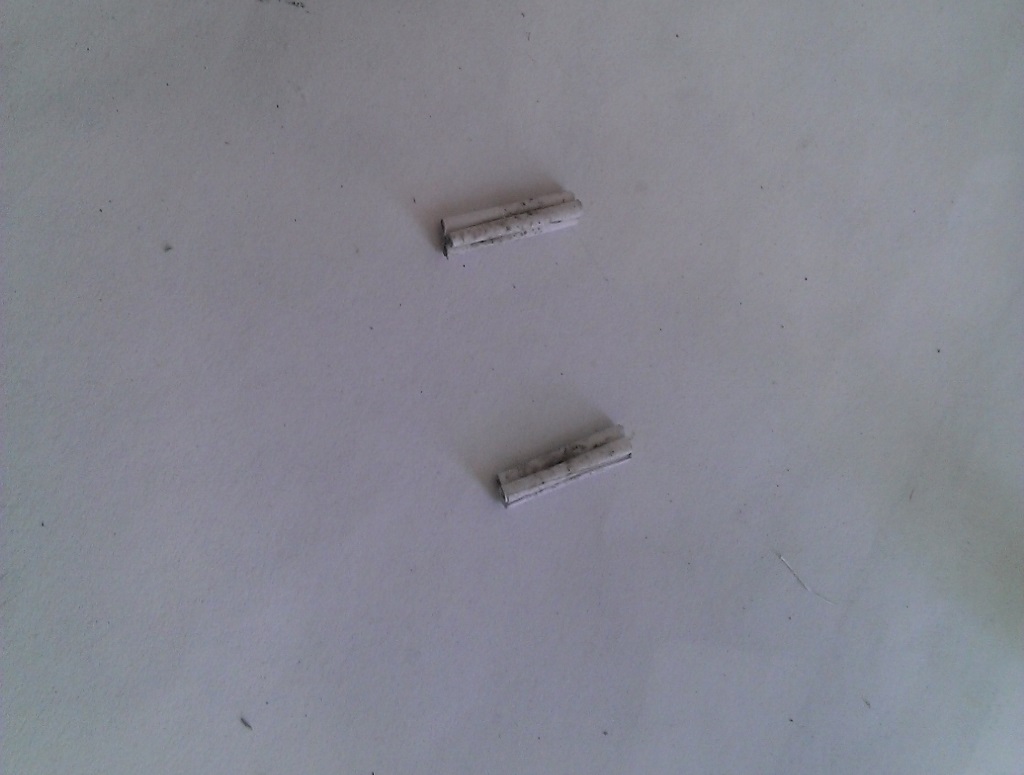
6) Then glue the barrels together.

SvnGnex.jpg


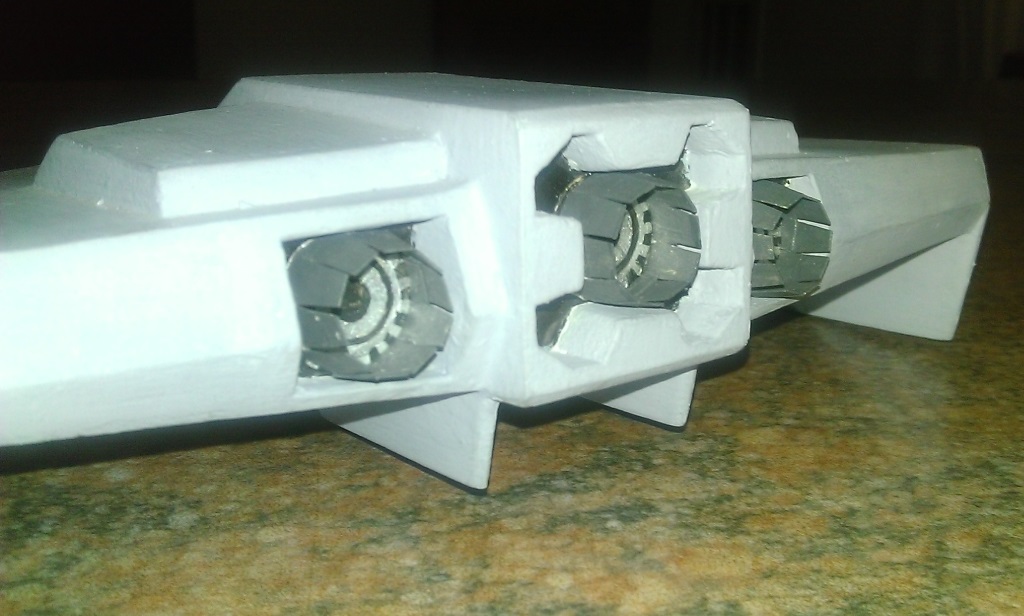
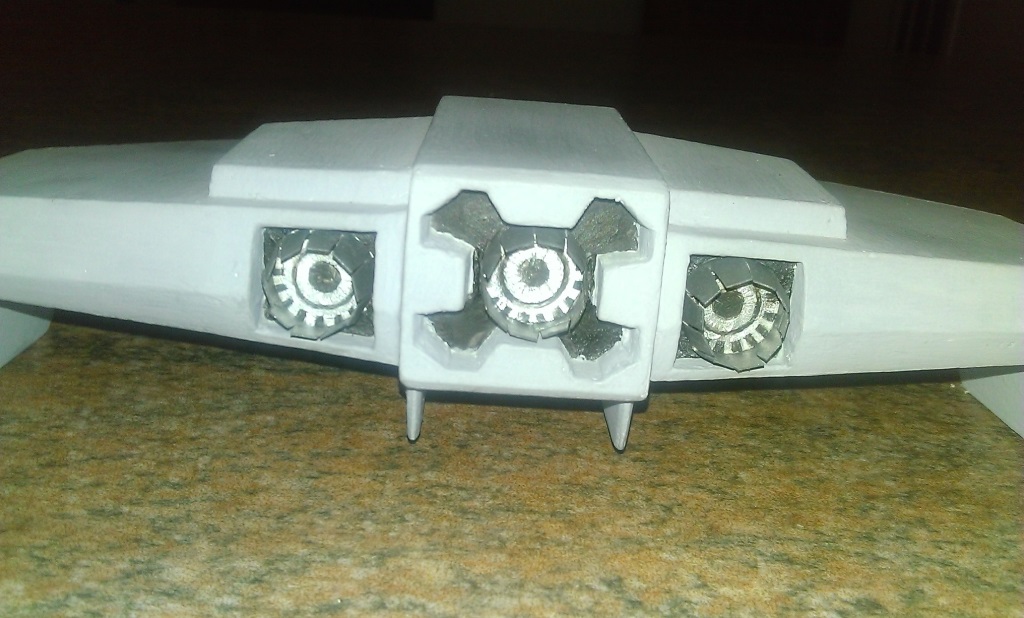
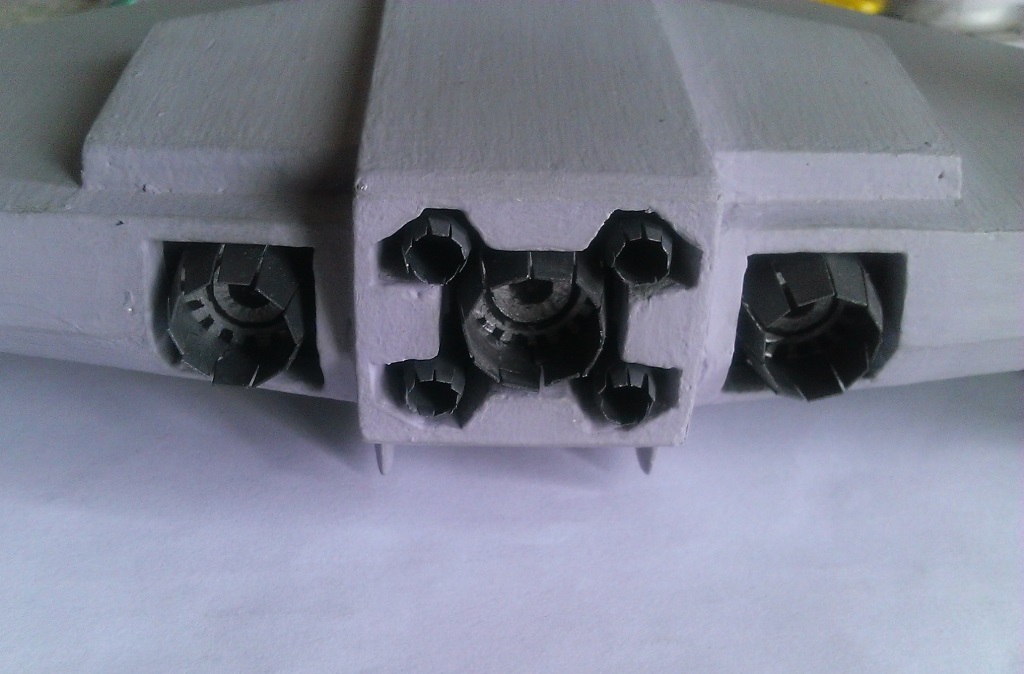
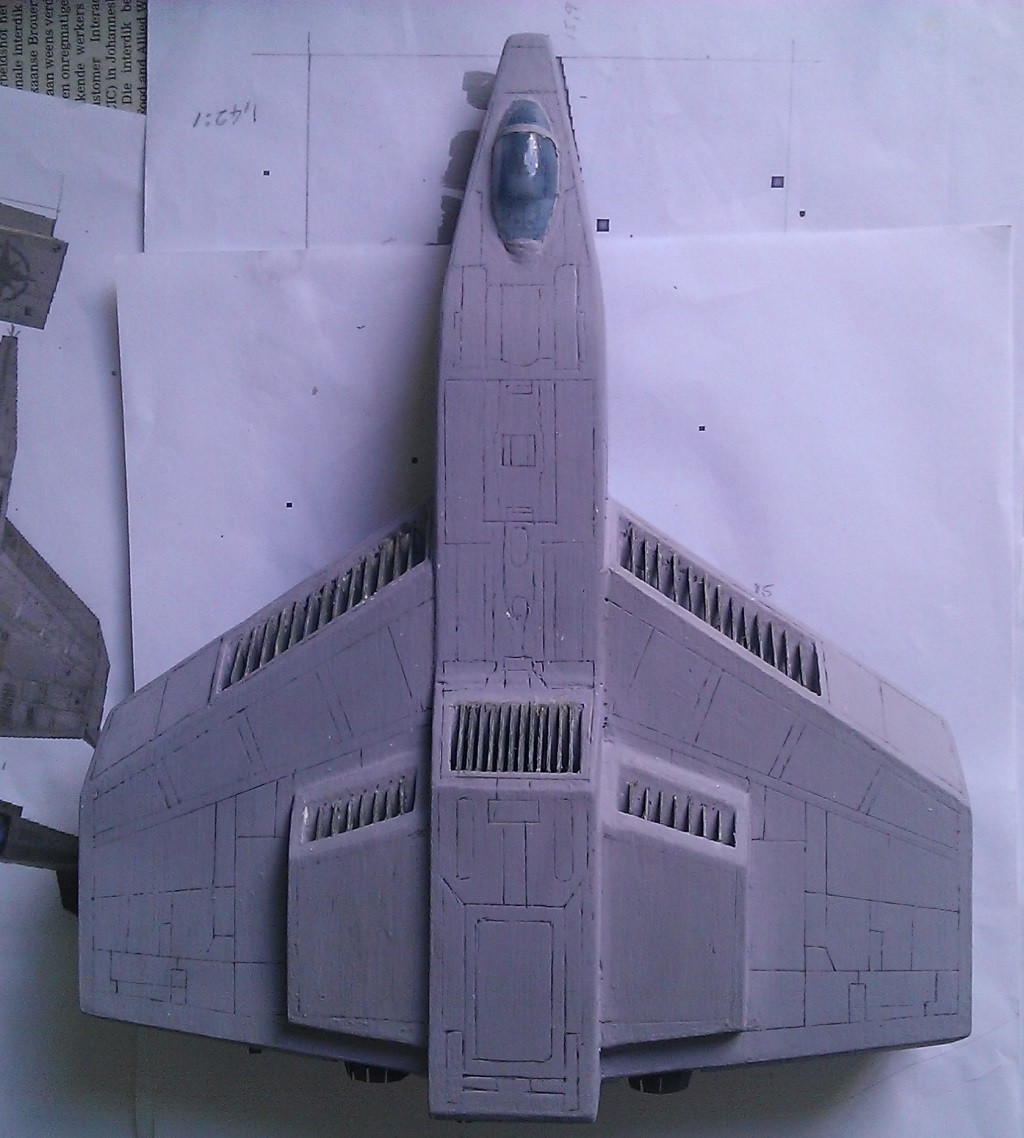
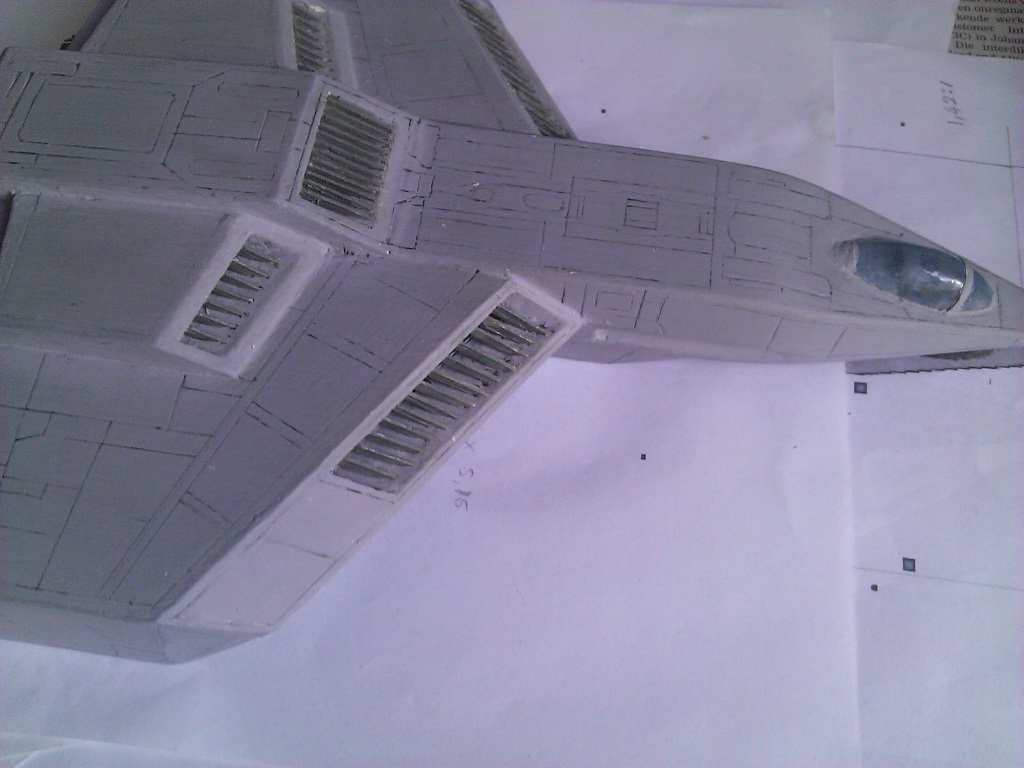
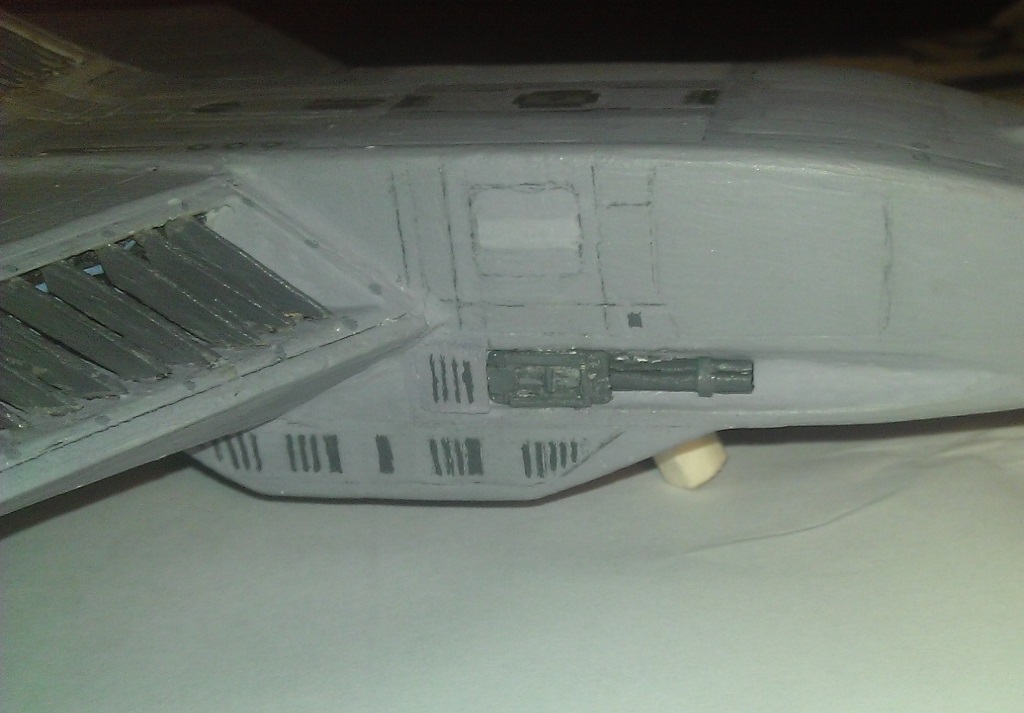
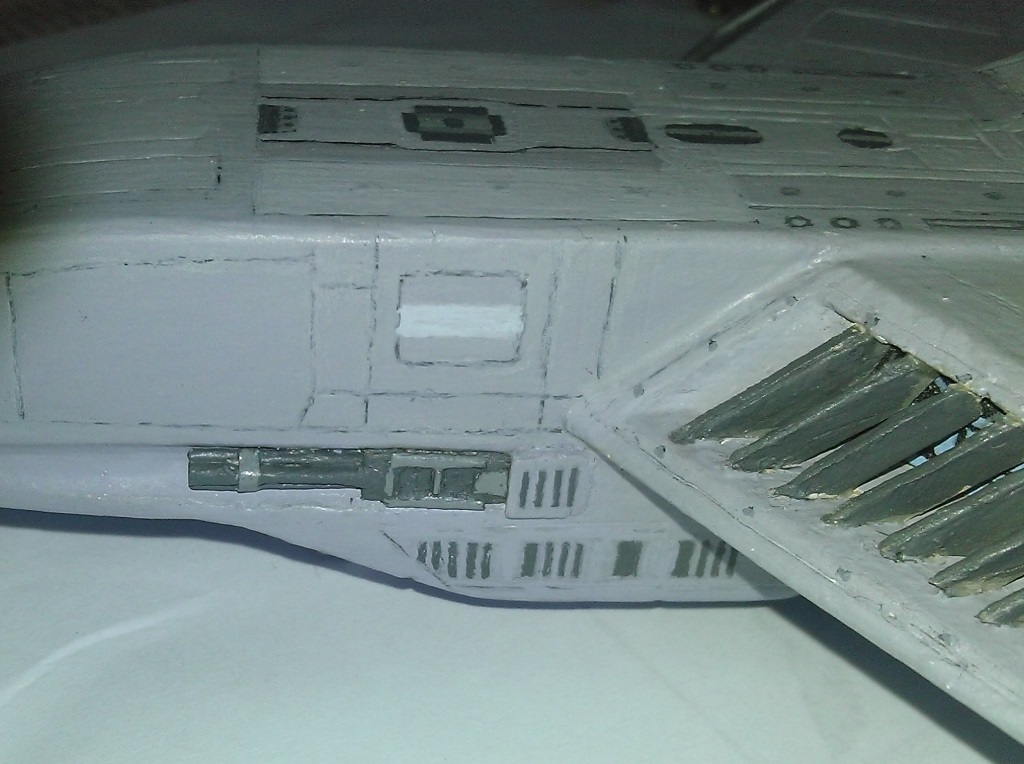
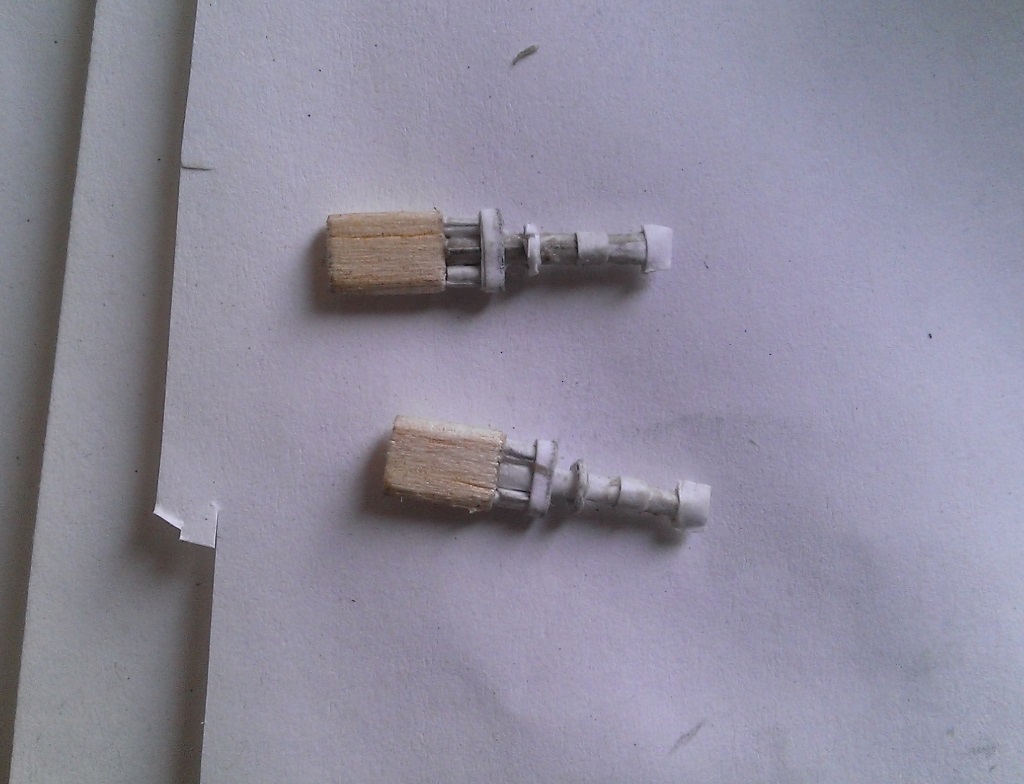
7) Barrels glued into place on the ship (after being painted of course)

tXhi4i3.jpg


8) Created some raised detail on the gun with thin cardboard (sorry, this one is a bit blurry but I didn't take any other shots)

5iI1MF4.jpg


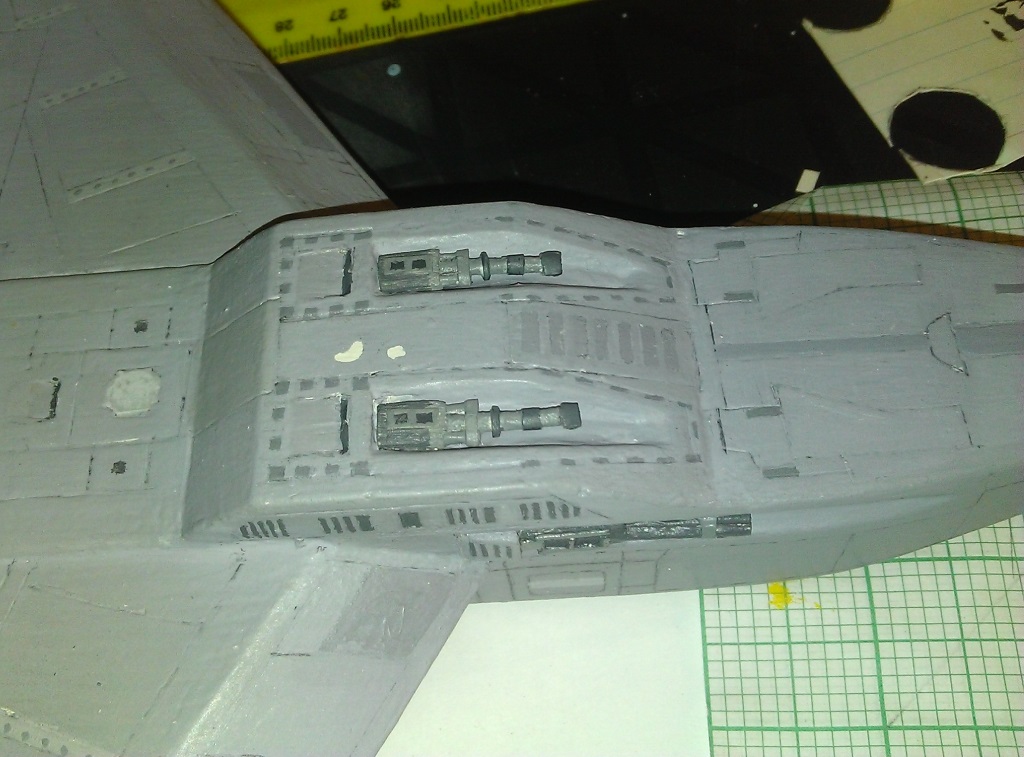
9) Final shape of the gun complete and painted.

yE5QQ4I.jpg


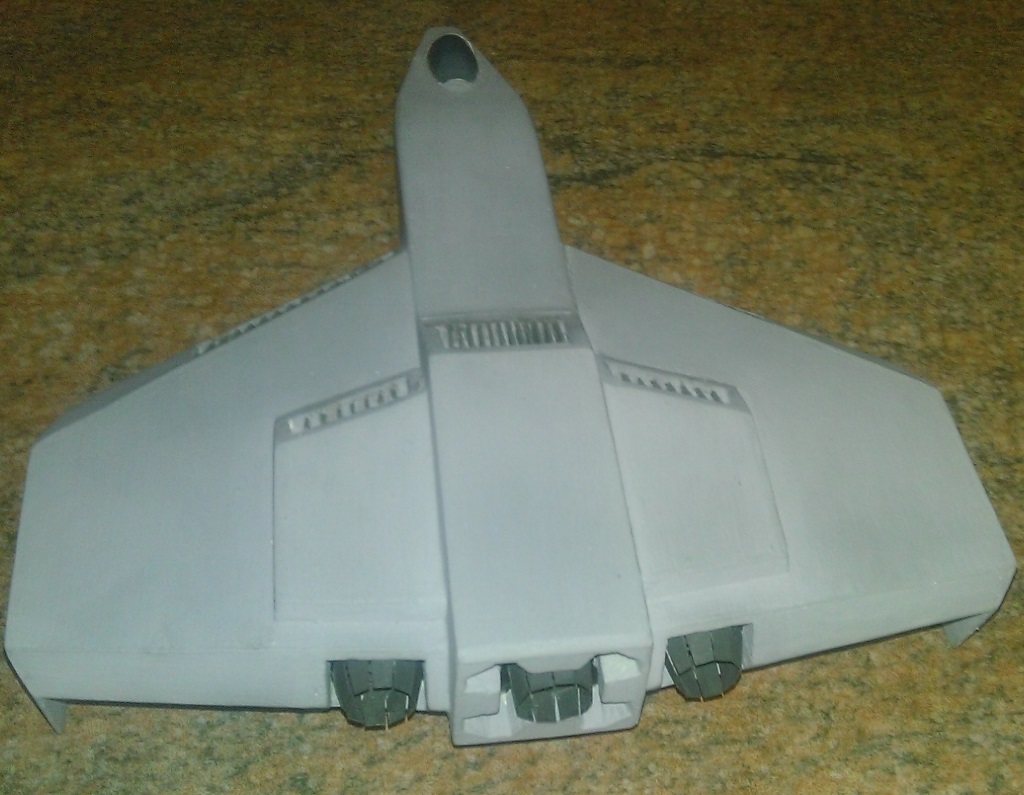
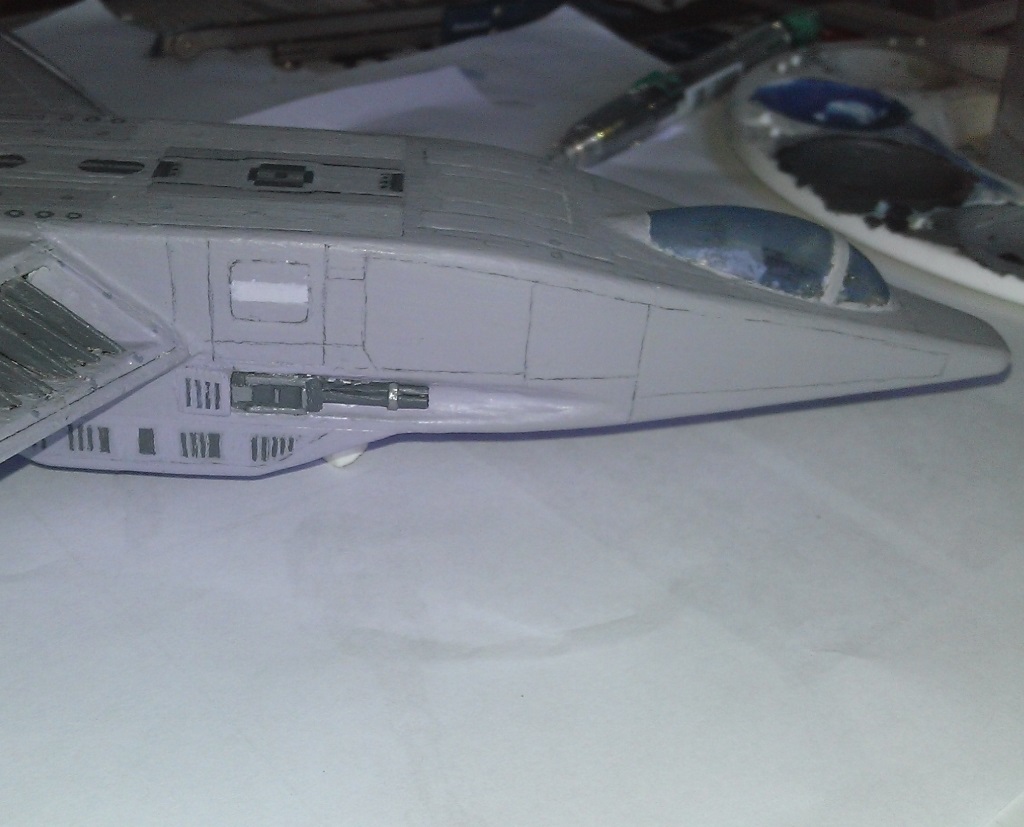
10) The final product: I added some lighter grey to bring out the detail.

GaDDL1L.jpg


nnImLNd.jpg


2AcOiS0.jpg


All done! Now for the ion cannons, which I'll show you next time.
 
Last edited:
I can' hold it back anymore: great work, your Hellcat really looks great. I especially like the effort you put into the details, like the panel lines. I am very impressed!
 
I can' hold it back anymore: great work, your Hellcat really looks great. I especially like the effort you put into the details, like the panel lines. I am very impressed!

My thanks to you :).

I wish more people would get to the point of not holding back; one of the most gratifying aspects of sharing my work with the community is that others can appreciate it as well. I always look forward to hearing what everyone thinks.
 
Last edited:
When I saw the frist updates on your project, I thought if I'd go in too early, I'd just repeat myself and the praise would seem worthless over time. But now, it just looks so good and I am always so impressed (and a bit envious ) how creative and dedicated people (still) are to WC. Sometimes, I feel like a second-rate fan...but that passes :).

Anyway: again, great work indeed!

Well I am envious of your post count, looks like you've been part of this community for ages! :) Wish I'd found the CIC sooner, it would have given me a wealth of information for my models, not to mention the chance to interact with fellow wingnuts. Of course, when I first started working on my ships, we didn't even have internet access at home.
 
Well I am envious of your post count, looks like you've been part of this community for ages! :) Wish I'd found the CIC sooner, it would have given me a wealth of information for my models, not to mention the chance to interact with fellow wingnuts. Of course, when I first started working on my ships, we didn't even have internet access at home.


Eh, a high post count is nothing to be envious about, since it does not mean high quality of posts as well. I think I joined the CIC in 2001, that's not so long ago, compared to other members here; actually, I only got interested in the internet because of this site.

And yes, the CIC has always been an incredible source of information...but better later than never.
 
I'm back folks!

It's been a very busy few weeks, but I finally managed to get to part 2 of my Hellcat weapon outfitting. Without further ado, here are the pictures.

I took inspiration from the ion cannon pictured in the WC4 manual:

qElJGIp.jpg


The build process then went as follows, using a mixture of paper and balsa wood:

5oxy9vJ.jpg

B5tp4g6.jpg

0httkx6.jpg

JKaElgn.jpg

L4M3n4O.jpg


Ready for painting! Here is the base coat:

5yr5s6v.jpg


And here are the finished articles, ready for fitting to the ship.

7FLqxDe.jpg


Hellcat V is now prepped, primed, loaded, locked, and ready to kick some ass!

JgEN2z2.jpg

0FG6OQx.jpg


With this, the construction is officially complete! All the bits and pieces are now in place. All that is left is painting the decals, Confed markings, and then final touch-up.

Hope you like it. Almost there!
 
Back
Top