
You are using an out of date browser. It may not display this or other websites correctly.
You should upgrade or use an alternative browser.
You should upgrade or use an alternative browser.
Wing Commander Prophecy Replay Week 6
- Thread starter Dundradal
- Start date
DaveO
Rear Admiral
With the exception of one mission in the remaining series, you're in either the Vampire fighter or Devastator bomber. Given my tendency to need a lot of help when in a bomber, I chose the Vampire missions so that I at least have a better chance to shoot back. The Vampire has the best turning capabilities of any of the Confed fighters. It also has those MIRV tracker missiles, and enough other missiles to take down several waves of the alien fighters. I also gave those experimental missiles a try on Hrissith mission #3, and they sure seem to sting really bad.

DaveO
Rear Admiral
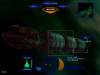
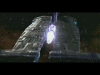
I'll be working on my full Photobucket compilation of shots tomorrow, but I thought I'd add some shots here for today. I forgot how much the Tiamat looks like a hand, and it flexes its 'fingers' to knock away an asteroid when its coming out of the wormhole gate.
Attachments
")
DaveO
Rear Admiral
The total for the added Photobucket shots was 19 for these missions.
http://s204.photobucket.com/albums/bb15/DaveO-MM/Wing Commander/
I've uploaded and verified new YouTube videos to my channel at:
http://www.youtube.com/davecaspermeyer
P.S. - I included videos up to mission 31 with just three to go for the finale, so if you want to avoid the newer missions before the Sunday announcement just watch the videos up to mission 25.
P.S.S. - WCPedia? What's that???
Just kidding...
DaveO
Rear Admiral
I knew I'd have just enough time to get half of the journal posted here. I should have the other half hopefully soon.
G’Mar 1
I’m still feeling a buzz of happiness and excitement as I enter the briefing room for information about the next mission. The sensors of the Midway have detected an alien communication relay station that can send signals all the way to the Kilrah system. This station must be taken out for us to have any hopes of advancing further into this system. The bugs have a significant defense for the station, and our plan is to set up an ambush by feigning an attack on the station. I’ve been assigned a Shrike bomber to destroy the transmitter arrays of the station, while multiple fighter wings attempt to provide cover. Once the aliens attack our group at the station, we’ll head for the T’lan Meth jump point to let the TCS Eisen send fighters thru the jump point to spring our ambush trap.
Our group arrives at the communication station nav point, and I let our fighters start their attack against the alien fighter contingent. I see a Stingray getting within close range of my bomber, and go after it on afterburners. One blast from my guns breaks apart and destroys a Stingray cluster segment. A second Stingray section attempts to evade me, but it too falls to a charged mass driver shot. I turn around since my ship has now attracted some attention, and make calls for help so that my Shrike does not end up with a lot of artificial holes. It takes quite some time to get a Manta in my gun sights long enough to try another shot. The blast impact on the Manta takes it out, and I splat another Stingray segment. I’m contacted to head for the ambush point, and I make it to the ambush point with some damage to the rear of my Shrike’s armor. With more fighters for the bugs to deal with, I’m expecting less opportunity for my Shrike to take more hits. Another Stingray falls to a full power shot, and I engage a Manta that almost hit me with its Gorgon guns. That Manta takes two hits before it is blown to bits, and our fighters are whittling down other enemies. I manage to make a lucky hit against a far more mobile Moray, and one attempts to make a direct attack approach. That’s perfect chance for me to show him the error of his ways, and only the communication facility is left. I set my light torpedoes for this attack on the station, and make sure I’m attacking it from the top. It takes six of my torpedoes, and one from another Shrike to shred the station. On our way back to the Midway, there is a bit of a reception committee. I hit a Stingray twice to take it out of action, and a second one makes a foolish direct attack. The mass drivers take it out too, and I get to see a MIRV tracker missile make multiple hits on a Stingray. A group of Stingrays cluster together, and I’m able to break it apart. One of our pilots had to eject after taking fire from those plasma bolts of the Stingray. I squish another Stingray with my Shrike, and finish off the fighters by blasting a Moray. The new fighters from the Wolf Pack squadron are transferred to the Midway for assistance on future missions. Upon approaching the Midway for landing, Rachel tells us she has used scout data to add on new missions on the simulator. She hopes that this new data about the fighting tactics of the bugs will prevent losses of fighters and pilots. Rachel then congratulates me on my performance for this mission, and I’m quite surprised that I got over ten kills flying in the Shrike bomber as well as only the armor damage to the ship itself.
G’Mar 2
I see Maniac in the ready room, and say that it looks like he saw a ghost. Maniac tells me that he lost two rookies to the bugs today. I say that losses like that can happen, and Maniac says that he never had this happen. He continually charges on the attack, and never gets a scratch. I point out that although his luck did not carry over to the rookies, he did the best he could to make the rookies survive. Maniac admits that my words have helped him to feel a bit better, and he makes an awkward attempt to thank me. I return his thanks, and we both go into the briefing room for our next assignment. The CAG tells us that Finley has been able to jam alien communication, so there is no way that other bugs here can call for help. The CAG makes it clear that all remnants of the attack force in this system will be targeted for extermination. Due to the successful attack on the communication station, the bugs cannot contact their primary fleet. The Midway will be moving to block the H’rissith jump point so that no alien forces can slip by to warn the fleet. We’ll conduct a four point patrol sweep for a seek-and-destroy on the alien forces. At the third nav point, we’ll do a visual reconnaissance of the destroyed communication station and deal with any forces still at that point. The CAG again reminds us that we must hunt down every single bug so that no warning can get thru to their main fleet.
Upon launching in Panthers, Anderson says our element of surprise would be lost if any bugs get away. At the first nav point are alien fighters along with an Orca destroyer. I let the fighters get within close range before engaging afterburners to attack and pursue. A Moray is quickly destroyed, and I eliminate two Stingrays. Another fighter on our wing blasts a Stingray bug with a missile, and I score two Morays before Maestro has to eject. Three more Morays are vaporized by my Panther, and Zero helps out with a kill. Four Remoras are taken care of, and one of our bombers finishes off the destroyer. Zero and I each get a Stingray ship, and it’s time to move on to the next nav point. I wipe out two Morays, and one of our pilots has to eject. I see a Stingray cluster and take it apart. I then get two of the Stingray segments, and my fighter quickly deals with two more of the Morays. I see another Stingray cluster, and break it apart before it can turn any of our ships into Swiss cheese. I get a Stingray segment and a few Remoras. I then help finish off three more of the Stingray segments, and there are no aliens left here. When we arrive at the destroyed communication station, there are more fighters along with some Triton transports. Looks like we may have scored on a supply convoy under escort. I deal with two of the Morays, and start looking for Stingrays after seeing some plasma shots. I shoot down two Stingray segments, and I engage more of the Morays. Three are exterminated, and another Stingray segment is shot to shards. One more Moray and a Stingray are dealt with, and only the transports are left. I engage afterburners to quickly take down that very accurate rear gun of the Triton. One torpedo from a bomber is shot down before I can get that turret out of commission. The other turrets on its bridge are blasted, and I head for the second transport. Another fighter and I take down the rear and bridge turrets of the second Triton. The first Triton is torpedoed, and the bridge on the second one takes a direct torpedo hit. There’s nothing left for me to do here except to admire a close view of the defenseless Triton. One of our bombers finishes off the transport, so the bugs can’t use whatever those ships were carrying. At the final point of our patrol are Mantas and Stingrays. I take down two of the Mantas, but we lose one of our pilots for good from Stingray plasma shots. I break that Stingray cluster apart and blast one of its segments. I make a mess of a Manta, and then scuttle two more Stingray clusters. One of our pilots has to eject after taking too many hits, and I finish off a badly damaged Manta. Two more Stingrays and another Manta are taken down, but I have very little afterburner fuel left. I’m forced to use multiple missiles along with my guns to get rid of the final Manta. We head back to the Midway, and Anderson congratulates us on stopping the bugs from alerting their primary fleet. On the Midway, the CAG and Anderson tell me that I’ve been recommended to receive the Confed Flying Cross. I see a shocked look from Maniac, and I suspect he feels that his efforts have been ignored. After I check my performance score and note the large number of kills for this mission, I overhear the CAG asking Maniac to explain why his squadron is performing so poorly.
G’Mar 3
I head right for the briefing room, and the CAG shows us some spy data that we’ve captured on the aliens. Finley shows us a Kraken Ship Killer that appears to be in dry dock for repairs. We then get to see what a plasma weapon can do to a fleet. One shot from the Ship Killer took out an entire contingent of Kilrathi capital ships. With Midway as the next likely target of this Ship Killer, we’ll be launching in Shrike bombers to take it out. The Marines will be coming along in their landing craft in an attempt to help kill the Kraken. The CAG says to expect heavy enemy opposition along with the Ship Killer, and tells us to watch our backs to prevent our own destruction.
Right after launching, one of our fighters picks up a distress beacon from a Confed ship. The ship will be brought back to the Midway, and Maniac is looking forward to our upcoming fight against the bugs. Once we reach the Ship Killer, Maestro encourages me to deal with the turrets and expresses surprise over the size of the Kraken. I ignore his suggestion to go after the turrets of the Ship Killer since there are plenty of alien fighters around to cause me grief if I ignore them. I manage to get two hits on a Moray to destroy it, and I manage to taunt a Moray into attacking me directly. That ship is taken down by the charged mass drivers, and I repeat that success on another Moray. Two Stingray segments make the bad choice of doing a frontal attack, and two shots shatter their aspirations. I tag two more Stingray segments, but my Shrike takes a few hits from a Stingray cluster. The frontal armor is completely wiped out, but I scraped by with minor ship core damage. I blast two more of the Stingrays, and then I have to hit a Moray three times to take it down. Maniac thinks I’m not quite up to his level of skills, but I ignore his comment to concentrate on splashing another Stingray. The Marines have reached the Ship Killer, and the fighters help me out against the last alien fighter. A Devil Ray ship jumps in, and I know I’m no match for it in a bomber. I ask for assistance, and our fighters send that Devil Ray to Hell. The Marines tell me that the Kraken has started up its engines, and I can see it pulling away from the dry dock. I arm a heavy torpedo, and hit the engines of the Ship Killer. Maestro also puts a torpedo up its tailpipe, so the Ship Killer is immobile now. I assist in taking out the bridge of the Ship Killer, and it is now no longer a threat. The Kraken manages to say that we all will perish before multiple explosions leave the Kraken a blasted shell. I take a few moments to look over what remains of the Ship Killer before heading back to the Midway. Upon approach, Finley tells me that they’ve retrieved a Confed distress beacon that may provide more information about the alien forces were are up against. After landing on the Midway, Rachel congratulates me and I get to see that I again got more than ten kills with a bomber.
I head for the Rec room, and Maniac is attempting to explain his voluntary resignation from being a squadron commander to a female crew member. He makes some sort of lewd comment that gets him a drink in his face as his reward. Maniac offers to celebrate this resignation with me, and I state that I thought it was his dream of having his own squadron. Maniac complains that his responsibilities felt more like a nightmare with pilots squawking about their performance statistics and the CAG asking for results. Maniac offers a toast to the ‘free and easy’ life of being a wing commander. I hear an announcement by Anderson on the ship intercom to report to the ready room, and Maniac recognizes that I’ll be receiving an award. I ask if he’ll recover from this setback, and he tells me he did not get his callsign for nothing. Maniac gives me the advice to accept the medals I’m getting, but to not take a position as a squadron commander. I then enter the ready room, and the Captain along with many other personnel are here to give me the Confed Flying Cross. The CAG, Commodore Blair, and other pilots give me their congratulations. Stiletto also admires that I received a promotion to the Midway’s Wolf Pack squadron along with the medal. I say that Maestro, Zero, and Stiletto will be coming along into the Wolf Pack with me and Maestro says it’s time to celebrate.
Meanwhile, at the Wormhole Gate in the Kilrah system a ship known as the Tiamat makes its passage through the wormhole and knocks aside an asteroid with its entry.
Some time later, a new Plasma gun has been installed on the Midway. In the briefing room, Finley shows the CAG and I some data that was captured from the Ship Killer. The aliens created the Wormhole Gate artificially, and Finley says that it took quite a bit of planning to pull this off with their technology. With data from the Confed beacon, the tactical division believes that the aliens that came thru the Wormhole Gate were only a reconnaissance force. The Wormhole Gate itself is being reinforced for a permanent passage. The ‘plumes’ of the individual nodes on the gate may possibly be cooling towers to dissipate the amount of heat needed to keep the Wormhole Gate open. If the towers are taken out, it may cause an overload to destroy the Gate but there is not enough information to be certain. The CAG emphasizes that some way must be found to shut down the Wormhole Gate. I think the Midway’s new Plasma weapon would make short work of the remaining alien capital ships and the Wormhole Gate itself. Finley is not sure if the Plasma weapon will work with Confed technology, and there is a risk that the Midway itself could be destroyed when it tries to use this new weapon. The CAG points out that this Plasma weapon may be the only chance we have to win against the bugs.
Lorien
Rear Admiral
I'm making a point of selecting all the Devastator missions when given the chance as I know that I tend to pick the Vampire otherwise. Plus, I get to watch all those cap ships blow up.
G'Mar 1:
Now that we've retaken the T'Lan Meth system, the Midway is going on the offensive. Our first target is a comm relay station in the G'Mar system, capable of broadcasting all the way to the Kilrah system. With the heavy alien defenses around the station, Tactical has decided to conduct an ambush. We'll launch a strike on the station in Shrikes but when the aliens counter-attack we'll fall back to a jump point. Once the alien forces get close enough, Vampires from the TCS Eisen will jump in and take them out. There's a large number of Stingray fighters around the station when we arrive, I manage to break one apart using dumb fires but the other succesfully joins up and takes out two of our escorting Panthers. The Shrike's slow speed makes it hard to keep up but I do my best to take out alien fighters until the ambush is called.
Once the ambush is called, I afterburn straight to the jump point. Anderson yells at me to hurry up but there's no much I can do in a Shrike. Whenever an alien fighter gets too close, I drop a mine behind me to force them to swerve off a little. After what seems like forever, the Vampires jump through the jump point and start engaging the enemy fighters, making quick work of them. My wingmen and I head over to attack the Relay station's antennas, taking out any fighters that stray a little close. The last fighter is dispatched by the time we reach the station, allowing us to simply park over the top of it and launch torpedoes as quickly as they lock on. The Station makes for a very satisfying explosion.
Following the explosion, the CAG comes on the radio and orders the Wolf Pack pilots to set course for the Midway as they've been transferred. It looks like we'll be getting some heavier hardware. It's a good thing they're with us on the return journy as a couple of alien fighters jump us on the way back. They're no match for the Vampires. Arriving back at the Midway, Rachel informs me that she's managed to create some simulator sessions based on the aliens' technology and tactics. She hopes a little extra practice will give us an extra edge.
G'Mar 2:
I find a weary looking Maniac near the pilot's lockers as I suit down from the last mission. I ask him what's up and he tells me about two rookies that he took up earlier today. They pulled a typical Maniac move by charging some heavy fighter clusters and promptly got blown out of the sky. Maniac wishes that his luck could cover the rookie pilots, so it's time for some basic psychology. I tell Maniac that the only thing that matters is that he gave those rookies the best possible chance they could have. That cheers him up a little and I nudge him a little. As we're called into the briefing room, Maniac can't quite bring himself to thank me but that's okay, we both know what he means.
The CAG explains the reason for another quick turn-around in our mission schedule. With the comm station out of the way the Midway can now jam the enemy's comm signals thanks to Finley. In order to stop them from warning their fleet, we're going to hunt down every bug in this system and kill it. The CAG is quite emphatic on that last point. I'm in the lead of quite a powerful force for this mission, 5 Panthers and 5 Shrikes, but it's obvious we'll need that firepower when we encounter a cruiser surrounded by fighters at our first Nav Point. In order to protect the bombers, I take out the Stingarys as quickly as possible. Fortunately, they're an easy target when attempting to form up. We lose a Shrike, but take down all the enemy craft. Nav 2 features more Stingrays and Morays screening a Ray cluster and are dealt with quickly. The comm array features another mix of Morays and Stingrays but with the added bonus of two transports, probably inspecting the wreckage. Once the fighters are dealt with, I remove the turrets on the transports as I watch the one on the back intercept two torpedoes fired at the engines, then we can just sit back and watch the bombers. Our last Nav point has even more Stingrays and Mantas and I'm unable to stop one cluster from forming up, the cluster manages to take out a Shrike and a Panther before it's destroyed and we're able to return home.
On landing I'm met by a proud looking CAG and Anderson. The CAG is so impressed by my flying that she's recommended me for the Confed Flying Cross, though Maniac in the background doesn't seem to agree. I make my way to the elevator as she starts to chew out Maniac for losing too many pilots.
G'Mar 3:
I know that today's mission is going to be important when I see who's in the briefing room with the CAG. Finley means that we've discovered something new about the aliens and Dekker means that it's something bad the Marines are going to take out. Finley's briefing is sobering. We've detected one of two ships that wiped out the Kilrathi fleet when they first appeared. It's in dry dock so we think the cats may have damaged her before they were taken out. That's the good news. The bad news is simple enough, the primary weapon on these things can take out an entire fleet by themselves. The Midway wouldn't stand a chance against that kind of firepower.
The mission itself is very audacious. While the Ship Killer is in drydock, we're going to land some marines on it and steal it. That's certainly one way to put the balance back on our side. As we launch, the computer catches some traffic from Delta Wing, who have found an old Confed distress beacon that may shed some light on what's happenning. Our attack force sets the autopilot and heads towards our target. The amount of chatter of the radio when we arrive belies how nervous most of the pilots must feel. The Ship Killer itself has plenty of turrets studding it's surface and a fairly heavy fighter escort. I release my wing to take out the turrets while I cover them on approach. I manage to keep the fighters off their back but one of my wingmen wanders into too much turret fire and is destroyed. The Marines make their way in as we pick off the last of the turrets.
The initial reports from the marines aren't good, they're encountering heavy enemy resistance. Even worse is the news that they haven't quite taken out the control deck before the Ship Killer starts to move out of it's dock, presumably to fire on the Midway. The Marines evacuate as the CAG directs us to take it out. My wingmen take out the bridge but an ace pilot in a Devil Ray is keeping me from attacking the engines. The dogfight is harsh but the alien pilot makes a fatal mistake and gets a little to close after an attack run, leaving him vulnerable to the Shrikes heavy guns. A dumbfire takes him out and I afterburn towards the Ship Killer's engines, locking on a torpedo as I do. The first heavy torpedo doesn't do enough damage to take the ship out, so I park myself behind the Ship Killer, protected by it's dock, and lock on a second which ends the Ship Killer's career before it can take out the Midway. The Vampires clean out the remaining fighters with a little missile assistance from the Shrikes as we set a course for home. As we land, Finley indicates that Delta wing have succesfully retrieved the beacon.
I head up to the pilot's bar to find a rather drunk Maniac making the moves on his fellow female pilots but not having much luck with it. He pulls me over to celebrate his voluntary demotion from Squadron commander to Wing Commander. It seems Maniac's dream wasn't all he thought it would be and he's flooded under from the CAG and the pilots under him. Secretly, I think it's a good idea to keep Maniac away from the leadership role. He's a great pilot but his luck doesn't extend to everyone. He's blearily telling me to follow in his steps as I'm called into the ready room. I'm wandering into the Ready Room, wondering if maybe I shouild have worn my dress uniform when everyone else's dress status calms me down. The Captain's praise in particular fills me with pride, as does my friends on ship gathering around to congratulate me afterwards. A Confed Flying Cross and promotion to an elite squadron don't always happen on the same day.
As the new Golden Boy of the Midway, I'm invited to sit in on a briefing between Finley and CAG about some of the information we've discovered from the Ship Killer. The aliens aren't from this part of space. Rather, they've invested a lot of time and effort into opening a passage from a weak point in the space-time fabric in their system to our space. The bad news is that what we've been facing so far appears to be a recon mission and not their full fleet. Finley indicates that they're definitely reinforcing the hole to function as a permament passage that will allow them to bring the rest of their fleet in. The only real weak spot in the structure are what appear to be cooling towers for the power plant to the array. The CAG thinks that they'll take a full-on torpedo hit so I float the idea of using the giant crystal being built on the Midway to take it out. Finley doesn't seem sure about the crystal weapon, though, indicating that they're not sure that it won't take out the Midway even if it does work. The CAG orders Finley to find a way to take those towers out.
H'rissith 1:
One of the perks of being on an elite squadron is the ability to choose which fighter you'll go up in. Scuttlebut says that we're taking out an enemy carrier so I can't resist taking the Devastator out for a spin. The Rumours appear to be true as the mission briefing explains that we're taking out an enemy carrier group that's heading the the TCS Eisen. The Eisen has jumped ahead to clear a path to the Kilrath system for us so we're going to make sure their back is clear. The group sent to take out the carrier is very large and it becomes obvious once we arrive that the carrier is devoting all it's fighters to attacking the Eisen, leaving only a thin screen for itself. Our Devastators assist in taking out the CAP while the turrets are being taken out. The heavy plasma cannon is hard to aim but packs one hell of a punch when you score a hit. The CAP is quickly taken care of and our fighters move in on the carrier, assisting with the turret clearing. The carrier is covered in turrets, so this takes a while but soon enough the fighters are pulling out, leaving the carrier to us. A torpedo run using light torpedoes backed up by the plasma gun is all it take to finish the carrier off.
H'rissith 2:
With the carrier unable to provide support for them the cruisers going after the Eisen are now vulnerable. The bombers are being quickly turned around to take them out while the Vampires clear a path through a minefield for the Midway. As expected, the fighter cover around the cruisers is light, allowing us to ignore the fighters and head straight for the cruisers as our escort covers us. I do a run over both cruisers taking out the shield generators and missiles turrets to give my wingmen a chance before I start doing my own bombing runs. My wingmen concentrate on the first cruiser as I attack the second. MY prowess with the Devastator's plasma guns become evident when Stilletto's "Top THAT, Casey" is followed shortly by the explosion of the cruiser I'd been targeting. We're dealing with a few stray fighters at NAv when Anderson comes on the comm. They've detected another carrier hiding in the asteroids and would like us to take a crack at it. Since the wing's in good condition I decide that we'll take the opportunity. The CAP around this carrier is fairly heavy consisting mostly of Manta Medium fighters. Given the heavy cannons on them, I decide to help out take down the fighters before moving in on the carrier. The plasma cannon makes short work of an fighters pointed my way and I'm soon making my way over to the carrier, where the assault is already underway. I've just about taken out all the turrets when Maestro manages to deliver the death blow to the carrier. When head back to the Midway to the congratulations of Anderson.
H'Rissith 3:
The Midway is navigating it's way through an asteroid field, which limits our sensor range. My wing are being dispatched in Vampires to scout ahead of the Midway and clear a path. We'll also be equipped with some new missiles based on enemy technology that have improved range. Before we can being our patrol, though, the Midway is attacked by a small enemy force. They're not strong enough to take the Midway down but they can sure let the rest of the bugs know where we are and call the hammer down on us. This is my first time taking a Vampire against the aliens and it almost feels unfair. The massive missile complement and heavy guns make it more than a match for an fighter we've encountered so far and the speed and manueverability are unparalleled, especially with clever use of the engine pod's increased roll and pitch rate.We cut through all enemy opposition that we find, though we do lose a CAP pilot to a collision with an asteroid during the battle, a stark warning to be careful with all the manueverability. Our patrol is diverted halfway through to investigate some signals that we've detected. Finley's theory is confirmed once we come out of autopilot and see the Ship Killer straight ahead of us. I grab as much targetting data as needed and bug out. The last batch of alien fighters are almost an anti-climax and present little opposition to a successful mission.
DaveO
Rear Admiral
H’rissith 1
For this mission, I can choose to fly either the Vampire or Devastator. I choose the fighter since I’ve had ship damage problems when being in a bomber. The Eisen carrier group has leap frogged ahead of the Midway to clear a path to the Kilrah jump point. An alien carrier group could place the TCS Eisen and its contingent in danger. We are to do a strike on the aliens to eliminate this threat. Multiple wings will be launched against the carrier, and our job is to take out the turrets of the carrier along with its fighter cover.
Upon launching in the Vampire, the CAG emphasizes that my work will be influential on how easy the bombers can attack the carrier. Once our group reaches the carrier’s position, there are Squid fighters defending it. Spyder is in a bomber for this mission, and says that he will attack the carrier as soon as its defenses are down. The speed and firepower of the Vampire makes short work of the first Squid. Another Squid follows the first in oblivion, and I get on the tail of a Lamprey. It’s hard to get all guns to hit the Lampreys since they have slim ship profiles. I get enough hits to its engines to stop that threat. I take out another Squid, and a few Remoras that were released from a destroyed Ray. I have my opening to attack the turrets of the carrier, and make multiple runs on the carrier to take down nine turrets. I eliminate six of the carrier’s missile turrets, and Zero finishes off the carrier with a torpedo. While heading back for the Midway, Spyder congratulates us for our great work. Upon landing approach to the Midway, Anderson says that the Vampire must fit me like a glove. The Vampire is certainly the fastest and most maneuverable of the Confed fighters.
H’rissith 2
For this mission, we’ll launch a two-pronged attack against the remaining alien fleet. Our Devastator bombers will go after the alien cruisers, and our fighter wing will clear a path for the Midway thru a minefield. The CAG says that time is short, and we launch again in Vampires.
When we arrive at the minefield, the bugs make our job a bit easier. Two of the alien fighters are immediately destroyed by the mines. I take out a Skate segment with a missile, and do a combination of missile and guns to quickly deal with a Manta. Another Manta was attempting to take me from behind, and I use the guns of the Vampire to handle him. A Skate tries to punch thru the shields of my Vampire, but frontal shots to that segment blow it to bits. Another Skate is tagged by a missile, and yet another one fails to survive a direct pass against my guns. Two more Skate fall to missiles from my ship, and another Skate is shot down. I try to use one of the MIRV Trackers on a Manta, but he’s aware enough to decoy the missiles away. I take down the Manta with my guns, and pop another Skate with a missile. Our fighter wing takes down the last alien fighter. There are no mines left to deal with either, so we return to the Midway. Anderson congratulates us for clearing a path.
H’rissith 3
I’m to lead a wing of Vampires for a patrol ahead of the Midway’s position. We’ll need a visual reconnaissance since there are asteroids preventing a complete scan. This recon will make sure that there are no positions where the aliens are lurking for an ambush. If we encounter any alien capital ships, our orders are to gather targeting data and withdraw back to the Midway. Our fighters have been equipped with new missiles that have alien technology added. The missiles could be either a bane or boon, so I’ll make it an objective to try some out.
As soon as I launch, Anderson requests that I assist in dealing with alien fighters that have emerged from the asteroids. There are Morays and Mantas attacking, and I shoot down four of the Morays and one Manta. I did not get a chance to try out the new missiles before all of the fighters were eliminated. I’m sure I’ll have an opportunity along the remainder of my mission. When we arrive at our assigned nav point, there are more Morays and Mantas. This time I try out a missile and gun combo on a Moray, and it quickly falls. A second Moray is gutted by my guns, and I do another missile and gun combo on another Moray. Maestro compliments me on that kill, and there is just one Moray left. I put another missile up the tailpipe of that fighter, and it’s destroyed. These new missiles can surely pack a punch against the aliens! We head off to the next nav point, and Anderson comes on the communication channel. He says that the Midway has picked up an ultra-low frequency signature that matches what the bugs use. Finley pinpoints the source, and asks us to check the ship out. There are the Morays at this area to deal with, and our fighter wings takes down one Moray. I shoot down a Moray with my guns, and do another combination of missile and guns to destroy a second. Our fighter wing handles an alien fighter in front of me, and the final fighter is dealt with. We head for the location of the ship found by Finley. When we arrive, I see that it is indeed a second Kraken Ship Killer. After reaching a range of 20000, Finley tells us to head back for the Midway. Along the way back, there is another wing of Morays to handle. I try another of the enhanced missiles on one of the Morays, but it decoys it away. I take down that ship with gun blasts, and continue with using just the guns on two more of the Morays. I then handle the final Moray with a missile and gun combo, and our group returns to the Midway. Upon landing approach, Finley tells us that she is downloading our targeting data for our bombers to attack that ship.