Sorry for the longer delay, but I had a challenging time crunch that I knew would be an issue in getting these journals posted. Matters were not helped by me having overtime every single day at work the last week. I'm also taking some precautionary measures against possible hard drive issues since I saw an error message about difficulties writing to my E drive. That is not where my operating system is, but it does have the video files. I'm using the SpinRite utility to make sure everything looks ok before flying any missions. So expect yet another late upload to YouTube. With all that explanation out of the way, enjoy the update!
Loki 1
I happen to see Vaquero in a very happy mood in the berths. He’s offering me tickets to opening night at his cantina since he’s expecting the Behemoth to make a big bang to end the war with the Kilrathi. There are no fellow people to talk to, so I head down to the briefing room. I get a slight but not unexpected surprise when I see only Tolwyn there. He’s taken over command of the Victory, in order to ensure protection of the Behemoth. He arrogantly thinks he holds all the cards in the deck to ensure victory, but the cats do have a way of springing surprises when it’s least expected. The plan is to test firing the Behemoth on Loki 6. This planet was chosen due to its inability to call for help caused by its orbit of a quasar. Before the firing for Behemoth is ready, I’m to sweep the area for any Kilrathi resistance. I have a feeling I’m going to need all the help I can get here, so I choose Maniac as my wingman and Arrow for the better firepower, smaller ship profile, and quicker speed.
At the first nav point, there looks to be fairly light resistance with some Darkets and Corvettes. I dust the Darkets pretty easily, but the Corvette brings in a wing of Vaktoths. Time to let Maniac do his thing, and I go after a Vaktoth. I take a missile hit on my Arrow before getting one Vaktoth vaporized. Maniac makes two kills while I’m dodging more missiles launched by the Vaktoths. I evade the missile fire and fry a second Vaktoth. No more fighter wings jump in, so it’s time to go after the Corvettes. I check my ship damage, and things are not good with my communications nearly fried and my shields have taken half damage. Maniac and I split Corvette kills, and I ask his status before moving on. He has taken some damage too so we both better be more careful. At the next nav point, there are quite a number of Dralthis. Deciding to take less risk, I let Maniac get busy while I get behind and blast one Dralthi to bits. Not a bad start here, but there are still plenty of Dralthi to give us grief. I see another Dralthi quickly drop off my scope, though I wonder if friendly fire or another enemy fighter collision occurred. Maniac makes a kill, and I quickly follow with a fellow Dralthi. I get two more cats with my guns, and another one runs right into my Arrow. I take no damage, but the Kilrathi ship is a debris pile. Maniac bags another two kills, and I finish off the final Dralthi. At the next nav point are multiple Vaktoths, so both Maniac and I go after the cats. I take one out with a combo of missiles and guns, and decoy away a missile coming in my direction. Maniac asks for my help, and I’m doing some serious evasive maneuvers to keep any fire from hitting me. I manage to get another Vaktoth, and Maniac mangles another fighter as well. Maniac makes the final kill in this wing of fighters, but some Darkets have come in. I get the entire wing of four fighters myself without Maniac making a contribution. A group of Strakha stealth fighters comes in to attack. I scrap two, and Maniac shoots down three himself. I get the last fighter, and there are no more stray cats in the area. I head back to the Victory, and Rollins acknowledges that it will be smooth sailing for the Behemoth. Rachel is shocked at how much damage my Arrow took, so she chastises me for taking those hits.
Loki 2
I see Maniac hanging around near the bar on the living level. He points out the plight of Eisen, and that he attempted to warn the Captain. I explain that I’ve yet to hear of a situation where people have listened to his advice. Maniac believes that I’ve poisoned Admiral Tolwyn from acknowledging his achievements. I explain that his flying style has fizzled his promotion chances, and that the Admiral does not even know about him. Maniac attempts to prove that everyone knows about him, but he’s shot down in typical style. I find Cobra in the berths, and she’s real keyed up about killing more Kilrathi. I attempt to find out why she is so anxious to kill the cats. She would annihilate every single planet of the cats if she could, and would not leave out Hobbes as a target. She then tells me that the Kilrathi captured her when she was only ten years old. She could not escape until she was 20, and she explains that I’ll never have any idea on how it must have been for her. She spent two years under psychiatric care in attempt to help rid herself of all the horrible memories. There’s a part of the Kilrathi inside of her that she can never purge, and she feels that the cat mentality will eventually overtake her. I attempt to lift her spirits by saying that we’ll defeat the Kilrathi, but she thinks that it won’t come to fruition. I see Admiral Tolwyn on the bridge and explain that ship morale has certainly taken a hit due to him taking command. Tolwyn’s not interested in being popular and points out that I did have hesitations in being assigned to this ship. I point out that after getting to know the crew of the Victory, I’ve changed my opinion. The Admiral explains that he’s been on the Behemoth project since it began, and felt a need to be its guardian angel. That meant that whatever actions he had to take were in the best interests in winning the war. I see Captain Eisen hanging around in gunnery control. The Captain is not feeling good about losing his command and wonders what he is without a ship. I try empathizing with him by saying that top brass like Tolwyn can do whatever they want to people, but at least we can look at ourselves in the mirror and accept with fewer regrets the decisions we make. I head down in the lift to the flight level to see what’s in store for my next mission. The Admiral says that my duty here is to cover the Behemoth for its test firing. I figure there will be few cats attempting to stop this, so I pick Hobbes and a Hellcat fighter.
The Kilrathi waste no time with some resistance, and I give Hobbes the order to go after them. Looks like some Paktahns are attempting to stop the Behemoth. One bomber is shot down immediately, so it looks like we have some defensive fire coming from our battle group. I do my standard adjustments, and afterburn towards one of the bombers. I line him up in my sights, match speed, and blast him to bits with a barrage. I see another bomber, and Hobbes herds him my way with his attacks. I take that Paktahn down too, and I see the Behemoth charging up for its firing. The recoil of the shot is enough to send the Behemoth scooting back some distance. I watch as Loki 6 is completely obliterated by the Behemoth. That gun is going to make the Phase Transit Cannon of the Concordia look like a pop gun if it gets to Kilrah. Some Kilrathi Corvettes jumped in after the explosion, so Hobbes and I go off to handle them. Hobbes gets the Corvette, but I assisted in its elimination. Hobbes also gets the other Corvette, and I see some stealth fighters jump in. They’re some distance away, so all I can do is afterburn and hope I get lucky in terms of the range when the fighters decloak. Due to the cloaking and uncloaking of the fighters, it takes me a bit of time before I can hit one enough to eliminate it. I strike a second stealth fighter down, and one manages to make a missile hit. I gun down two more, and more Paktahns jump in to attempt a torpedo attack on the Behemoth. I get to gun one down, but not before seeing a near miss between two bombers. I go after the other bomber, and he joins his friends in death. There are no more attempts to attack the Behemoth, and I get confirmation from the ship that it is in good condition. After getting clearance to land, Rollins is really impressed at the Behemoth’s big bang.
Loki 3
I see Hobbes in gunnery control, and he admits that it’s been a long time since he’s been this close to Kilrah. I inform him that I’ll understand if he has mixed feelings about what the Behemoth will do to his home planet. He acknowledges that it has been a long war that has turned everybody inside out. I explain that there will be Kilrathi that will survive this strike on the planet and that they’ll understand what he did. Hobbes laments that nobody will truly understand, but thanks me for my loyalty. I head down to the flight level for my next briefing. Tolwyn tells me that we’re heading for the jump point, and that we’re off to Kilrah to finish this war once and for all. I’m to protect the Behemoth since the future of Confed and humanity is at stake. I choose Flash as my wingman, and Arrow as the fighter I will fly.
We both head for the Behemoth, and there are a plethora of Paktahns here. I don’t even dust one before the Behemoth is blown up. DAMN! The cats knew EXACTLY where to hit the Behemoth. I then get another blow when Prince Thrakhath communicates to me from his personal Bloodwing fighter. He throws all sorts of taunts, and then shows me the final fate of Angel. She was personally disemboweled by the Prince, and Thrakhath taunts me some more to goad me to attack him. As much as I’d want to go after the Prince, the Victory tells me they are leaving in 90 seconds. Knowing that withdrawal is the better option, I head straight for the Victory. Getting clearance to land was difficult due to the plentiful taunts from the Prince. After landing, the Admiral is giving command back to Captain Eisen. Tolwyn points out the obvious implications about how the Kilrathi ambushed the Behemoth and made short work of the ship. I turn away in numbness due to the loss of Angel. Eisen’s offended by the Admiral’s statement that our ship is leaky with saboteurs onboard, and reminds the Admiral that there are never any guarantees in war as well as the fact that Tolwyn was commanding the ship when the Behemoth met its demise. The Admiral tells the Captain to fight well since our struggle will only get harder.
Alcor 1
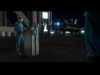
I head straight to the bar hoping to drown my troubles in some alcohol. Rachel’s there to lend a sympathetic ear, and asks if I’d like some company. I decide to push away the bottle of booze before I can do further damage to myself. Rachel says that I should pick a better method to get my frustrations out and to not wait until I get in the cockpit. I’m not given that luxury since I hear Eisen announce a red alert over the intercom. It’s going to be a magnum launch in an Arrow, and Hobbes is along for help.
At the first nav point are multiple Corvettes, along with the Sheffield to engage them. Hobbes and I go after one of the Corvettes, and the Sheffield shellacs one Corvette with its guns. The Sheffield then downs two more of the Corvettes including the one Hobbes and I were working on. A wing of Vaktoths comes in, so I do what I can with the Arrow to attack them. The guns of the Sheffield get two of the Vaktoths, and I manage to make a kill myself. The Sheffield eliminates yet another Corvette, and I finish off a second Vaktoth. A number of Darkets drop in, and the Sheffield shreds one before it jumps out. I give Hobbes a hand since he’s seriously surrounded by Darkets. I demolish four of the fighters, so that should help out quite a bit. Hobbes then scores a kill and I finish off the final Darket. At the next nav point are Paktahns and Vaktoths. I break off pursuit of a Paktahn after taking a bit of damage from its turret. A Vaktoth hits me with a missile, and I manage to do a lot of shaking and baking before finishing another of the Vaktoths. I concentrate on culling another cat, and finish off another Vaktoth fighter. Looks like there are just the Paktahn bombers left. I gun down three of them, but have taken some hits on my Arrow. A wing of Dralthi drop in, and I dust several of them before Hobbes can fry a feline. I gun down a few more before Hobbes adds to his kill score. I get the last Dralthi in that wing, and some more Paktahns decide to come in. I eliminate the entire wing myself, and the way is clear to move on to the next nav point. At that area are several stealth fighters. I let Hobbes loose, and get one in my sights long enough to shatter it. I also gun down the rest of the stealth fighter wing without help from Hobbes. We head onwards, and there are a few Vaktoth fighters. I avoid a few missiles from the fighters, and get in enough forward damage to defang a fighter for good. I split a second Vaktoth in two with my guns, and I rapidly gun down a third one with a savage blast of guns. Hobbes hands the final fighter its defeat, but I did some significant help on that cat. I get a slight surprise of seeing Sorthaks attempting to attack the Victory. I give one of them an eternal ending, and see the second one destroyed as well. Rollins is relieved that we were able to dodge this bullet, and I certainly dodged one myself by not having another drink before flying this frenzy mission. Flint sees me after I get out of my Arrow, and asks if I’m ok. I admit that I’ve had better days, and she’s impressed with how I’ve held up under the multiple morale blows of losing Angel and the Behemoth. Flint does offer her condolences for my loss, and I nod when she mentions that she must have been something special to me.
Alcor 2
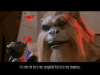
I see Cobra and Rollins sitting outside the berths, and Cobra is proposing a method to find the person sending the transmissions Rollins still can’t decode. If Rollins reroutes the sensors correctly, finding the traitor should be a short task. Cobra believes that Hobbes is the culprit, and can’t believe I’m still sympathetic to the cats especially after Thrakhath’s actions. I admit that I believe that what we’ve encountered lately is more than a case of bad luck. I ask Rollins to keep up his work to attempt to decode the messages, and point out that none of us are above suspicion. I then find a very unexpected visitor in gunnery control. Paladin is here, and I point out that he’s missed out on the fun. Paladin expresses his wishes that he was still flying, and lets me know that he has already heard of my run-in with Prince Thrakhath. Paladin expresses his sympathy that I had to find out about Angel’s death from the Prince himself. I ask him how long he knew, and he says that had the news before our reconnaissance on the crashed Concordia. I hit him HARD, and Paladin winces a bit. He feels that I’ve not lost my touch, and I explain my anger that he not only lied to me but that he also betrayed my trust. Paladin makes an attempt to defend himself by saying he was under orders, but I’ve heard that used already too often for my tastes as an excuse. Paladin then points out he was trying to protect me from going after Thrakhath like I was tempted to earlier. By not telling me of Angel’s demise on Vespus, he wanted to protect me from myself. I ask Paladin if he understood how much she meant to me, and he does. He then states that I should not expect special treatment just because I lost Angel. Everyone has lost somebody in this war with the Kilrathi. Paladin points out that Angel may help us to win this war with the work that she did. There is a final transmission that she made before she was taken prisoner on Kilrah, and Paladin says that I would likely be interested in seeing it. I head for the briefing room, and Paladin and Eisen are there. Paladin explains that the Behemoth was not the only weapon that Confed had at their disposal. Paladin’s Covert Ops folks had started a special project after receiving data from Angel’s science package. The multiple parts of the package are in orbit as well as on the ground and also cloaked to keep the cats from finding them. Data from the devices are still being sent to Confed, and Paladin has discovered that the Kilrathi home world is a fragile place with its tectonic plates commonly shuffling. Paladin’s theory is that the heavy seismic activity is what led the Kilrathi to become so aggressive. Eisen points out that Paladin is trying to say that Kilrah has an Achilles’ heel. During the last ten years, work has been proceeding on a tectonic frequency weapon called the Temblor bomb. The theory is that if this weapon is set to the proper frequency and used with absolute precision, it can cause the planet to literally shake itself apart. I have my doubts since the Kilrathi do have an army deployed, and destroying their planet still leaves plenty of the cats to deal with. Paladin points out that the Kilrathi use a hierarchy with the Emperor pulling the strings. If this hierarchy is destroyed, Paladin feels that the cats won’t know what to do since they all live and die for the Emperor. I then wonder what we’re waiting for if this is our best ace in the hole. Paladin pops my hopes that for the moment there is no bomb. Doctor Severin was the main mind behind the bomb, and was captured by the Kilrathi over a year ago. All attempts to continue his work have led to dead ends, so we’re going to be raiding a prison planet to retrieve him. As Paladin stated, it sure beats having to wait for the Kilrathi to parole him. Rescuing Doctor Severin is the only chance to finish the Temblor bomb. In order to ensure that we can reach the planet undetected, I’m to sweep the area and eliminate any defensive presence. I choose Cobra to come along and select the Thunderbolt in expectations of some sort of cap ship prowling the area.
At the first nav point, there are three Kilrathi Corvettes with a Destroyer. The firepower of our Thunderbolts should make short work of them. Cobra gets one Corvette with a torpedo, so we go after the next one. Cobra gets another of the Corvettes, and I pitch in with a cap ship kill. I then turn the guns on the Destroyer. I hear the damage on the Destroyer after my first pass, and on the second the rear of the Destroyer is in the red. A few more passes, and most of the ship is seriously damaged. I then finish off the Destroyer, but if there is another Kilrathi cap ship besides a Corvette it will be a target for my torpedo. A wing of Darkets darts in, and it takes me multiple attempts to down one of the fighters. My ship took a few hits but it should not be an issue unless I take many more hits. I let another Darket unsuccessfully handle a missile. I get a third one, and Cobra contributes with a kill. I then handle the last Darket fighter, and he goes down from my guns. There is still a Corvette that came in with the fighters, so Cobra and I deal with it. We get it gunned down, but Cobra has taken enough hits to state that she wants to retreat. Now some asteroid fighters come in. Cobra makes short work of one, and it takes a bit of mine avoidance on my part to take out a second. I then reduce a third to rubble, and Cobra is continually relaying her desire to get out of here. I get two more of the rock fighters, and helped get that final one off of her rear. I hear stealth fighters come in, and keep my eye on the radar to avoid the slew of mines the asteroid fighters left. I see one in range, but he cloaks before I can get him. A second one is not as fortunate, and I get another of the fighters before Cobra takes one down. She blasts the final fighter, and another wing of Darkets comes in. I shred one of the Darkets in two with my guns, and another explodes away from gun fire. He probably ran into a mine that finished him off, and Cobra gets another fighter kill. There are no more fighters or cap ships around, so we head off for the next nav point. There are Paktahn bombers here, and I let Cobra loose to deal with them. Cobra quickly takes out one, and I scatter the pieces of another into space. Cobra makes another quick kill, and I see a Destroyer on the radar scope. I arm a torpedo and head in to get in range. I then launch it, and Cobra has had enough. She bails to head back to base, so I’m left to deal with the remaining Paktahn. The Destroyer is tagged by my torpedo, so I get enough gun fire on that bomber to blast it down. A wing of six Darkets has come in after I dealt with the Paktahn, so I decide to start using missiles to even the odds. I take out five of them with missiles and have no more left. That final fighter is eliminated a lot easier without his friends to help attack me. Looks like I’m not done here though since there are now Dralthi coming in. All four of the fighters are fried by my guns, and at long last I can head back to the Victory. Rollins says the way looks clear now, so it looks like my next mission will be to help rescue Doctor Severin. Upon landing, Rachel tells me that Cobra’s ship had to be pulled in with a tractor beam.
Alcor 4
I find Vagabond hanging outside the berths, and he informs me that he’s heard that we’ll be rescuing Doctor Severin soon. Vagabond nicknames him Doctor Death, and firmly believes the Kilrathi did the right thing putting him in prison. He reveals that the Doctor was the reason Vagabond became a combat pilot. The Doctor did a demolitions test on Pax 7 that caused the death of millions of civilians. Vagabond is sure that the Doctor knew the danger, but did not care to warn the populace. Vagabond feels that Confed covered up the Doctor’s actions, and he feels guilty about all of the blood on his hands. I state my beliefs that he should not blame himself for what the Doctor did, but that there is a chance for redemption if the T-bomb helps us win this war. I then hear over the intercom about an emergency on the flight deck. I head down there as soon as I can, and I see Cobra mortally wounded on the deck. Captain Eisen and a medic are here, and the Captain confirms that Hobbes was the one who attacked Cobra. Cobra shows me a pad that Hobbes was going to use to send another transmission to the Kilrathi. It’s right from Paladin’s T-bomb briefing and that bastard has had us bugged for who knows how long. Cobra wants me to get revenge on Hobbes, but Eisen tells me that if I go in pursuit there is a risk to the entire operation. As much as revenge is tempting, I know that the Captain is right. I can’t afford to let anger rule me like it almost did during Thrakhath’s taunting. I helplessly watch Cobra die, and head to the berths. Eisen is cleaning out Cobra’s locker, and he explains that he has nobody to write a letter of condolence to since Cobra had no family. I admit that I did not treat her well, and wonder what happened with Hobbes. Eisen emphasizes that speed is now of the essence since there is no way to know how much the Kilrathi learned from Hobbes. I then preside over the funeral service for a fallen friend. In my eulogy, I admit that few of us really knew Cobra well and that she has been released from her painful memories. We all watch in remembrance as her coffin floats out into the depths of space and the honor guard gives a 21-gun salute. I silently dedicate myself to helping to achieve the final victory over the Kilrathi. I head into the briefing room, and Paladin points out that it is now time to extract Doctor Severin from the prison planet. I am to provide cover for the Marines to retrieve the Doctor, and the Excalibur is the only ship equipped to do atmospheric entries. Paladin then points out that this could be the most important mission I’ll ever fly since the Kilrathi will surely win if we don’t finish the T-bomb. Paladin desperately wants to come along to help, but he acknowledges that he’s too old and that his skills are too rusty to provide much assistance.
I take off and head to a point before planet entry. There are multiple Darkets here, but the auto-tracking guns of the Excalibur make the opposition seem like they are almost not there at all. After entry, there are new Kilrathi fighters called Ekapshi. These fighters are quite maneuverable with a specialized design. I manage to make readjustments in time to deal with them. My fighter took a few hits, but it’s going to take much more to bring down this ship. I try to get fancy by afterburning away from the Ekapshi and come at them from a head-on approach. They don’t fall for that tactic, so time to do things the old-fashioned way. They all go down from the six guns of the Excalibur, and then I open up on some prison complex buildings. I’m not letting any other people have the same fate as Cobra on this planet. At the next point, there are more Ekapshi fighters but they don’t fare any better than the first group did. Further along there are tanks in defense. This is a more clever move since the tanks are quite small and difficult to hit. I do take out all of the tanks and some more buildings. I head onward, and more tanks guard the primary prison complex. I get two immediately on a strafing run, and then follow with two more on my third pass. I then finish off the defense, and the Marines are heading to retrieve the Doctor.
A Hellcat lands on the planet, and Vagabond jumps out to give his version of a warm reception to the Doctor. The Marines take Vagabond into custody while the Doctor is definitely dazed by Vagabond’s greeting. Upon my approach, I hear a little bit about Vagabond’s action from Rollins before I get clearance to land. Paladin congratulates me and says that he has a lot of work to get ready on his end now that the Doctor is back in our hands.
On Kilrah, the Emperor has read the latest battle reports and wonders why we went to so much trouble to just retrieve one prisoner. Melek offers to shed some light by explaining that it was a scientist that we got back, but he never had the chance to fully explore his range of knowledge. Prince Thrakhath feels that the Emperor really should not concern himself with this rescue since the Kilrathi are still winning the war. The entire might of the Kilrathi is creating an armada vast enough to punch thru and eradicate Earth. The Emperor does point out that a foe is most dangerous when it is almost defeated, and the Prince acknowledges the Emperor’s wisdom.
Alcor 3 – Revenge on Hobbes
I hear over the intercom about an emergency on the flight deck. I head down there as soon as I can, and I see Cobra mortally wounded on the deck. Captain Eisen and a medic are here, and the Captain confirms that Hobbes was the one who attacked Cobra. Cobra shows me a pad that Hobbes was going to use to send another transmission to the Kilrathi. It’s right from Paladin’s T-bomb briefing and that bastard has had us bugged for who knows how long. Cobra wants me to get revenge on Hobbes, but Eisen tells me that if I go in pursuit there is a risk to the entire operation.
I decide to ignore Eisen and take off in the nearest fighter that happens to be a Hellcat. I see Hobbes in a Thunderbolt, and he says that he was prepared to meet me again in this duel to the death. He feels that it was always our destiny to meet again as enemies, and that this final duel shall be a test of will and courage. He forgot to mention skill, so I’m not about to let him beat me on that account. Hobbes gets a missile hit on my Hellcat, but I return the favor with a salvo launch. One missile hits, and then I get another salvo to hit his rear with both missiles at close range. I then attempt a final salvo during a head on pass, but it looks like he managed to decoy it away. Time to make him waste his afterburners in dodging my fighter. I use afterburners sparingly and in situations where he’s trying to make direct frontal attacks that I can’t afford to take hits from those six guns of the Thunderbolt. He runs out of the fuel he desperately needs, and I match speed and attack him from behind. I do evasive maneuvers to keep out of his rear turret fire and see some chunks come off his fighter. Finally, I deal a fatal blow to his fighter and Hobbes bids farewell to me as a friend. I head back to the Victory after dealing with Hobbes, but there are multiple stealth fighters blocking my way. There’s also an ace here by the name of Stalker. I get a stealth fighter and the ace, but now there are Paktahns looking to put some holes in the Victory. I pound a Paktahn into particles, and get another one soon after. I get clearance to land, and Captain Eisen is not happy. He feels I should get a court martial for disobeying his orders, and due to my absence the Victory was ambushed. Without the extra hand, Vaquero died during the fight so I am to report to the barracks ASAP after landing. Eisen asks if I know how much he hates having to write letters to the family when a pilot dies. He firmly feels that he’s written too many death letters and chastises me for putting my personal interests above those of the ship. I’ll write the death letter since I’m responsible AND the wing commander. I ask Eisen what happened with Hobbes, but he’s furiously frustrated and tells me to get back to him if I ever find an answer to that question. I cradle my head with my hands and mourn over how much my vengeance has cost: two dead pilots with Vaquero’s loss of fulfilling his dreams especially hard for me to handle. This is going to be a VERY bitter pill to swallow for a long time.
P.S. - Looks like Kilrah is going to be next week. Prepare to unleash hell.